Developing a Micro-Service with Lumen
I introduced Lumen to you all in my previous post. Today we’ll be creating a simple microservice with Lumen.
Let’s give the name of the service we’ll be building “Developer Status“. ![]()
![]() .
.
So, the idea is to build a microservice that showcases your Developer Evangelist status based on the number of public repos you have on Github. The assumption here is that the more publicly available repos you have on github, the more you support the idea of Open source..giving back to the community.
Create a new Lumen Project
From your terminal, run the following command:
|
1 |
composer create-project laravel/lumen DevStatus --prefer-dist |
DevStatus is the name of our new app. The command creates a new folder for it and downloads all the dependencies.
To see our application live we need to cd into our DevStatus folder and run:
|
1 |
php artisan serve |
Our project will be up and running on
|
1 |
http://localhost:8000 |
Now, there are a number of configurations we’re required to make if we are going to use a database.
1. Enable Eloquent
Edit the app.php file in the bootstrap folder and uncomment the following lines:
|
1 2 |
$app->withFacades(); $app->withEloquent(); |
The first line enables the support for Facades (a very common feature used in Laravel and inherited by Lumen) that simplifies the usage of some of the core classes of the framework while the second enables us to work with Laravel’s ORM.
2. Enable .env
Edit the app.php file in the bootstrap folder and uncomment this line:
|
1 |
Dotenv::load(__DIR__.'/../'); |
This allows you to use the .env file to store your Database credentials and other important secret values.
Presently, for the microservice we are building, we don’t really need any of that so we’re at liberty not to configure any of that.
Routing
We need to configure our routes. Navigate to app/Http/routes.php.
Let’s edit routes.php to set up our routes.
|
1 2 3 4 5 |
$app->get('/', function() use ($app) { return response([ 'result' => 'DevStatus' ]); }); |
Reload your browser, you’ll see a JSON response like this:
|
1 |
{ "result": "DevStatus" } |
Let’s set up our second route to take in a github user’s username
|
1 2 3 4 5 6 7 8 9 10 11 12 |
$app->get('/{name}', function($name) use ($app) { $options = array('http' => array('user_agent' => $_SERVER['HTTP_USER_AGENT'])); $context = stream_context_create($options); $url = "https://api.github.com/users/" . urlencode($name); $result = json_decode(file_get_contents($url, true, $context)); return response([ 'result' => $result ]); }); |
This is the how the result would look in our browser:
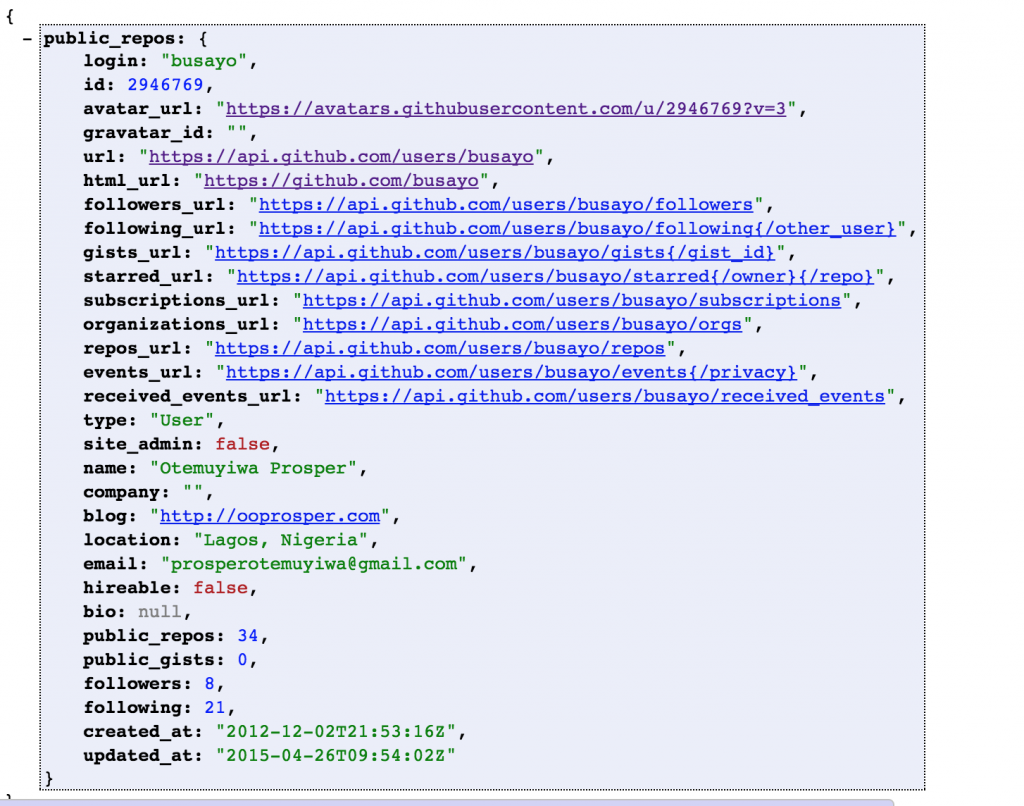
Note: i use a JSONVIEW chrome plugin to format json output nicely in my browser.
Now, we need only the “public_repos” and “name” data. Let’s tweak our code to involve the logic for determining a Developer status.
|
1 2 3 4 5 6 7 8 9 10 11 12 13 14 15 16 17 18 19 20 21 22 23 24 25 26 27 |
$app->get('/{name}', function($name) use ($app) { $options = array('http' => array('user_agent' => $_SERVER['HTTP_USER_AGENT'])); $context = stream_context_create($options); $url = "https://api.github.com/users/" . urlencode($name); $result = json_decode(file_get_contents($url, true, $context)); $name = $result->name; $public_repos = $result->public_repos; $status = ""; if($public_repos <= 10){ $status = "Rookie"; } if( $public_repos > 10 && $public_repos <= 25){ $status = "Intermediate"; } if( $public_repos > 25){ $status = "Ninja"; } $finalStatus = $name . " is a " . $status . " Open Source Evangelist"; return response([ 'Developer Status' => $finalStatus ]); }); |
The $options variable contain header information sent to github Api as part of our request. If the HTTP_USER_AGENT is not sent, then github would decline our request.
Then our result should look like this now:

Check Out The Code here: https://github.com/busayo/DevStatus
Feel free to ask your questions in the comment section.
Finally: pls don’t put your logic in your routes when building apps/microservices..Let them be inside your controllers to ensure modularity, separation of concerns and overall clean code!.
- How to build your own Youtube – Part 10 - August 1, 2016
- How to build your own Youtube – Part 9 - July 25, 2016
- How to build your own Youtube – Part 8 - July 23, 2016
- How to build your own Youtube – Part 6 - July 6, 2016
- Introducing Laravel Password v1.0 - July 3, 2016
- How to build your own Youtube – Part 5 - June 28, 2016
- How to build your own Youtube – Part 4 - June 23, 2016
- How to build your own Youtube – Part 3 - June 15, 2016
- How to build your own Youtube – Part 2 - June 8, 2016
- How to build your own Youtube – Part 1 - June 1, 2016