Build A Contact Management web Application with AdonisJS Framework – Part 3
Hello, guys welcome back!
From the last article, we had our User authentication working for the application. In this article, we will work on the Create, Read, Update and delete of Contacts.
Let’s get started by creating a controller for contacts using the ace command
|
1 |
$ node ace make:controller contact |
Check your ‘app/Http/Controllers/’ directory, you will discover a controller called ‘ContactController.js’ has been created.
# Create Contacts
Let’s quickly create a view for contact creation. Go to ‘resources/views/contacts’ directory. Create a file called ‘new.njk’ and add the code below to it
|
1 2 3 4 5 6 7 8 9 10 11 12 13 14 15 16 17 18 19 20 21 22 23 24 25 26 27 28 29 30 31 32 33 34 35 36 37 38 39 40 41 42 43 44 45 46 47 48 49 50 51 52 53 54 55 56 57 58 59 60 61 62 63 64 65 66 67 68 69 70 71 72 73 74 75 76 77 |
{% extends 'master' %} {% block content %} {% include 'layout.nav' %} <div class="container"> <div class="row"> <div class="col-md-8 col-md-offset-2"> <div class="panel panel-default"> <div class="panel-heading">Add Contact</div> <div class="panel-body"> {% include 'layout.alerts' %} <form class="form-horizontal" role="form" method="POST" action="/contacts/create"> {{ csrfField }} <div class="form-group"> <label class="col-md-4 control-label" for="first_name">First Name</label> <div class="col-md-6"> <input type="text" class="form-control" name="first_name" id="first_name" value="{{ old('first_name') }}"> </div> </div> <div class="form-group"> <label class="col-md-4 control-label" for="last_name">Last Name</label> <div class="col-md-6"> <input type="text" class="form-control" name="last_name" id="last_name" value="{{ old('last_name') }}"> </div> </div> <div class="form-group"> <label class="col-md-4 control-label" for="office_number">Mobile Number(office)</label> <div class="col-md-6"> <input type="text" class="form-control" name="office_number" id="office_number" value="{{ old('office_number') }}"> </div> </div> <div class="form-group"> <label class="col-md-4 control-label" for="home_number">Mobile Number(Home)</label> <div class="col-md-6"> <input type="text" class="form-control" name="home_number" id="home_number" value="{{ old('home_number') }}"> </div> </div> <div class="form-group"> <label class="col-md-4 control-label" for="office_email">Email(office)</label> <div class="col-md-6"> <input type="text" class="form-control" name="office_email" id="office_email" value="{{ old('office_email') }}"> </div> </div> <div class="form-group"> <label class="col-md-4 control-label" for="personal_email">Email (Personal)</label> <div class="col-md-6"> <input type="text" class="form-control" name="personal_email" id="personal_email" value="{{ old('personal_email') }}"> </div> </div> <div class="form-group"> <label class="col-md-4 control-label" for="birthday">Birthday</label> <div class="col-md-6"> <input type="text" data-provide="datepicker" data-date-format="yyyy-mm-dd" class="form-control" name="birthday" id="birthday" value="{{ old('birthday') }}"> </div> </div> <div class="form-group"> <label class="col-md-4 control-label" for="note">Note</label> <div class="col-md-6"> <Textarea class="form-control" rows="4" name="note" id="note">{{ old('note') }}</Textarea> </div> </div> <div class="form-group"> <div class="col-md-6 col-md-offset-4"> <button type="submit" class="btn btn-primary"> <i class="fa fa-btn fa-sign-in"></i>Create </button> </div> </div> </form> </div> </div> </div> </div> </div> {% endblock %} |
Old() is an AdonisJS helper function that helps the form remember previous values entered into its fields. What this does is, in situations where validation fails, the user won’t to have type all over again.
csrfField helps prevent your forms from cross-site request forgery attacks.
Open ‘app/Http/Controllers/ContactController.js’ and add the code below to it.
|
1 2 3 4 5 6 7 8 9 10 11 12 13 14 15 |
'use strict' const Validator = use('Validator') const Contact = use('App/Model/Contact') class ContactController { /** * Show the form for creating a new contact. */ * create(request, response){ yield response.sendView('contacts.new'); } } module.exports = ContactController |
The ‘Create’ function will display the form to create contact. Let’s create routes to handle the creation of new contact
|
1 2 3 4 5 |
Route.group('authenticated', function () { Route.get('/contacts', 'ContactController.index') Route.get('/contacts/create', 'ContactController.create') Route.post('/contacts/create', 'ContactController.store') }).middleware('auth') |
We grouped the routes into a group called ‘authenticated’ because they share the same middleware called ‘auth’. As we know the routes in the group are protected.
If you click on ‘Add Contact’ link on the navbar, you will see the below page
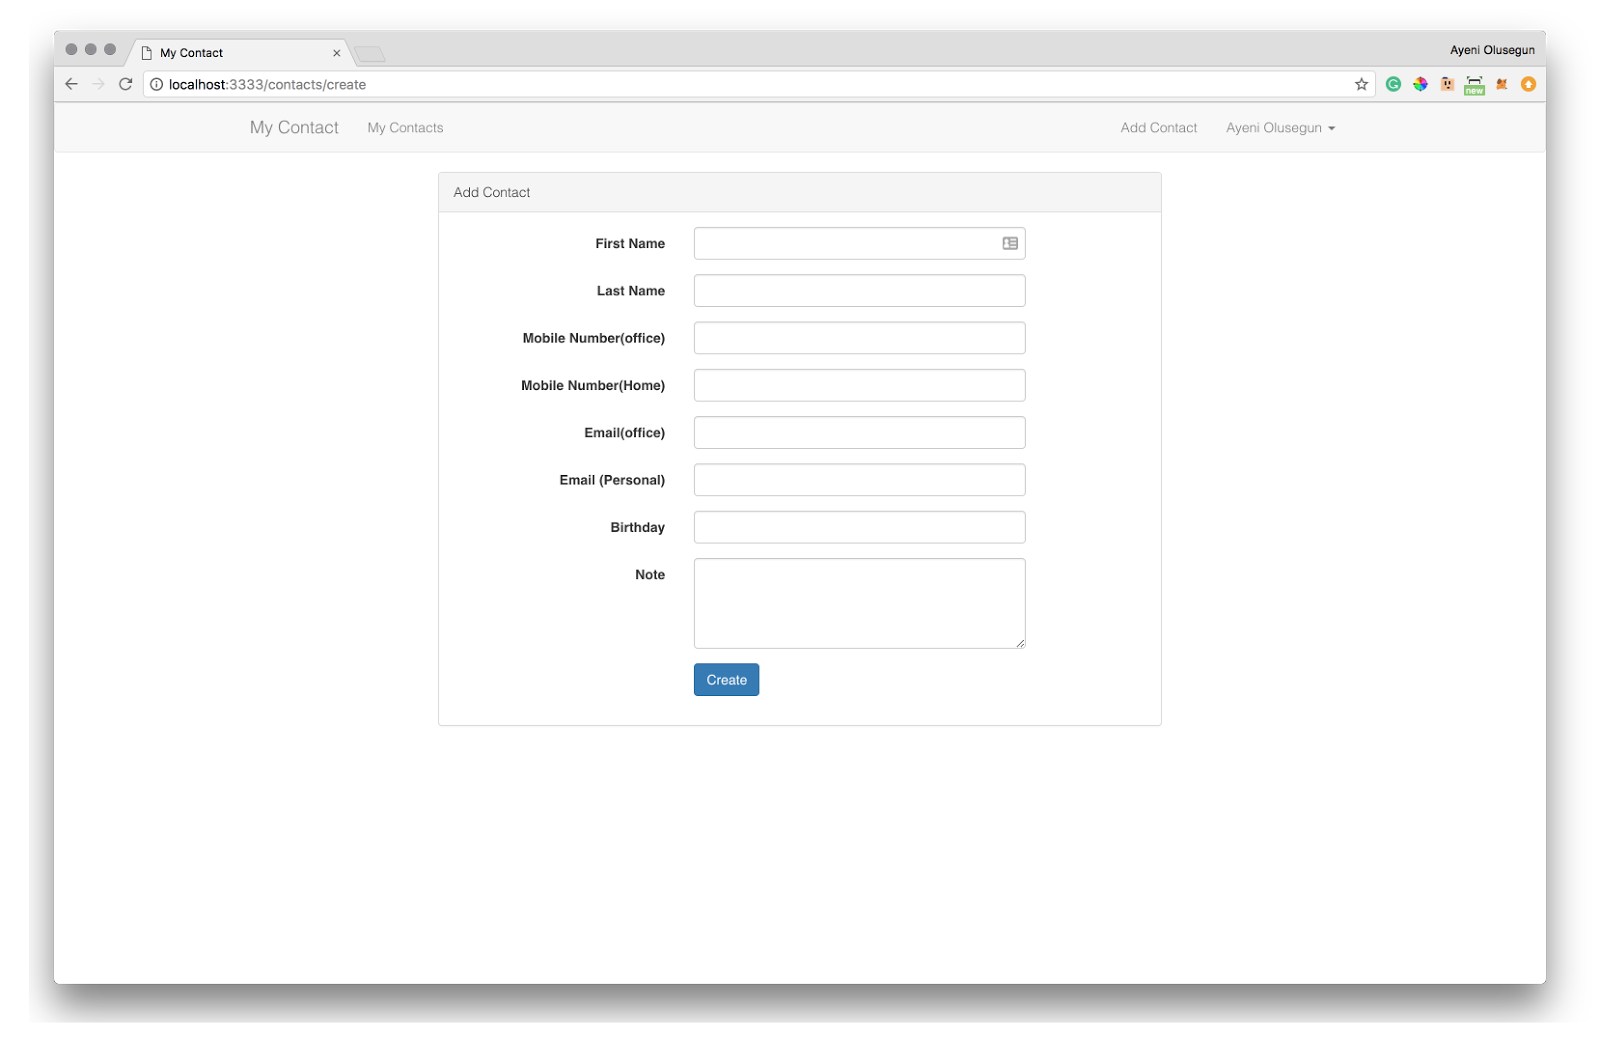
Add Contact Page
Now, Let’s handle saving of the contact. Edit ‘app/Http/Controllers/ContactController.js’ and add the below code.
|
1 2 3 4 5 6 7 8 9 10 11 12 13 14 15 16 17 18 19 20 21 22 23 24 25 26 27 28 29 30 31 32 33 34 35 |
// Add this code to ContactController class /** * Store a newly created contact in database. */ * store (request, response) { const rules = { first_name : 'required', last_name: 'required', } const validation = yield Validator.validate(request.all(), rules) //return back to create contact form with error messages if validation fails. if (validation.fails()) { yield request.withAll().andWith({ errors: validation.messages() }).flash() response.redirect('back') return } const user = yield request.auth.getUser() yield Contact.create({ user_id: user.id, first_name: request.input('first_name'), last_name: request.input('last_name'), office_number: request.input('office_number'), home_number: request.input('home_number'), office_email: request.input('office_email'), personal_email: request.input('personal_email'), birthday: request.input('birthday') || null, note: request.input('note'), }) yield request.with({ status: `The Contact has been created.` }).flash() response.redirect('back') } // …. |
In the code above, we created a function called “store”. We set our validation rules for the form. If the validation fails, it will return the user back to the form filled with an appropriate error message.
Otherwise, we get the current login user’s detail and save the contact. When done with that, it will redirect to the form with a success message.
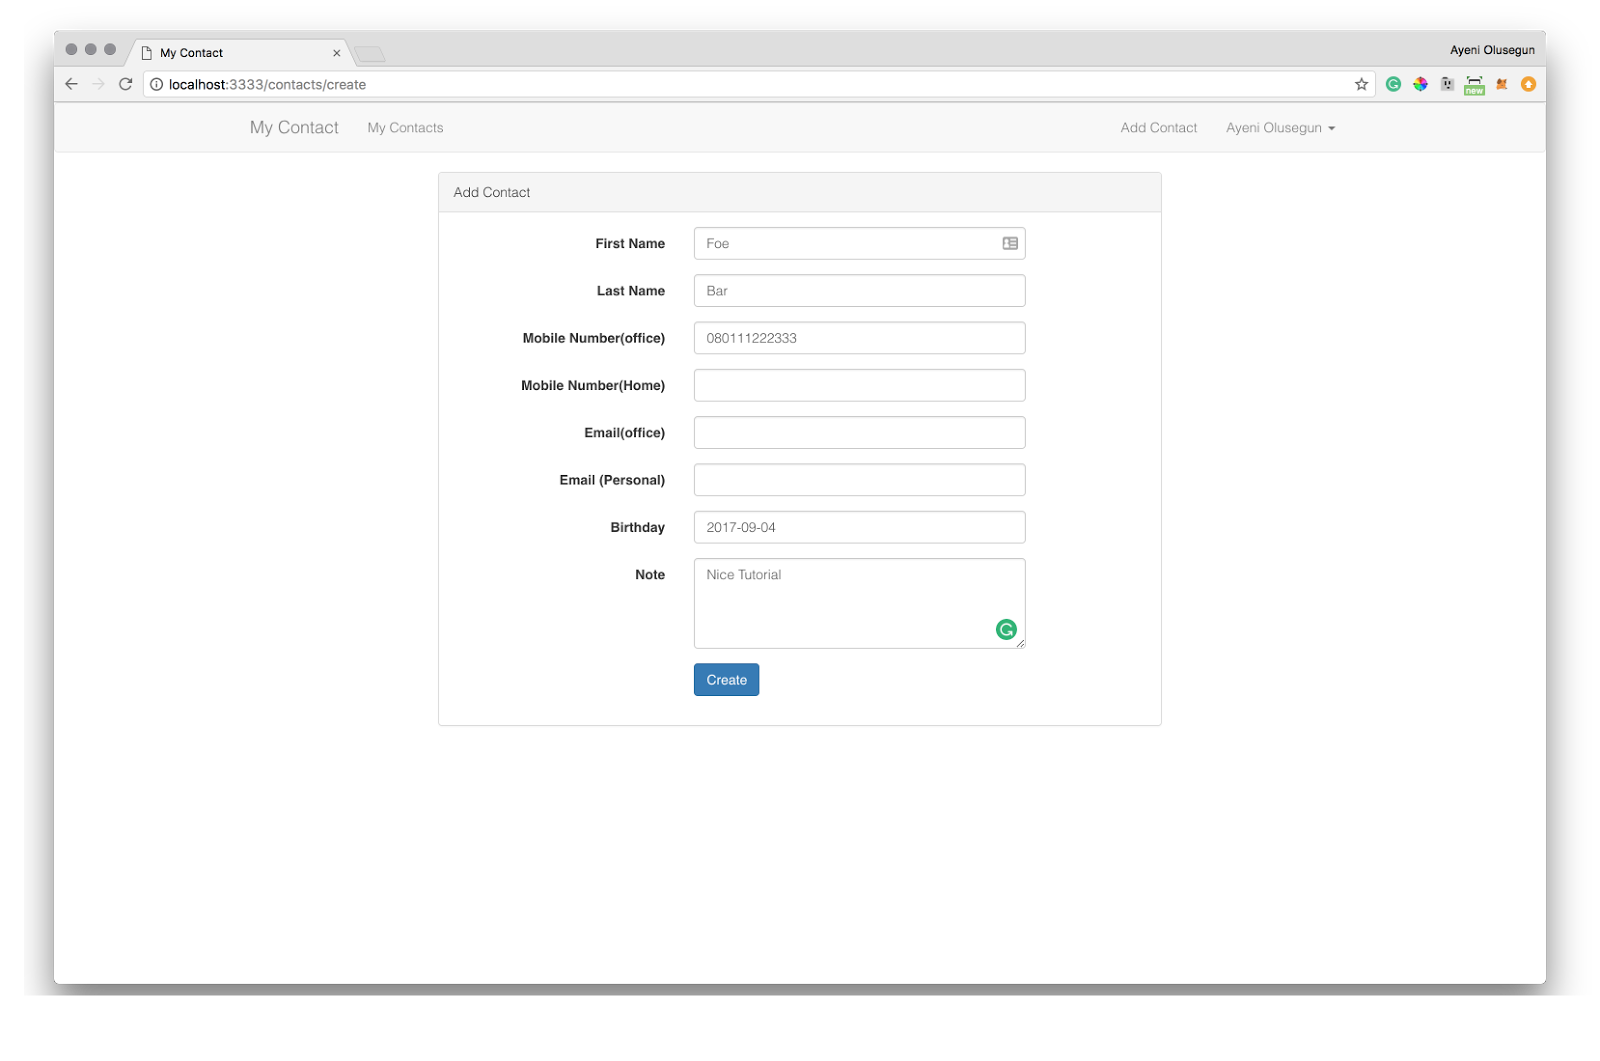
Before Contact Creation
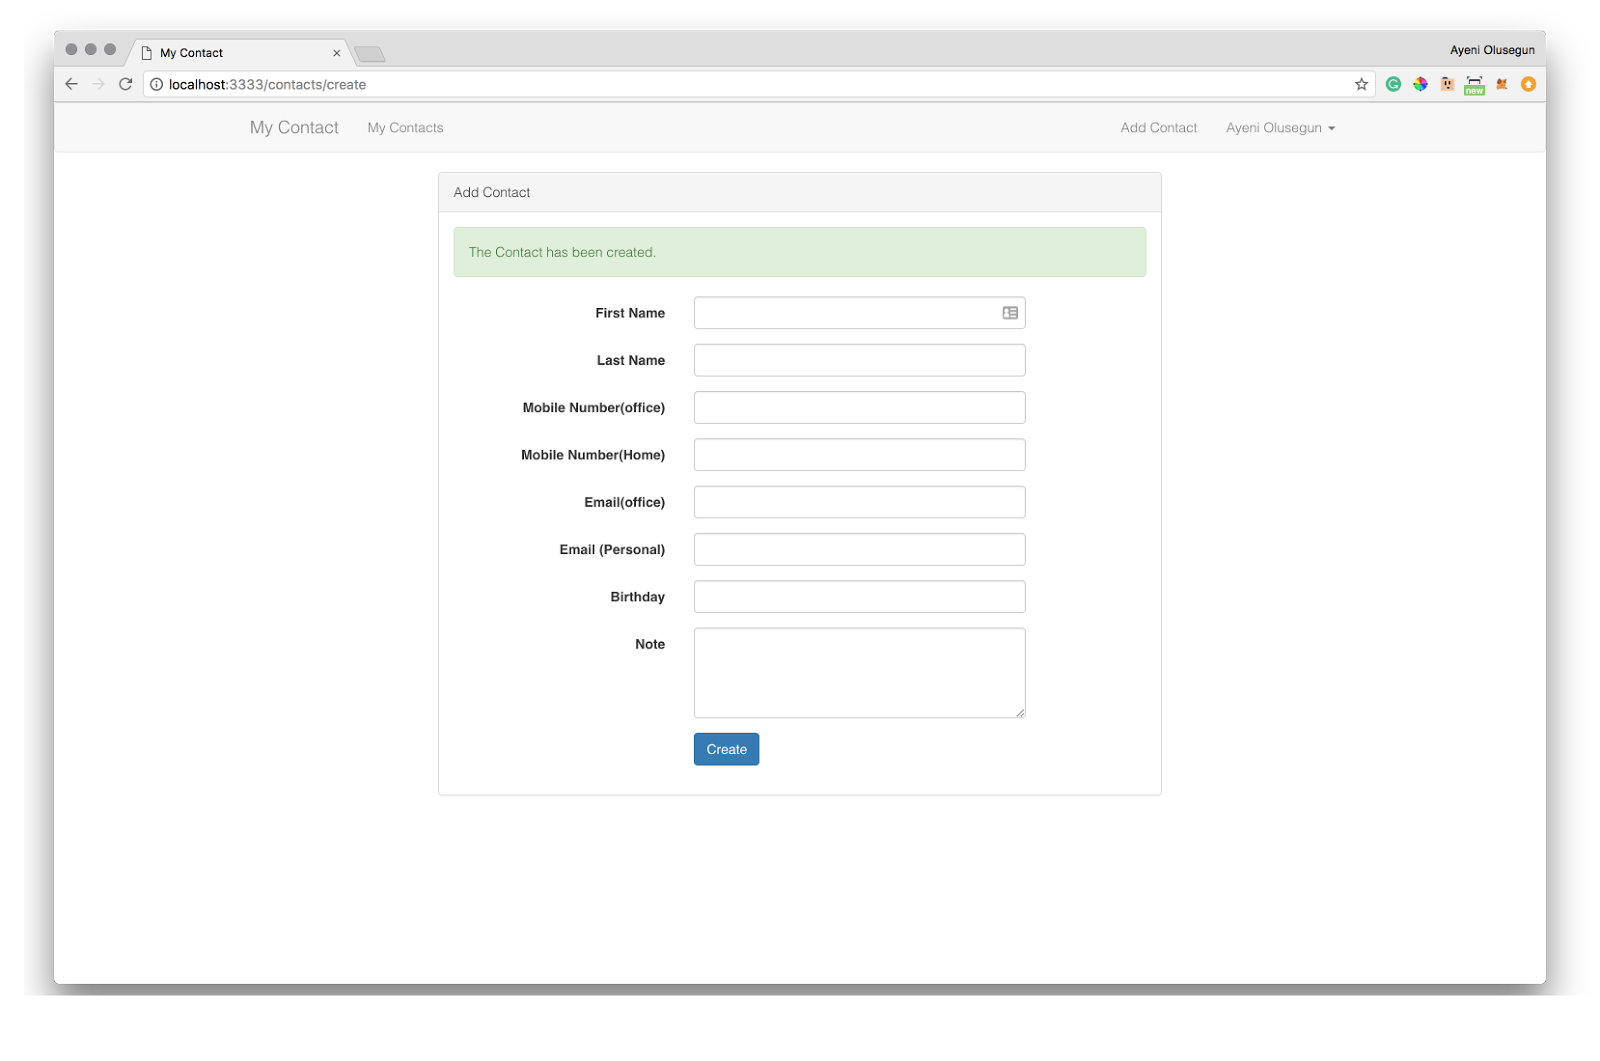
After Contact Creation
# Search contacts
Now let’s build the function to allow users search and view contacts by name. Open ‘app/Http/Controllers/ContactController.js’. Edit the controller by including the code below:
|
1 2 3 4 5 6 7 8 9 10 11 12 13 14 15 16 17 |
// Add this code to ContactController class /** * Display a listing of the resource. * * @return Response */ * index(request, response) { const user = yield request.auth.getUser() if(request.input('search') != null){ let contact = request.input('search'); var contacts = yield Contact.query().where('user_id', user.id).where('first_name', 'like', '%' + contact + '%').orWhere('last_name', 'like', '%' + contact + '%').fetch(); } else { var contacts = yield Contact.query().where('user_id', user.id).fetch(); } yield response.sendView('contacts.index', { contacts: contacts.toJSON() }) } |
In the code above, we get the current logged in user. Furthermore, we checked if the query string ‘search’ was sent to know if the user was performing a search or want to display all its contacts. The contacts are passed to a view file which we’ll create now.
Go to ‘resources/views/contacts/index.njk’. Let’s edit this by pasting the code below to it.
|
1 2 3 4 5 6 7 8 9 10 11 12 13 14 15 16 17 18 19 20 21 22 23 24 25 26 27 28 29 30 31 32 33 34 35 36 37 38 39 40 41 42 43 44 45 46 47 48 49 50 51 52 53 54 55 56 57 58 59 60 61 62 63 64 65 66 |
{% extends 'master' %} {% block content %} {% include 'layout.nav' %} <div class="container"> <div class="row"> <div class="col-md-10 col-md-offset-1"> <div class="panel panel-default"> <div class="panel-heading">Contacts</div> <div class="panel-body"> {% include 'layout.alerts' %} <div class="row" style=""> <form method="get"> <div class="col-md-10"> <input type="text" class="form-control" placeholder="Search" name="search" aria-describedby="sizing-addon2"> </div> <div class="col-md-2"> <button class="btn btn-primary" type="submit">Search</button> </div> </form> </div> <div class="row mt"> <table class="table table-hover"> <thead> <tr> <th>First Name</th> <th>Last Name</th> <th>Phone</th> <th>Action</th> </tr> </thead> <tbody> {% for contact in contacts %} <tr> <td>{{ contact.first_name }}</td> <td>{{ contact.last_name }}</td> <td>{{ contact.office_number }}</td> <td style="width: 25%"> <div class="btn-group" role="group" aria-label="..."> <a href="/contact/view/{{ contact.id }}" type="button" class="btn btn-default">View</a> <a href="/contact/edit/{{ contact.id }}" type="button" class="btn btn-default">Update</a> <a href="/contact/delete/{{ contact.id }}" type="button" class="btn btn-default" onclick="return confirm('Are you sure,you want to delete your Contact')">Delete</a> </div> </td> </tr> {% else %} <tr> <td colspan="4" class="nodata">No Data</td> </tr> {% endfor %} </tbody> </table> </div> </div> </div> </div> </div> </div> {% endblock %} |
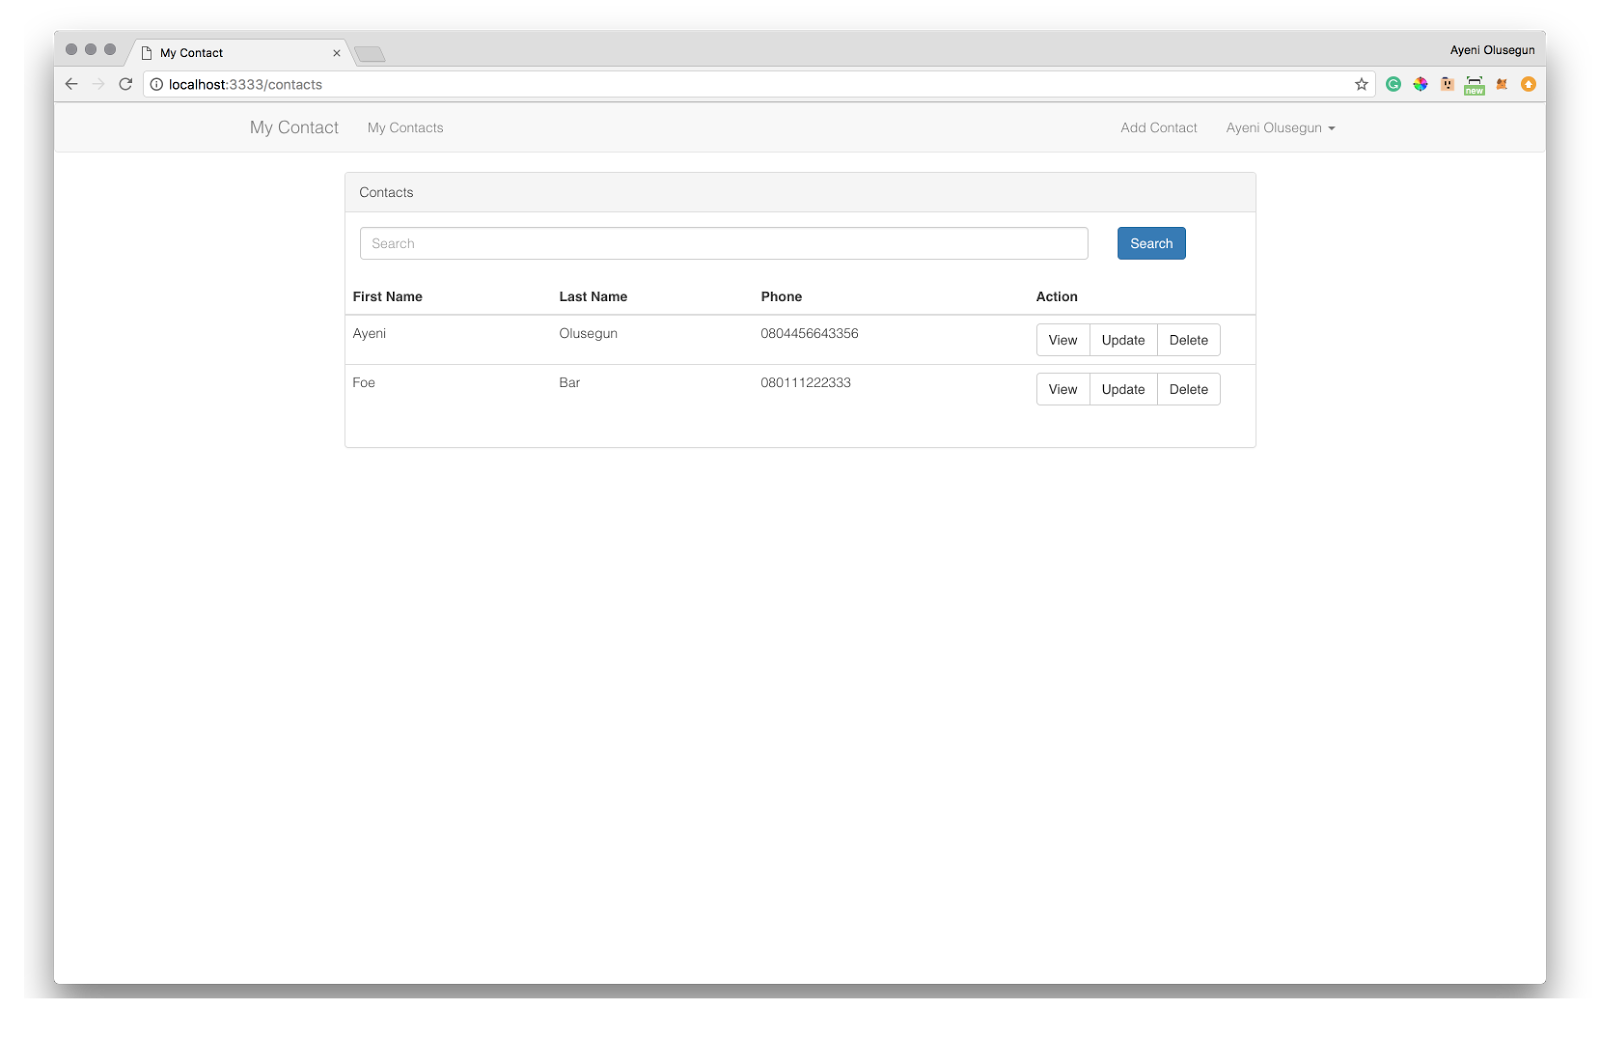
Display all contacts view
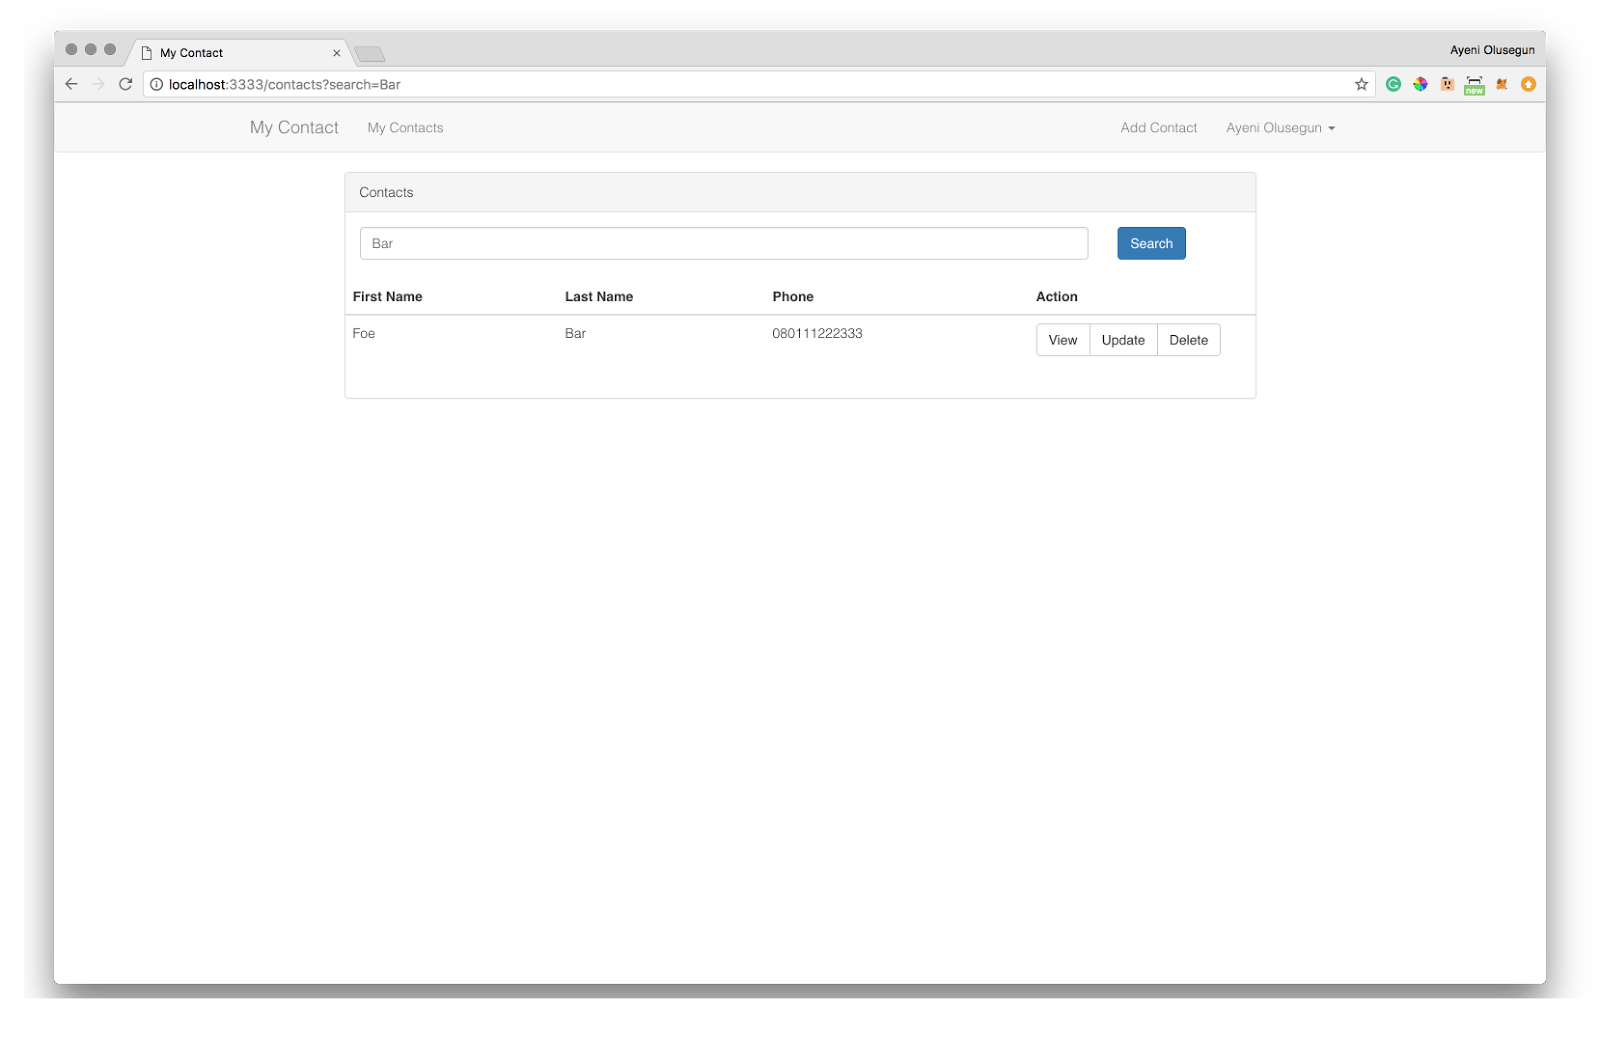
Search contacts View
# Display contact
We can now search for contacts, let’s work on viewing a particular contact.
As we have done in the previous sections, let’s start by creating a route inside the route group called ‘authenticated’
|
1 |
Route.get('/contact/view/:id', 'ContactController.show') |
For the view, go to ‘resources/views/contacts/’ directory, create a file called ‘show.njk’ and paste the below code in it.
|
1 2 3 4 5 6 7 8 9 10 11 12 13 14 15 16 17 18 19 20 21 22 23 24 25 26 27 28 29 30 31 32 33 34 35 36 37 38 39 40 41 42 43 44 45 46 47 48 49 |
{% extends 'master' %} {% block content %} {% include 'layout.nav' %} <div class="container"> <div class="row"> <div class="col-md-10 col-md-offset-1"> <div class="panel panel-default"> <div class="panel-heading">{{ contact.first_name }} {{ contact.last_name }}'s Contact</div> <div class="panel-body"> <div class="row paddingRound"> <div class="col-md-2">First Name</div> <div class="col-md-5">{{ contact.first_name }}</div> </div> <div class="row paddingRound"> <div class="col-md-2">Last Name</div> <div class="col-md-5">{{ contact.last_name }}</div> </div> <div class="row paddingRound"> <div class="col-md-2">Office Number</div> <div class="col-md-5">{{ contact.office_number }}</div> </div> <div class="row paddingRound"> <div class="col-md-2">Home Number</div> <div class="col-md-5">{{ contact.home_number }}</div> </div> <div class="row paddingRound"> <div class="col-md-2">Office Email</div> <div class="col-md-5">{{ contact.office_email }}</div> </div> <div class="row paddingRound"> <div class="col-md-2">Personal Email</div> <div class="col-md-5">{{ contact.personal_email }}</div> </div> <div class="row paddingRound"> <div class="col-md-2">Birthday</div> {% set birtday = formatDate(contact.birthday) %} <div class="col-md-5">{{ birtday }}</div> </div> <div class="row paddingRound"> <div class="col-md-2">Note</div> <div class="col-md-5">{{ contact.note }}</div> </div> </div> </div> </div> </div> </div> {% endblock %} |
Now, Add the code below to the ‘ContactController’ class
|
1 2 3 4 5 |
//Add this code to ContactController class * show(request, response) { const contact = yield Contact.find(request.param('id')); yield response.sendView('contacts.show', {contact: (contact) ? contact.toJSON() : {}}); } |
Here, we get the contact, with the id passed from the route using ‘request.param(‘id’)’, then query the database with the id. We then pass the given contact to the view file.
You should get something like the image below when you click on the ‘view’ link of a particular contact.
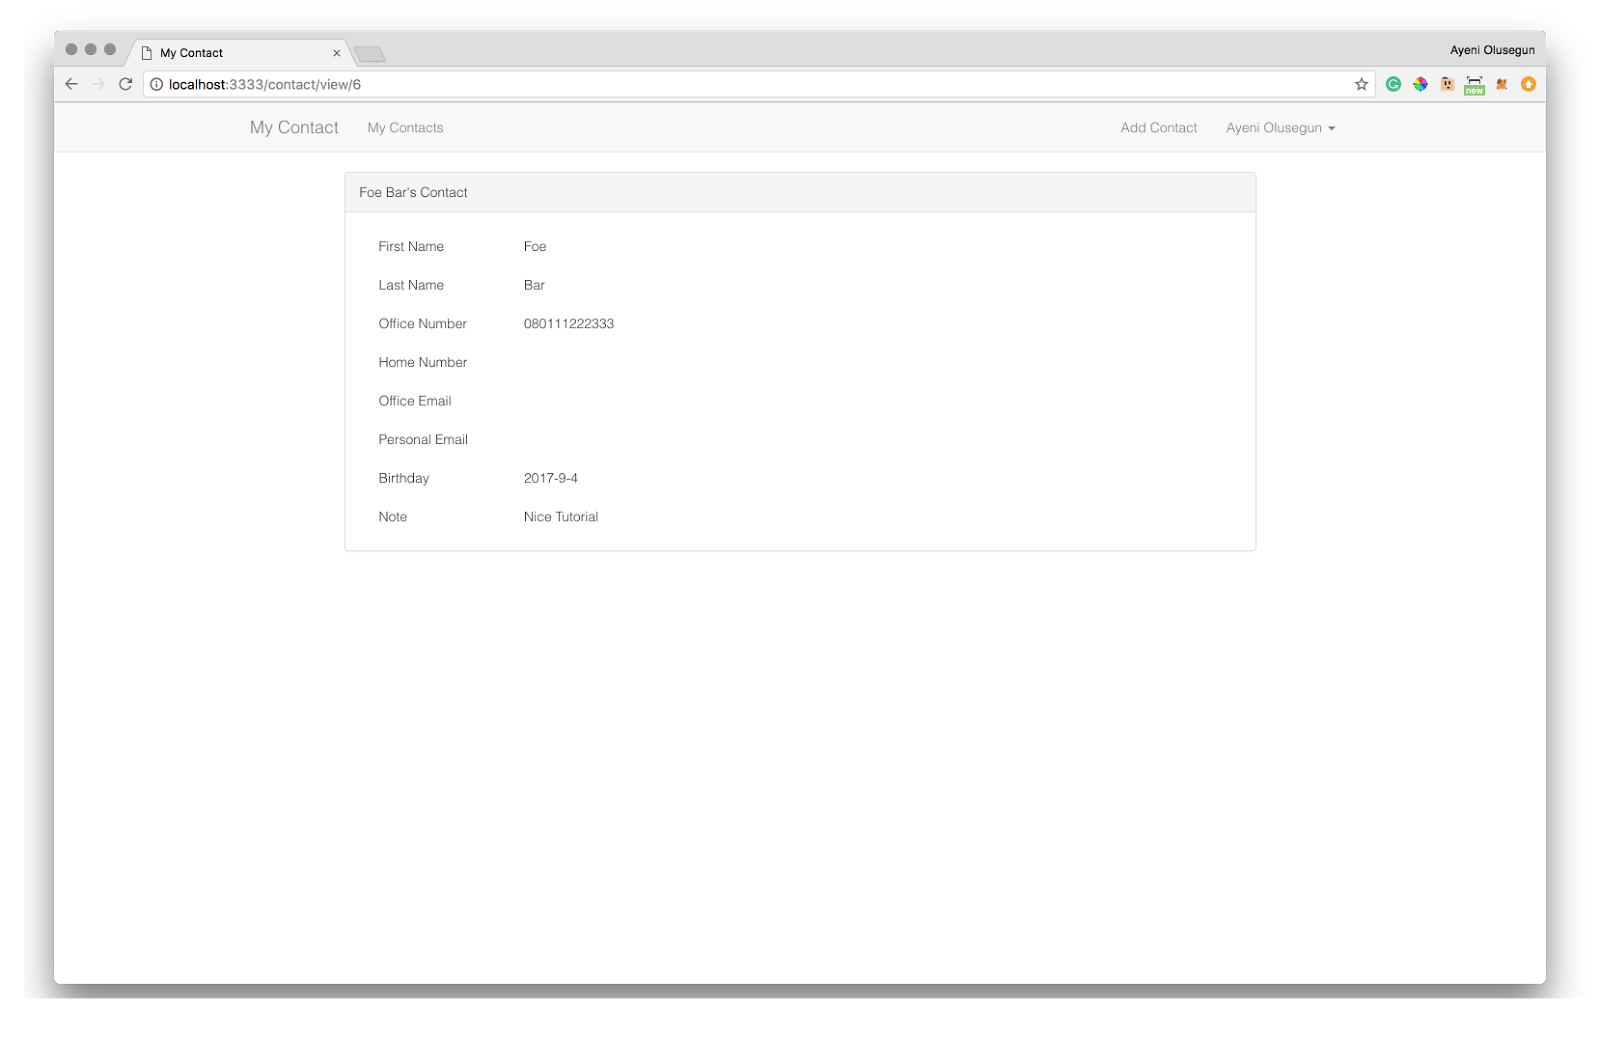
Display a contact
# Update Contact
We would also like Users to be able to update a particular contact.
Go to route.js then add the following routes to the route group called ‘authenticated’
|
1 2 |
Route.get('/contact/edit/:id', 'ContactController.edit') Route.put('/contact/update/:id', 'ContactController.update') |
Let’s work on the view by going to ‘resources/views/contacts’ directory then creating a file called ‘edit.njk’. Paste the following code in the file
|
1 2 3 4 5 6 7 8 9 10 11 12 13 14 15 16 17 18 19 20 21 22 23 24 25 26 27 28 29 30 31 32 33 34 35 36 37 38 39 40 41 42 43 44 45 46 47 48 49 50 51 52 53 54 55 56 57 58 59 60 61 62 63 64 65 66 67 68 69 70 71 72 73 74 75 76 77 78 79 |
{% extends 'master' %} {% block content %} {% include 'layout.nav' %} <div class="container"> <div class="row"> <div class="col-md-8 col-md-offset-2"> <div class="panel panel-default"> <div class="panel-heading">Edit {{ contact.first_name }} {{ contact.last_name }}'s Contact</div> <div class="panel-body"> {% include 'layout.alerts' %} <form class="form-horizontal" role="form" method="POST" action="/contact/update/{{ contact.id }}?_method=PUT"> {{ csrfField }} <div class="form-group"> <label class="col-md-4 control-label" for="first_name">First Name</label> <div class="col-md-6"> <input type="text" class="form-control" name="first_name" id="first_name" value="{{ contact.first_name }}"> </div> </div> <div class="form-group"> <label class="col-md-4 control-label" for="last_name">Last Name</label> <div class="col-md-6"> <input type="text" class="form-control" name="last_name" id="last_name" value="{{ contact.last_name }}"> </div> </div> <div class="form-group"> <label class="col-md-4 control-label" for="office_number">Mobile Number(office)</label> <div class="col-md-6"> <input type="text" class="form-control" name="office_number" id="office_number" value="{{ contact.office_number }}"> </div> </div> <div class="form-group"> <label class="col-md-4 control-label" for="home_number">Mobile Number(Home)</label> <div class="col-md-6"> <input type="text" class="form-control" name="home_number" id="home_number" value="{{ contact.home_number }}"> </div> </div> <div class="form-group"> <label class="col-md-4 control-label" for="office_email">Email(office)</label> <div class="col-md-6"> <input type="text" class="form-control" name="office_email" id="office_email" value="{{ contact.office_email }}"> </div> </div> <div class="form-group"> <label class="col-md-4 control-label" for="personal_email">Email (Personal)</label> <div class="col-md-6"> <input type="text" class="form-control" name="personal_email" id="personal_email" value="{{ contact.personal_email }}"> </div> </div> <div class="form-group"> <label class="col-md-4 control-label" for="birthday">Birthday</label> <div class="col-md-6"> {% set birtday = formatDate(contact.birthday) %} <input type="text" data-provide="datepicker" data-date-format="yyyy-mm-dd" class="form-control" name="birthday" id="birthday" value="{{ birtday }}"> </div> </div> <div class="form-group"> <label class="col-md-4 control-label" for="note">Note</label> <div class="col-md-6"> <Textarea class="form-control" rows="4" name="note" id="note">{{ contact.note }}</Textarea> </div> </div> <div class="form-group"> <div class="col-md-6 col-md-offset-4"> <button type="submit" class="btn btn-primary"> <i class="fa fa-btn fa-sign-in"></i>Update </button> </div> </div> </form> </div> </div> </div> </div> </div> {% endblock %} |
Let’s handle showing and editing of a particular contact. Open ‘app/Http/Controllers/ContactController.js’ and add below code to it.
|
1 2 3 4 5 6 7 8 9 10 11 12 13 14 15 16 17 18 19 20 21 22 23 24 25 26 27 28 29 30 31 32 33 34 |
* edit(request, response) { const contact = yield Contact.find(request.param('id')); yield response.sendView('contacts.edit', {contact: (contact) ? contact.toJSON() : {}}); } * update(request, response) { const rules = { first_name : 'required', last_name: 'required', } const validation = yield Validator.validate(request.all(), rules) //return back to create contact form with error messages if validation fails. if (validation.fails()) { yield request.withAll().andWith({ errors: validation.messages() }).flash() response.redirect('back') return } const contact = yield Contact.find(request.param('id')); contact.first_name = request.input('first_name'); contact.last_name = request.input('last_name'); contact.office_number = request.input('office_number'); contact.home_number = request.input('home_number'); contact.office_email = request.input('office_email'); contact.personal_email = request.input('personal_email'); contact.birthday = request.input('birthday') || null; contact.note = request.input('note'); yield contact.save() yield request.with({ status: 'Contact has been updated successfully' }).flash() response.redirect('back') } |
So, from the code above, we created edit function which fetches the details of the contact and sends it to the edit view to present them to the user. We also created the update function which validate the user input and update the contact as requested by the user.
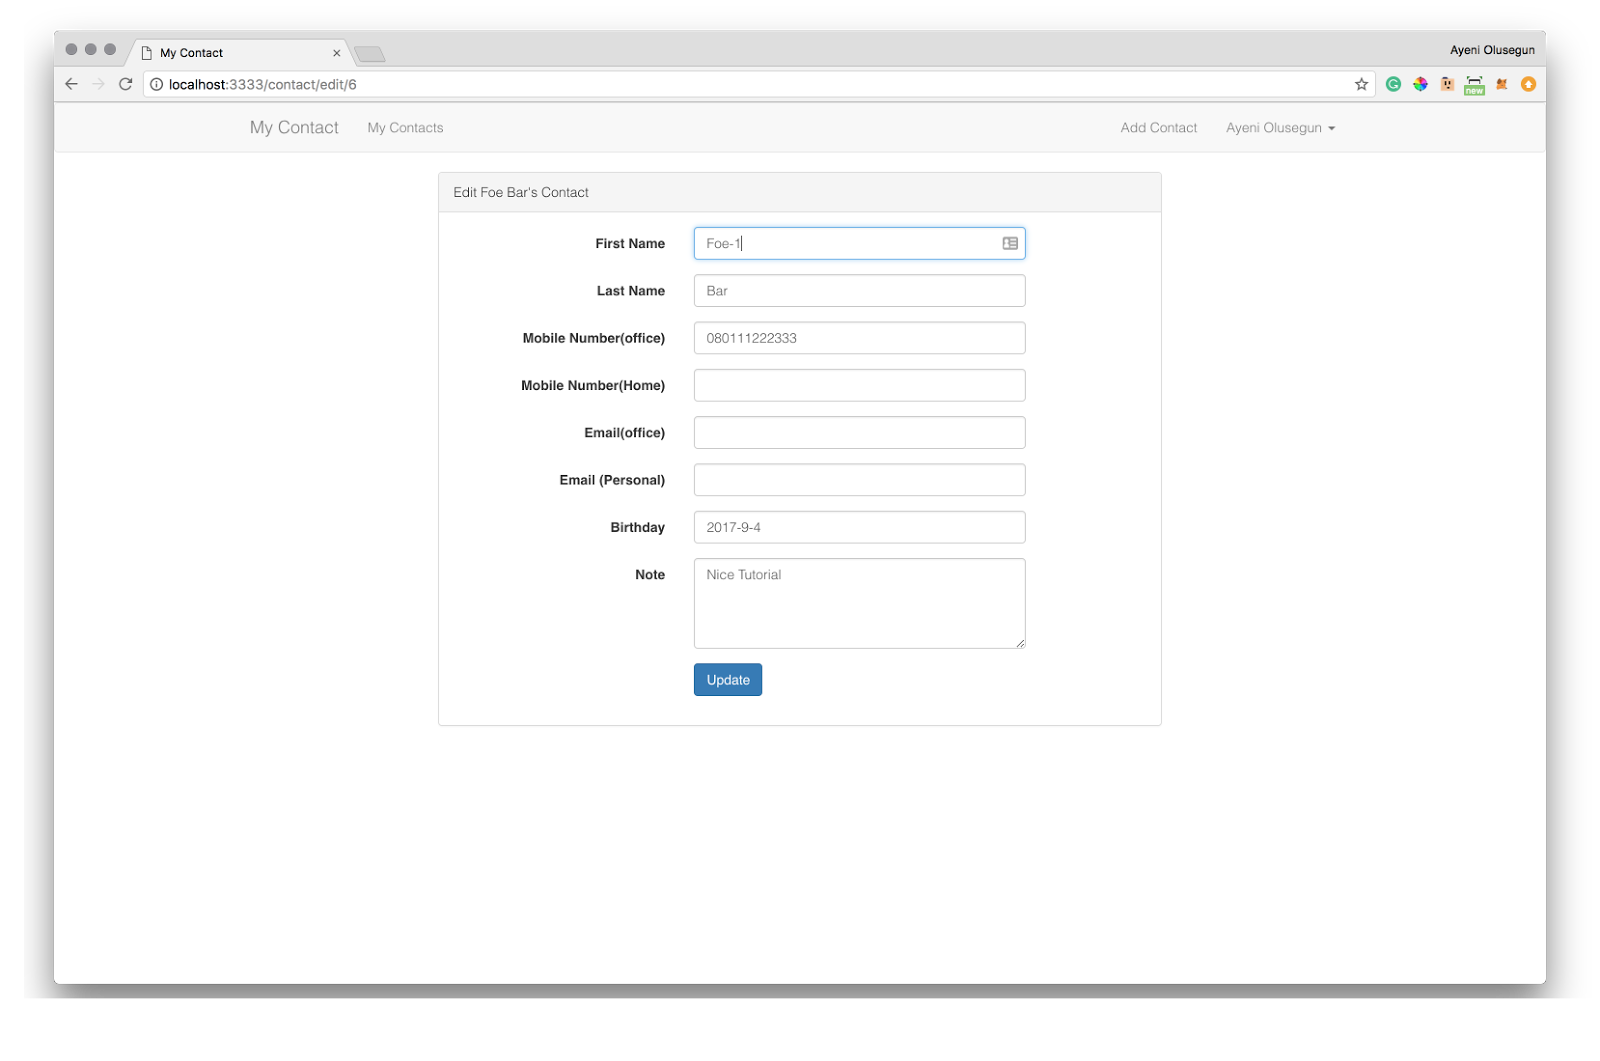
Before Update operation
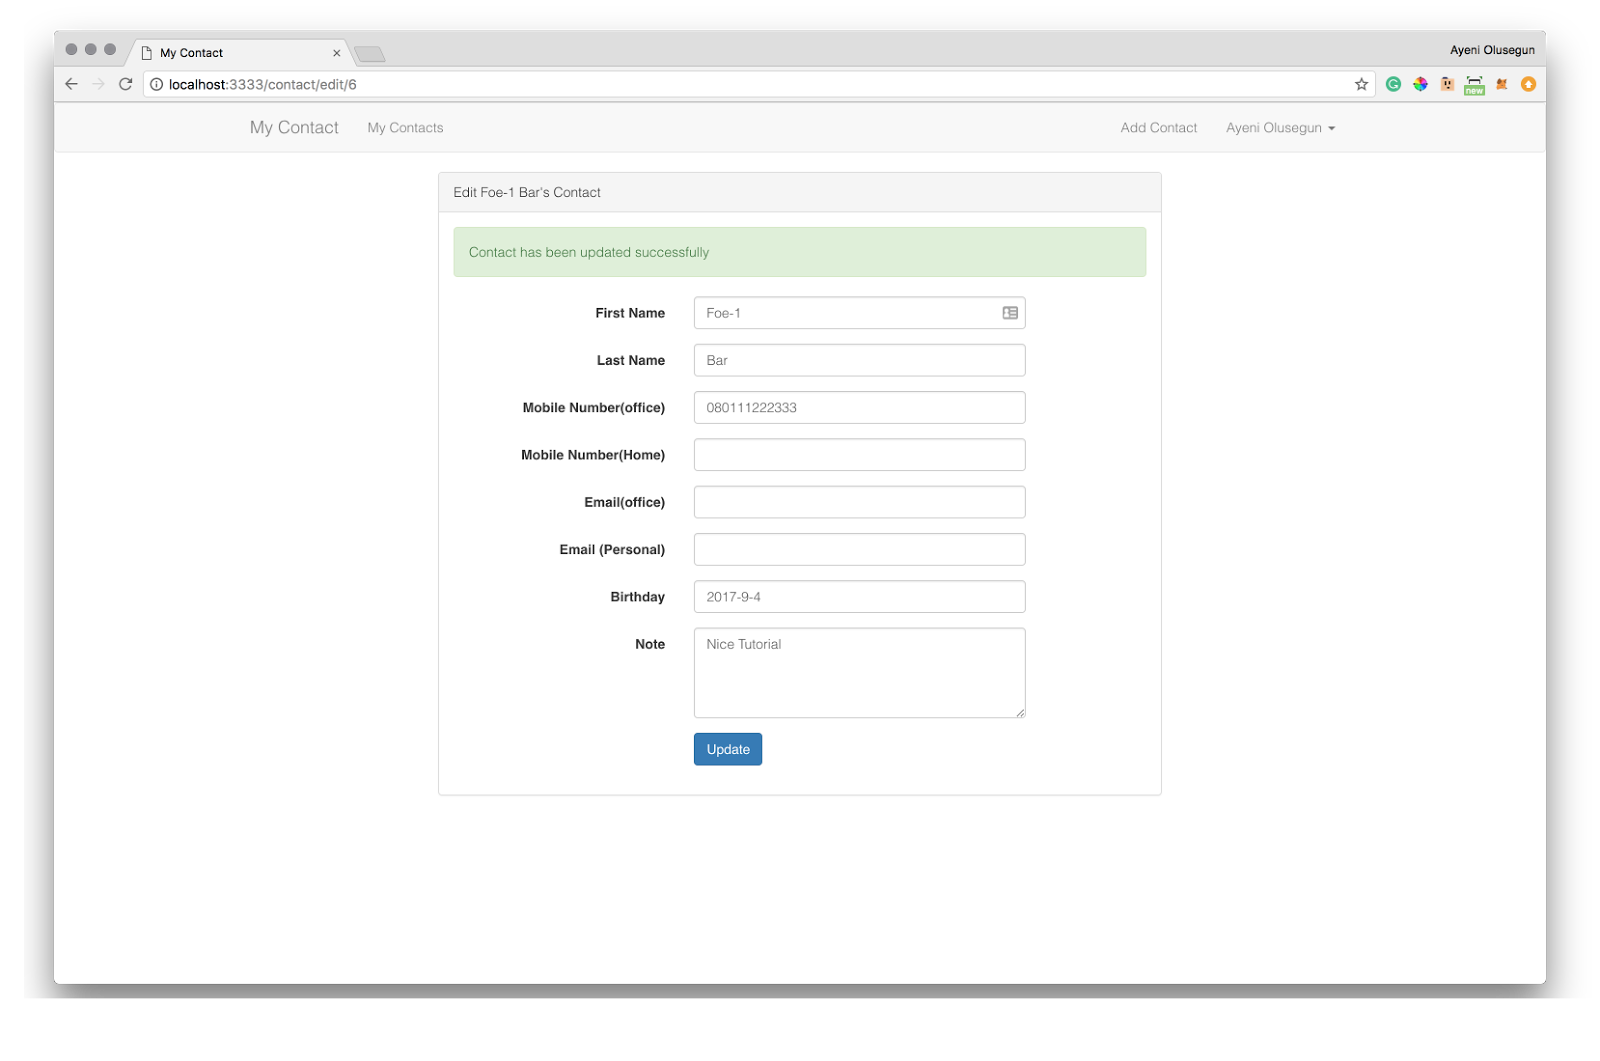
After Update operation
# Delete Contact.
This is the last feature which is deleting a particular contact. Yes! You are almost there. Open route.js file to add delete route inside the route group called ‘authenticated’
|
1 |
Route.get('/contact/delete/:id', 'ContactController.destroy') |
Now, Add the code below to the ‘ContactController’ class
|
1 2 3 4 5 6 |
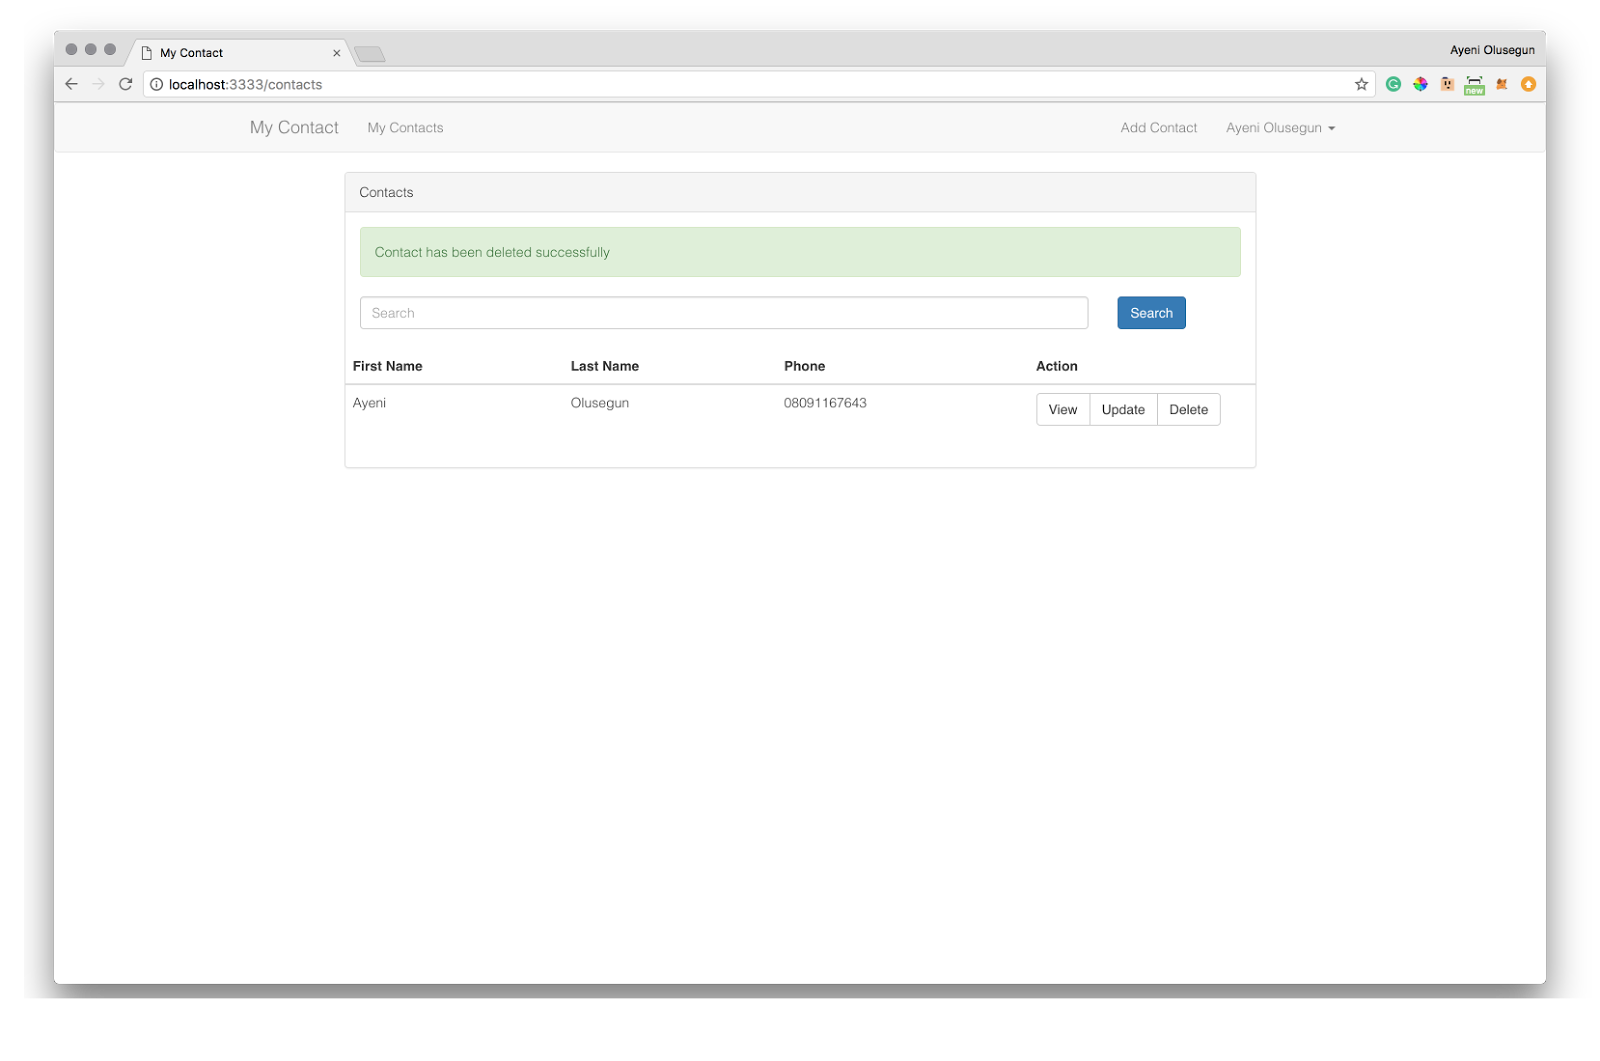
* destroy (request, response) { const contact = yield Contact.find(request.param('id')); yield contact.delete() yield request.with({ status: 'Contact has been deleted successfully' }).flash() response.redirect('/contacts') } |
The code creates a function called ‘destroy’. It gets the contact with the id passed from the route using ‘request.param(‘id’)’ then calls the ‘delete’ function.
We have finally come to the end of this tutorial series. Source code for the project is here
If you have any questions or observations, feel free to drop it in the comments section below. I would be happy to respond to you.
- Build A Contact Management web Application with AdonisJS Framework – Part 3 - September 25, 2017
- Build A Contact Management web Application with AdonisJS Framework – Part 2 - September 8, 2017
- Build A Contact Management web Application with AdonisJS Framework – Part 1 - August 4, 2017
- Get Started with AdonisJS; An MVC framework for Node.js - February 14, 2017