How to build your own youtube – Part 7
Introduction: If you missed the earlier parts, in this series we are covering how to build your own YouTube clone, Click here.
Note: You need to have at least some prior experience with client-side Javascript frameworks and Node.js to get the most out of this tutorial.
In the previous post, we looked at video resizing & cropping, renaming, trimming, deleting, concatenating, rotating, and creating rounding corners/circular videos.
In this post, we’ll look at Transcoding videos, Quality control, Bit rate control, Video codec settings, Generating Video thumbnails, Adding image overlays, Adding Video Overlays, Adding text captions, and Adding subtitles.
Transcoding Videos
Transcoding is the direct conversion of one video encoding format to another. Videos can be uploaded to Cloudinary in a variety of formats: mp4, webm, flv, mov, ogv, 3gp, 3g2, wmv,mpeg, flv, mkv or avi. These formats may not necessarily be best suited for web and mobile usage, so these videos can be dynamically converted and normalized to the relevant web formats, and optimized for different web browsers and mobile devices.
Transcoding the video to another format is done by simply specifying the new format as the file extension of the URL (client libraries can also use the format parameter to specify the new format). Cloudinary currently supports transcoding videos to one of the following output formats: MP4, OGV, FLV, WebM (see video_codec in the Video transformations reference table for the default settings for each format). Furthermore, video files can be converted to audio files by stipulating one of the following formats: MP3, OGG, WAV.
For example, transcoding the format of an uploaded mp4 video named dog to WebM format by changing the file extension to .webm like so:
|
1 |
cloudinary_url("dog", :resource_type => :video, :format => "webm"). |
where “dog” is the public_id of the video.
You can also change the file extension just via the URL like so:
|
1 |
http://res.cloudinary.com/demo/video/upload/dog.webm |
It’s that simple!!!  Let’s implement the functionality in our application.
Step 1: Add Components to Edit Video Page
Open up views/pages/edit_video.client.view.html and add this like so to the form:
|
1 2 3 4 5 6 7 8 9 10 11 12 13 14 15 16 17 18 19 20 21 |
<!-- Add format --> <div class="form_group"> <label path="title"> Current format: </label> <div class="form_controls"> <input type="text" class="form-control" placeholder="" ng-model="videoDetails.format" readonly> </div> </div> <!-- Change format --> <!-- Change format --> <div class="form_group"> <label path="title"> Change format to: </label> <div class="form_controls"> <label>OGV</label> <input type="radio" name="format" value="ogv" ng-model="videoDetails.format" checked> <label>FLV</label> <input type="radio" name="format" value="flv" ng-model="videoDetails.format"> <label>WEBM</label> <input type="radio" name="format" value="webm" ng-model="videoDetails.format"> </div> </div> |
Topmost part of your page should be looking like this:

Here we have the current format of the video & an option to change the format to either ogv, flv or webm.
Step 2: Add changeFormat Method to the Backend
Open up server/controllers/upload.server.controller.js and add this method like so:
|
1 2 3 4 5 6 7 8 9 10 11 |
changeFormat: function(req, res) { var videoUrl = req.body.url; var publicId = req.params.public_id; var format = req.body.format; /** * You can alternatively use the cloudinary method like so: cloudinary_url("dog", :resource_type => :video, :format => "webm"). */ var response = videoUrl.split("upload")[0].concat("upload/" + publicId + "." + format ); return response; }, |
We are actively changing the format of the video to the option selected on the frontend.
Open up server/controllers/video.server.controller.js and add this to the updateVideoDetails method
|
1 |
var newFormatVideoUrl = Upload.changeFormat(req, res); |
Update the Video.update method to return the newformatVideoUrl as a json response.
|
1 2 3 4 5 6 7 8 9 10 11 12 13 14 15 |
Video.update({public_id : publicId}, videoDetails, function (err) { if(err) { return res.status(404).json({success: false, message: 'User Details Not Found', err: err}); } else { return res.status(200).json({ success: true, message: 'Update Successful', audioUrl: newVideoUrl, colorVideoUrl: coloredVideoUrl, resizeVideoUrl: resizeVideoUrl, trimVideoUrl: trimVideoUrl, newFormatVideoUrl: newFormatVideoUrl }); } }); |
Also open public/js/controllers/transform.client.controller.js and update the updateVideoDetails like so:
|
1 2 3 4 5 6 7 8 9 10 11 12 |
Video.updateVideoDetails($routeParams.id, videoDetails, function(success, data){ if(success) { toastr.success(data.message, { timeOut: 7000 }); $scope.videoDetails.preview = data.audioUrl; $scope.videoDetails.colorPreview = data.colorVideoUrl; $scope.videoDetails.resizedVideo = data.resizeVideoUrl; $scope.videoDetails.trimmedVideo = data.trimVideoUrl; $scope.videoDetails.formattedVideo = data.newFormatVideoUrl; } else { toastr.error( data.message, 'Error', { timeOut: 2000 }); } }); |
Notice we included:
|
1 |
$scope.videoDetails.formattedVideo = data.newFormatVideoUrl; |
So we can use the formattedVideo scope variable in our edit_video.client.view.html .
Now, go back to the edit_video.client.view.html and add this in the preview div section like so:
|
1 2 3 4 5 6 7 8 |
<div class="col-md-8"> <div class="form_controls"> <div class="preview"> <label> Video with New format: </label> <video controls ngf-src="videoDetails.formattedVideo" autoplay="autoplay"> </div> </div> </div> |
Now, once you click on the format you want and click on the Update Info button, it will change the format and you will see a preview of the video with the new format. Hooray!!! So simple
Quality Control
Control the video quality with the quality parameter (q in URLs). This parameter represents a mapping between the actual low-level settings of each different video format normalized to a quality value between 1 (lowest) and 100 (highest). Reducing the quality is a tradeoff between visual quality and file size. See video_codec in the Video transformations reference table for the default settings for each format.
For example, reducing the quality of an uploaded mp4 video named dog to 50 results in a file size of 1.1 MB compared to the original file size of 9.8MB:
|
1 |
http://res.cloudinary.com/demo/video/upload/q_50/dog.mp4 |
Using the Cloudinary library method, for Node.js, you can apply it like so:
|
1 |
cloudinary.video("dog.mp4", {quality: 50}) |
where dog.mp4 refers to the public_id of the video
Note: There are libraries for other languages like PHP, Java, Ruby et.c . Check here for more details
Bit Rate Control
Use the bit_rate parameter (br in URLs) for advanced control of the video bit rate. This parameter controls the number of bits used to represent the video data. The higher the bit rate, the higher the visual quality of the video, but the larger the file size as well. Bit rate can take one of the following values:
- An integer e.g.
120000. - A string supporting ‘k’ and ‘m’ (kilobits and megabits respectively) e.g.
500kor2m.
For example, changing the bit rate of an uploaded mp4 video named dog to 500 kilobits (also reducing file size down to 1MB) can be done like so:
|
1 |
http://res.cloudinary.com/demo/video/upload/br_250k/dog.mp4 |
Using the Cloudinary library method, for Node.js, you can apply it like so:
|
1 |
cloudinary.video("dog.mp4", {bit_rate: "250k"}) |
Video Codec Settings
The video_codec parameter (vc in URLs) is used to determine the video codec, video profile and level to use in the form <codec>[:<profile>:[<level>]] e.g. vc_h264:baseline:3.1or vc_h264 or vc_h264:high. You can set this parameter to auto instead, to normalize and optimize the video for web (including audio settings).
By default, any transformation applied to the video (e.g., resizing) implicitly also uses the auto settings when delivering the transformed video, so using the auto setting is only needed when delivering the same format as originally uploaded with optimization but without any additional transformations. See video_codec in the Video transformations reference table for the default settings for each format.
For example, changing the video codec to h264, the profile to baseline and the level to 3:1 of an uploaded mp4 video named dog can be done like so:
|
1 |
http://res.cloudinary.com/demo/video/upload/vc_h264:baseline:3.1/dog.mp4 |
Using the Cloudinary library method, for Node.js, you can apply it like so:
|
1 |
cloudinary.video(<span class="string"><span class="delimiter">"</span><span class="content">dog.mp4</span><span class="delimiter">"</span></span>, {<span class="key">video_codec</span>: <span class="string"><span class="delimiter">"</span><span class="content">h264:baseline:3.1</span><span class="delimiter">"</span></span>}) |
where dog.mp4 refers to the public_id of the video.
You can also normalize the video for web with the default auto settings like so:
|
1 |
http://res.cloudinary.com/demo/video/upload/vc_auto/dog.mp4 |
Using the Cloudinary library method, for Node.js, you can apply it like so:
|
1 |
cloudinary.video("dog.mp4", {video_codec: "auto"}) |
Generating Video Thumbnails
You can easily generate image thumbnails of your videos. The goodness about this functionality is that you can actually generate image thumbnails of any frame within an uploaded video by simplifying the image format you need e.g jpg, png, webp, wdp.
To control which frame is captured from the video as a thumbnail (the middle frame is selected by default), use the start_offset parameter (so in URLs) with one of the following values:
- A float representing the time in seconds from the beginning of the video e.g.
5.44. - A string representing the percentage of the video from the beginning. This string consists of a number with a
pappended e.g.35p(0p is the first frame and 100p is the last frame). The client libraries also support appending a%instead of ap. - A value of
autowhich automatically selects a frame that best matches the average value of a color distribution analysis of the first few seconds of the video, making it more likely to display a typical frame.
Let’s see how this works in Yourtube.
Step 1: Add generateThumbnail to Backend
Open up server/controllers/upload.server.controller.js and add this method like so:
|
1 2 3 4 5 6 7 8 9 10 11 12 13 |
generateThumbnail: function(req, res) { var videoUrl = req.body.url; var publicId = req.params.public_id; var format = req.body.format; var startOffset = req.body.startOffset; /** You can alternatively use the Cloudinary NodeJS library option like so * cloudinary.image("dog.jpg", {start_offset: "8.5", resource_type: "video"}) * cloudinary.image("dog.jpg", {start_offset: "20p", resource_type: "video"}) **/ var response = videoUrl.split("upload")[0].concat("upload/so_" + startOffset + "p/" + publicId + ".jpg"); return response; }, |
Remember, we already have an offset percentage option on the edit video form from the previous trimmed video functionality we built in a previous post. We’ll just use that as shown in the code above.
Open up server/controllers/video.server.controller.js and add this to the updateVideoDetails method like so:
|
1 |
var videoThumbnail = Upload.generateThumbnail(req, res); |
Update the Video.update method to return the videoThumbnail as a json response.
|
1 2 3 4 5 6 7 8 9 10 11 12 13 14 15 16 |
Video.update({public_id : publicId}, videoDetails, function (err) { if(err) { return res.status(404).json({success: false, message: 'User Details Not Found', err: err}); } else { return res.status(200).json({ success: true, message: 'Update Successful', audioUrl: newVideoUrl, colorVideoUrl: coloredVideoUrl, resizeVideoUrl: resizeVideoUrl, trimVideoUrl: trimVideoUrl, newFormatVideoUrl: newFormatVideoUrl, videoThumbnail: generateThumbnail }); } }); |
Also open public/js/controllers/transform.client.controller.js and update the updateVideoDetails like so:
|
1 2 3 4 5 6 7 8 9 10 11 12 13 |
Video.updateVideoDetails($routeParams.id, videoDetails, function(success, data){ if(success) { toastr.success(data.message, { timeOut: 7000 }); $scope.videoDetails.preview = data.audioUrl; $scope.videoDetails.colorPreview = data.colorVideoUrl; $scope.videoDetails.resizedVideo = data.resizeVideoUrl; $scope.videoDetails.trimmedVideo = data.trimVideoUrl; $scope.videoDetails.formattedVideo = data.newFormatVideoUrl; $scope.videoDetails.generatedThumbnail = data.videoThumbnail; } else { toastr.error( data.message, 'Error', { timeOut: 2000 }); } }); |
Notice we included:
|
1 |
$scope.videoDetails.generatedThumbnail = data.videoThumbnail; |
So we can use the generatedThumbnail scope variable in our edit_video.client.view.html .
Now, go back to the edit_video.client.view.html and add this in the preview div section like so:
|
1 2 3 4 5 6 7 8 |
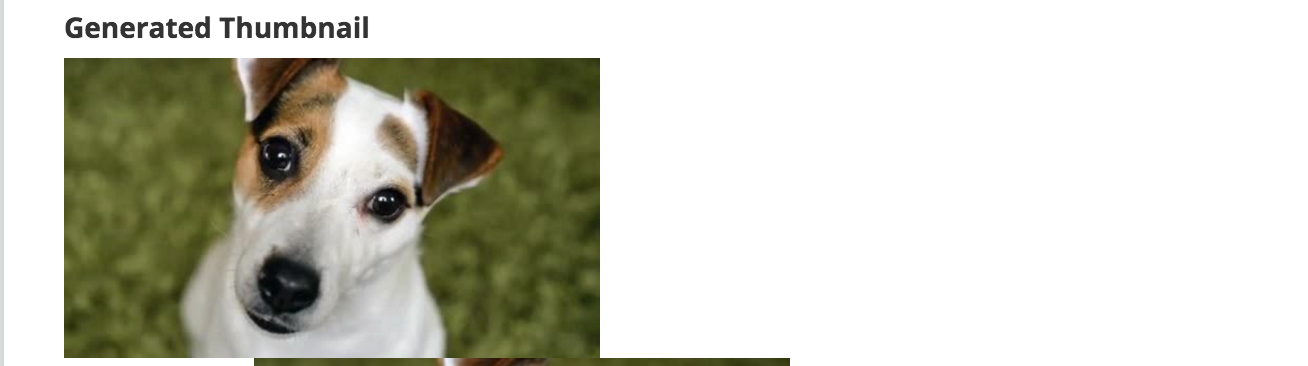
<div class="col-md-8"> <div class="form_controls"> <div class="preview"> <label> Generated Thumbnail </label> <img ng-src="{{ videoDetails.generatedThumbnail }}"> </div> </div> </div> |
Now try it out, you should see the thumbnail generated based on the off_set percentage you chose!
Now, for the generated thumbnail, you can actually apply several transformations in the generation of a nice fine thumbnail like so:
|
1 2 3 4 |
cloudinary.image("dog.jpg", {start_offset: "4p", width: 350, height: 350, radius: 20, effect: "grayscale", border: "5px_solid_black", crop: "crop", resource_type: "video"}); |
Here, the image will be grayed, it will have a certain width and height, it will also hav a border. The URL equivalent of that is this:
|
1 |
http://res.cloudinary.com/demo/video/upload/so_4,w_350,h_350,c_crop,r_20,e_grayscale,bo_5px_solid_black/dog.jpg |
Adding Image Overlays
Add an overlay image over a video with the overlay parameter (l in URLs) and the public ID of a previously uploaded PNG image (e.g. l_watermark for an image with the public ID of watermark). You can determine the dimension and position of the overlay using the width, height, x, y and gravity parameters the same way as used for images (see Adding watermarks, credits, badges and text overlays to images for more details). Furthermore, it is possible to control when the overlay is displayed by using any combination of the 3 offset parameters (see Trimming videos for more information on the parameters and their possible values). The overlay can also be further manipulated like any other image uploaded to Cloudinary
For example, adding an overlay of a PNG image called cloudinary_icon to the mp4 video named dog, that appears after 6.5 seconds and disappears at the 10 second mark. The overlay is also made into a watermark by reducing the opacity to 50 using the o parameter and increasing the brightness to 200% using the e_brightness effect can be done like so
|
1 |
http://res.cloudinary.com/demo/video/upload/l_cloudinary_icon,so_6.5,eo_10,o_50,e_brightness:200/dog.mp4 |
Using the Cloudinary library method, for Node.js, you can apply it like so:
|
1 2 3 |
cloudinary.video("dog.mp4", {overlay: "cloudinary_icon", start_offset: "6.5", end_offset: "10", opacity: 50, effect: "brightness:200"}); |
Check this video below
Adding Video Overlays
Add another video as an overlay over the container video by using the overlay video parameter (l_video: in URLs) and the public ID of a previously uploaded video (e.g. l_video:dog for a video with the public ID of dog). You can determine the dimension and position of the video overlay using the width, height, x, y and gravity parameters the same way as used for images (see Adding image overlays for more details). Furthermore, it is possible to control when the video overlay is displayed by using any combination of the 3 offset parameters (see Trimming videos for more information on the parameters and their possible values). The overlay can also be further manipulated like any other video uploaded to Cloudinary.
For example, adding an overlay of a video named dog to the same mp4 video named dog, that appears after 4.5 seconds and disappears at the 8 second mark. The overlay is also rotated by 90 degrees, set with a gravity of ‘east’ and scaled to a width of 200 pixels can be done like so:
|
1 |
http://res.cloudinary.com/demo/video/upload/l_video:dog,so_4.5,eo_8,a_90,w_200,g_east/dog.mp4 |
Using the Cloudinary library method, for Node.js, you can apply it like so:
|
1 2 3 |
cloudinary.video("dog.mp4", {overlay: "video:dog", start_offset: "4.5", end_offset: "8", angle: 90, width: 200, gravity: "east"}); |
This is how your video will look like:
Adding Text Captions
Add a text caption over the video with the text: property of the overlay parameter ( l_text:in URLs), followed by the font name and size (separated with an underscore), a colon, and then the text string to display.
For example, adding the text string “Cool Video” in 60 pt Arial font at a distance of 80 pixels from the bottom of the mp4 video named dog, that appears after 2 seconds and disappears at the 5 second mark will be done via URL like so:
|
1 |
http://res.cloudinary.com/demo/video/upload/l_text:arial_60:Cool Video,g_south,y_80,so_2,eo_5/dog.mp4 |
Using the Cloudinary library method, for Node.js, you can apply it like so:
|
1 2 |
cloudinary.video(<span class="string"><span class="delimiter">"</span><span class="content">dog.mp4</span><span class="delimiter">"</span></span>, {<span class="key">overlay</span>: <span class="string"><span class="delimiter">"</span><span class="content">text:arial_60:Cool%20Video</span><span class="delimiter">"</span></span>, <span class="key">gravity</span>: <span class="string"><span class="delimiter">"</span><span class="content">south</span><span class="delimiter">"</span></span>, <span class="key">y</span>: <span class="integer">80</span>, <span class="key">start_offset</span>: <span class="string"><span class="delimiter">"</span><span class="content">2</span><span class="delimiter">"</span></span>, <span class="key">end_offset</span>: <span class="string"><span class="delimiter">"</span><span class="content">5</span><span class="delimiter">"</span></span>}); |
Let’s see how this works in Yourtube!!!
Step 1: Add Components to Edit Video Page
Open up views/pages/edit_video.client.view.html and add this like so to the form:
|
1 2 3 4 5 6 7 |
<!-- Add Video Caption --> <div class="form_group"> <label path="title"> Add Video Caption </label> <div class="form_controls"> <input type="text" class="form-control" placeholder="Add Video Caption" ng-model="videoDetails.caption"> </div> </div> |
Step 2: Update TransformController
Open up public/js/controllers/transform.client.controller.js and add this to the videoDetails Object in the $scope.updateVideo function like so:
|
1 |
caption: $scope.videoDetails.caption |
So, the updated videoDetails Object should be looking like so:
|
1 2 3 4 5 6 7 8 9 10 11 12 13 14 |
var videoDetails = { tag: $scope.videoDetails.tag, title: $scope.videoDetails.title, description: $scope.videoDetails.description, audio: $scope.videoDetails.audio, format: $scope.videoDetails.format, width: $scope.videoDetails.width, height: $scope.videoDetails.height, startOffset: $scope.videoDetails.startOffset, duration: $scope.videoDetails.duration, videoBackground: $scope.videoDetails.backgroundColor, url: $scope.videoDetails.url, caption: $scope.videoDetails.caption }; |
Step 3: Add captionVideo method to Backend
Open up server/controllers/upload.server.controller.js and add this method like so:
|
1 2 3 4 5 6 7 8 9 10 11 12 13 14 15 16 17 18 19 |
captionVideo: function(req, res) { var videoUrl = req.body.url; var publicId = req.params.public_id; var format = req.body.format; var startOffset = req.body.startOffset; var caption = req.body.caption; var format = req.body.format; /** You can alternatively use the Cloudinary NodeJS library option like so * cloudinary.video("dog.mp4", {overlay: "text:arial_60:Cool%20Video", gravity: "south", y: 80, start_offset: "2", end_offset: "5"}) * cloudinary.video("dog.mp4", {overlay: "text:arial_60:Cool%20Video", gravity: "south", y: 80, start_offset: "10p", end_offset: "90p"}) * where 10p refers to 10percent and 90p refers to 90percent **/ var response = videoUrl. split("upload")[0]. concat("upload/l_text:arial_20:" + caption + ",g_south,y_80," + "so_" + startOffset + "p,eo_100p/w_500/" + publicId + "." + format); return response; }, |
Remember, we already have an offset percentage option on the edit video form from the previous trimmed video functionality we built in a previous post. We’ll just use that as shown in the code above.
Open up server/controllers/video.server.controller.js and add this to the updateVideoDetails method like so:
|
1 |
var captionedVideoUrl = Upload.captionVideo(req, res); |
Update the Video.update method to return the captionedVideoUrl as a json response.
|
1 2 3 4 5 6 7 8 9 10 11 12 13 14 15 16 17 |
Video.update({public_id : publicId}, videoDetails, function (err) { if(err) { return res.status(404).json({success: false, message: 'User Details Not Found', err: err}); } else { return res.status(200).json({ success: true, message: 'Update Successful', audioUrl: newVideoUrl, colorVideoUrl: coloredVideoUrl, resizeVideoUrl: resizeVideoUrl, trimVideoUrl: trimVideoUrl, newFormatVideoUrl: newFormatVideoUrl, videoThumbnail: generateThumbnail, captionedVideoUrl: captionedVideoUrl }); } }); |
Also open public/js/controllers/transform.client.controller.js and update the updateVideoDetails like so:
|
1 2 3 4 5 6 7 8 9 10 11 12 13 14 |
Video.updateVideoDetails($routeParams.id, videoDetails, function(success, data){ if(success) { toastr.success(data.message, { timeOut: 7000 }); $scope.videoDetails.preview = data.audioUrl; $scope.videoDetails.colorPreview = data.colorVideoUrl; $scope.videoDetails.resizedVideo = data.resizeVideoUrl; $scope.videoDetails.trimmedVideo = data.trimVideoUrl; $scope.videoDetails.formattedVideo = data.newFormatVideoUrl; $scope.videoDetails.generatedThumbnail = data.videoThumbnail; $scope.videoDetails.captionedVideo = data.captionedVideoUrl; } else { toastr.error( data.message, 'Error', { timeOut: 2000 }); } }); |
Notice we included:
|
1 |
$scope.videoDetails.captionedVideo = data.captionedVideoUrl; |
So we can use the captionedVideo scope variable in our edit_video.client.view.html .
Now, go back to the edit_video.client.view.html and add this in the preview div section like so:
|
1 2 3 4 5 6 7 8 |
<div class="col-md-8"> <div class="form_controls"> <div class="preview"> <label> Video with caption: </label> <video controls ngf-src="videoDetails.captionedVideo" autoplay="autoplay"> </div> </div> </div> |
Now try it out, you should see the text we put in the form show as an overlay on the video!
Adding Subtitles
You can add subtitles to videos from SRT files previously uploaded to Cloudinary as raw files with the subtitles: property of the overlay parameter ( l_subtitles: in URLs), followed by the SRT file name (including the .srt extension).
For example, to overlay the subtitles in the sample_sub_en.srt file to the mp4 video named dog, you can do it via the URL like so:
|
1 |
http://res.cloudinary.com/demo/video/upload/l_subtitles:sample_sub_en.srt/dog.mp4 |
Using the Cloudinary library method, for Node.js, you can apply it like so:
|
1 |
cloudinary.video("dog.mp4", {overlay: "subtitles:sample_sub_en.srt"}) |
You can also optionally include font and size settings (separated with an underscore) before the subtitles file name. For example, to overlay the subtitles in the sample_sub_en.srt file to the mp4 video named dog, using the Arial font with a size of 20 pixels, you can do it via the URL like so:
|
1 |
http://res.cloudinary.com/demo/video/upload/l_subtitles:arial_20:sample_sub_en.srt/dog.mp4 |
Using the Cloudinary library method, for Node.js, you can apply it like so:
|
1 |
cloudinary.video("dog.mp4", {overlay: "subtitles:arial_20:sample_sub_en.srt"}) |
You can also specify a particular type of color and border to the text like so:
|
1 |
http://res.cloudinary.com/demo/video/upload/l_subtitles:arial_75:sample_sub_en.srt,co_rgb:ffff0080,b_black/dog.mp4 |
Using the Cloudinary library method, for Node.js, you can apply it like so:
|
1 2 |
cloudinary.video("dog.mp4", {overlay: "subtitles:arial_75:sample_sub_en.srt", color: "#ffff0080", background: "black"}); |
Let’s talk about SRT files for a bit. Remember when you download movies from the internet and you need translations for the video, you go ahead to look for srt files in different languages. Aha!, it’s exactly the same type of SRT files we are focusing on here.
SRT(SubRip Text files) are text files named with the extension .srt, and contain lines of plain text in groups of subtitles separated by a blank line. The subtitles are numbered sequentially, starting at 1 and the timecode format used is hours:minutes:seconds,milliseconds with time units fixed to two zero-padded digits and fractions fixed to three zero-padded digits (00:00:00,000) with the comma used as a fractional separator. The file is structured as follows:
- A numeric counter identifying each sequential subtitle.
- The time that the subtitle should appear on the screen, followed by
-->and the time it should disappear. - Subtitle text itself on one or more lines.
- A blank line containing no text, indicating the end of this subtitle.
This is an example of an SRT file:
|
1 2 3 4 5 6 7 |
1 00:00:01,000 --> 00:00:05,000 How to build your own Youtube 2 00:00:06,000 --> 00:00:10,000 This is so good, New Video Service loading... |
A very good scenario for this is building a video service where users can upload a Japanese video and also upload SRT files that can make that Japanese video have translations for English viewers to understand. Cloudinary makes this possible without breaking a sweat!
Conclusion
In this post, we have looked at Transcoding videos, Quality control, Bit rate control, Video codec settings, Generating Video thumbnails, Adding image overlays, Adding Video Overlays, Adding text captions, and Adding subtitles.
In the next post, we’ll look at Audio Frequency Control and tweaking alll sorts of Video Effects like noise, contrast, brightness, saturation, gamma and vignette.
The source code for this project is on GitHub.
If you have any questions or observations, please drop your thoughts in the comment section below
- How to build your own youtube – Part 7 - July 15, 2016