How to build your own Youtube – Part 2
Introduction: If you missed part 1, in this series we are covering how to build your own YouTube clone, Click here.
You need to have at least some prior experience with client-side Javascript frameworks and Node.js to get the most out of this tutorial.
Before proceeding, you need to make sure you have these tools installed:
Step 1: Setting up new Express Project
Create a new directory called yourtube. Create two files package.json and server.js inside the folder.

Open package.json and paste the following:
|
1 2 3 4 5 6 7 8 9 10 11 12 13 14 15 16 17 18 19 20 21 22 23 24 25 26 27 28 29 30 31 32 33 34 35 36 37 38 39 40 41 42 43 44 45 46 47 48 49 50 |
{ "name": "yourtube", "version": "1.0.0", "description": "Build your own youtube", "main": "server.js", "engines": { "node": "0.12.7" }, "scripts": { "test": "echo \"Error: no test specified\" && exit 1", "start": "node server.js" }, "repository": { "type": "git", "url": "https://github.com/goodheads/yourtube.git" }, "keywords": [ "Mean", "Stack", "mean", "yourtube", "angularjs", "expressjs", "nodejs", "mongodb", "developers", "map" ], "author": "Prosper Otemuyiwa", "license": "MIT", "bugs": { "url": "https://github.com/goodheads/yourtube/issues" }, "homepage": "https://github.com/goodheads/yourtube", "dependencies": { "async": "^1.2.1", "bcrypt": "^0.8.3", "body-parser": "^1.12.4", "cloudinary": "^1.2.1", "cors": "^2.7.1", "dotenv": "^1.1.0", "express": "^4.12.4", "gravatar": "^1.1.1", "jwt-simple": "^0.5.0", "lodash": "^3.10.0", "moment": "^2.13.0", "mongoose": "^4.0.5", "morgan": "^1.5.3" } } |
These are the node packages/modules that we will be using in this project. I’ll write a brief description for each package. In subsequent blog posts, as need arises, we’ll add more modules.
- async – For managing asynchronous flow
- bcrypt – For hashing passwords
- body-parser – For parsing POST request data
- cloudinary – For uploading videos to Cloudinary Storage
- cors – For managing cross origin request permissions
- dotenv – For reading environment values from the .env file
- express – Web framework for Node.js
- gravatar – For fetching a user’s avatar from the popular gravatar service
- jwt-simple – For creating json web tokens
- lodash – For easy manipulation of data structure
- moment – For getting time stamps easily
- mongoose – MongoDB ODM with validation and Schema support
- morgan – HTTP Request logger
Run npm install  in the terminal to install the packages we specified above.
Open server.js and paste the following code . It’s a minimal Express application enough to get started.
|
1 2 3 4 5 6 7 8 9 10 11 12 13 14 15 16 17 18 19 20 21 22 23 24 25 26 27 28 29 30 31 32 33 34 35 36 37 38 39 40 41 42 43 44 45 46 47 48 49 50 51 52 53 54 55 56 57 58 59 60 61 62 63 64 65 66 67 |
require('dotenv').load(); var express = require('express'), morgan = require('morgan'), bodyParser = require('body-parser'), mongoose = require('mongoose'), cors = require('cors'), testdb = require('./config/testdb'), route = require('./server/routes'); var port = process.env.PORT || 3000; /** * Connect to MongoDB. */ testdb.dbconnect(); /** * Create Express server. */ var app = express(); /** * Express configuration. */ // Force HTTPS on heroku if(process.env.NODE_ENV === 'production') { app.enable("trust proxy"); app.use (function (req, res, next) { if(req.secure) { //request was via https, so do no special handling next(); } else { //request was via http, so redirect to https res.redirect('https://' + req.headers.host + req.url); } }); } app.use(cors()); app.use(morgan('dev')); app.use(bodyParser.urlencoded({extended: true})); //use bodyParser for request and parsing info app.use(bodyParser.json()); app.use(express.static( __dirname + '/public')); //use to serve static files like favicon, css, angular and the rest /** * Routes Configuration */ route(app); //configure any route whatsoever to redirect to angular app.get('*', function(req, res) { /** frontend routes ========================================================= * route to handle all angular requests * load the single view file (angular will handle the page changes on the front-end) **/ res.sendFile(__dirname + '/public/index.html' ); }); /** * Start Express server. */ app.listen( port, function(){ console.log("Yourtube Server Listening on port ", port ); }); |
Next, quickly create a config folder in the yourtube directory. Create two files secrets.js and testdb.js inside the config folder. The server.js file is dependent on these two files.
secrets.js
|
1 2 3 4 5 6 |
module.exports = { db: process.env.MONGODB || process.env.MONGOHQ_URL, TOKEN_SECRET: process.env.TOKEN_SECRET, }; |
This is where we extract all our secrets and environment variables.
testdb.js
|
1 2 3 4 5 6 7 8 9 10 11 12 13 14 |
var mongoose = require('mongoose'), secrets = require('./secrets'); var db = mongoose.connection; mongoose.connect(secrets.db); module.exports = { dbconnect: function(){ db.on('error', console.error.bind( console, 'MongoDB Connection Error. Please make sure that MongoDB is running.')); db.once('open', function callback(){ console.log('Yourtube db opened'); }); } }; |
This helps us in connecting to the MongoDB database. Now, make sure you have started your MongoDB server already by running mongod from your terminal.
Next, create a new folder called public in the yourtube directory. This is where we will place all our frontend/client code comprising of images, CSS and Javascript files.
Create a blank index.html file inside the public folder.
Run npm start in the Terminal to make sure our Express app is working without any issues.
You should see something like so:

Step 2: Project Structure
The architecture of this app involves building our backend as an  API and consuming the API with a frontend framework. In this case, our frontend framework is AngularJS. We already created the public folder.
Go ahead and create css, img, js, and views folder inside the public directory.
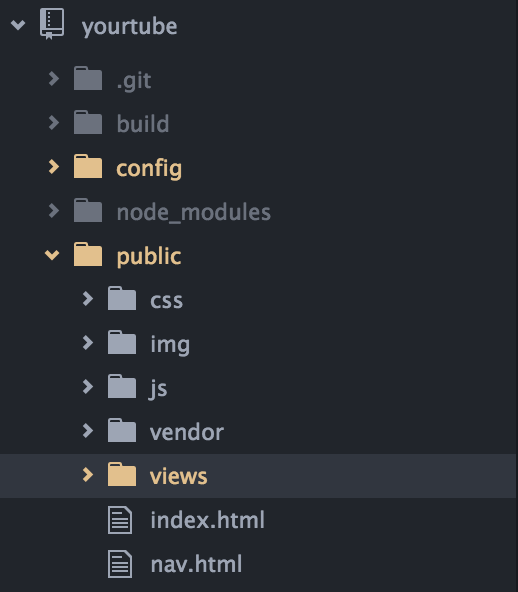
If you look at the diagram above, you’ll spot a vendor directory. This is where all our frontend libraries will be placed. How?
Next, create .bowerrc file in the yourtube directory and place this in it.
.bowerrc
|
1 2 3 |
{ "directory" : "public/vendor" } |
With this, when we run bower install, it installs all the frontend libraries to the vendor directory.
Next, create a bower.json file in the yourtube root directory and place this in it.
bower.json
|
1 2 3 4 5 6 7 8 9 10 11 12 13 14 15 16 17 18 19 20 21 22 23 24 25 26 27 28 29 30 31 32 33 34 35 36 37 38 39 40 41 42 43 44 45 46 47 48 49 50 51 52 53 54 55 56 |
{ "name": "yourtube", "version": "0.0.0", "homepage": "https://github.com/goodheads/yourtube", "authors": [ "Prosper Otemuyiwa <prosperotemuyiwa@gmail.com>" ], "moduleType": [ "amd", "es6", "globals" ], "keywords": [ "Mean", "tube", "youtube", "youtube", "leaflet" ], "license": "MIT", "private": true, "ignore": [ "**/.*", "node_modules", "bower_components", "public/vendor", "test", "tests" ], "dependencies": { "font-awesome": "~4.3.0", "angular": "~1.4.0", "angular-route": "~1.4.0", "bootstrap": "~3.3.4", "angular-sanitize": "~1.4.0", "angular-material": "~0.9.8", "ui-bootstrap": "~0.13.0", "angular-bootstrap": "~0.13.0", "angularjs-toaster": "~0.4.14", "angular-toastr": "~1.4.1", "angular-moment": "~0.10.1", "angular-leaflet": "~0.8.2", "ngstorage": "~0.3.4", "ng-lodash": "~0.2.3", "angular-messages": "~1.4.0", "angular-loading-bar": "~0.7.1", "ngDialog": "~0.4.0", "angular-utils-disqus": "~0.3.0", "satellizer": "^0.14.1", "angular-cookies": "~1.4.3" }, "resolutions": { "angular": "1.4.3", "satellizer": "^0.14.1" } } |
Run bower install to install all these libraries.
We have the understanding that the public directory will deal with the frontend code.
Next, create a folder in the root directory called server. Within this recently created folder, create controllers and models folder. Also, create a routes.js file within the server directory. This will handle our API routes.
One more thing, create a .env file within the root directory. This is where all our environment variables will be placed as we develop locally. Place this inside the .env file
.env
|
1 2 |
TOKEN_SECRET=yourtube MONGODB=mongodb://localhost:27017/yourtube |
Our token secret and MongoDB URL. Quickly check the config/secrets.js, you’ll discover we used the node process function to read the environment variables after dotenv has loaded them into memory.
Step 3: Setting Up APIs
Let’s set up our server side Node APIs.
Right now, we need the following routes:
GET /api – We really don’t need this route, but I think it’s not bad if we have it there .
GET & PUT /api/me, – This route is to allow us get the info of the logged-in user and also update his information.
POST – /api/login, –Â This route is to allow us authenticate a user’s details against the database to either allow the user login or not.
POST –/api/register –Â This route is to create a new user.
Create a user.server.model.js file in the server/models directory.
We’ll create our User Schema in this file. Mongoose allows us to create schemas that serve as database representation of collections.
user.server.model.js
|
1 2 3 4 5 6 7 8 9 10 11 12 13 14 15 16 17 18 19 20 21 22 23 24 25 26 27 28 29 30 31 32 |
var mongoose = require('mongoose'), bcrypt = require('bcrypt'), userSchema = mongoose.Schema({ fullName: { type: String }, email: { type: String, required: true, unique: true, lowercase: true }, password: { type: String, required: true }, user_avatar: { type: String, default: 'http://s3.amazonaws.com/37assets/svn/765-default-avatar.png' }, registered_on: { type: Date, default: Date.now } }); userSchema.pre('save', function(next) { var user = this; if (!user.isModified('password')) { return next(); } bcrypt.genSalt(10, function(err, salt) { bcrypt.hash(user.password, salt, function(err, hash) { user.password = hash; next(); }); }); }); userSchema.methods.comparePassword = function(password, done) { bcrypt.compare(password, this.password, function(err, isMatch) { done(err, isMatch); }); }; module.exports = mongoose.model('User', userSchema, 'users'); |
So our User collection will have the fullName, email, password, user_avatar and registered_on fields
The comparePassword method compares if the password supplied by the user matches that in the user collection.
The pre-save method hashes the password with bcrypt just before saving it in the user collection. Very awesome nifty feature of mongoose. 
Next, Create a user.server.controller.js file in the server/controllers directory.
user.server.controller.js
|
1 2 3 4 5 6 7 8 9 10 11 12 13 14 15 16 17 18 19 20 21 22 23 24 25 26 27 28 29 30 31 32 33 34 35 36 37 38 39 40 41 42 43 44 45 46 47 48 49 50 51 52 53 54 55 56 57 58 59 60 61 62 63 64 65 66 67 68 69 70 71 72 73 74 75 76 77 78 79 80 81 82 83 84 85 86 87 88 89 90 91 92 93 94 95 96 97 98 99 100 101 102 103 104 105 |
var User = require('../models/user.server.model'), cloudinary = require('cloudinary'), gravatar = require('gravatar'), secrets = require('../../config/secrets'), token = require('../../config/token'); module.exports = { /** * Welcome Notice * @param req * @param res * @return Void */ welcome: function(req, res){ return res.status(200).json({ message: 'Welcome to Yourtube Api'}); }, /** * Register User with Full Name, Email and password * @param req * @param res * @return Void */ registerUser: function(req, res) { User.findOne({ email: req.body.email }, '+password', function(err, existingUser) { if (existingUser) { return res.status(409).json({ message: 'Email is already taken' }); } // Obtain the avatar from gravatar service var secureImageUrl = gravatar.url(req.body.email, {s: '200', r: 'x', d: 'retro'}, true); var user = new User({ fullName: req.body.fullName, email: req.body.email, password: req.body.password, user_avatar: secureImageUrl }); user.save(function(err, result) { if (err) { res.status(500).json({ message: err.message }); } res.send({ token: token.createJWT(result) }); }); }); }, /** * Fetch Logged In User Details * @param req * @param res * @param next * @return Void */ getLoggedInUserDetail: function(req, res) { User.findById(req.user, function(err, user) { res.send(user); }); }, /** * Update Logged In User Details * @param req * @param res * @return json | void */ updateLoggedInUserDetail: function(req, res) { User.findById(req.user, function(err, user) { if (!user) { return res.status(400).send({ message: 'User not found' }); } user.fullName = req.body.fullName || user.fullName; user.email = req.body.email || user.email; user.save(function(err) { res.status(200).send({ message: 'Profile Update Succesfully'}); }); }); }, /** * Authenticate a User via Email and Password * @param req * @param res * @return json */ authenticate: function(req, res) { User.findOne({ email: req.body.email }, function(err, user) { if (!user) { return res.status(401).json({ message: 'Invalid Email' }); } user.comparePassword(req.body.password, function(err, isMatch) { if (!isMatch) { return res.status(401).json({ message: 'Invalid Password' }); } res.send({ token: token.createJWT(user) }); }); }); } }; |
Here we have five functions. Let’s break it down a little.
- The welcome function simply returns a json response that says “Welcome to Yourtube Api”
- The registerUser function, with the aid of the User model checks if a user already exists with that email coming from the user input. If no user exists with that email, It gets the avatar of the user, saves the user details and creates a secure token else it returns an appropriate message. token.createJWT does the work of creating the token. The createJWT function can be found in the config/token file.
- The getLoggedInUserDetail function queries the user collection and returns the user detail.
- The updateLoggedInUserDetail function updates the user details in the user collection.
- The authenticate function verifies if the email and password matches before returning a valid token.
Note: I like to name my files using the .***.controller.js convention to help easily differentiate the client and server side controller files, same goes for services and models too.
Next, let’s create the routes and call the functions in this file.
Open routes.js and place this in it.
routes.js
|
1 2 3 4 5 6 7 8 9 10 11 12 |
var User = require('./controllers/user.server.controller'), token = require('../config/token'); module.exports = function(app) { app.get('/api', User.welcome); app.post('/api/login', User.authenticate); app.post('/api/register', User.registerUser); app.get('/api/me', User.getLoggedInUserDetail); app.put('/api/me', User.updateLoggedInUserDetail); }; |
Here we have the routes and the methods that will be called on each API route whenever a request is made to it.
Now, let’s test our routes. You can use POSTMAN or HTTPIE from your terminal


You can try that with the register routes. Now if you notice, you’ll discover that anyone can actually access this API routes. That shouldn’t be the case, so let’s protect the routes with a middleware.
Step 4: Setting Up Middlewares
Open config/token.js and add this:
token.js
|
1 2 3 4 5 6 7 8 9 10 11 12 13 14 15 16 17 18 19 20 21 22 23 24 25 26 27 28 29 30 31 32 33 34 35 36 37 38 39 40 41 42 43 44 45 46 47 48 49 50 |
var jwt = require('jwt-simple'), secrets = require('./secrets'), moment = require('moment'); /* |-------------------------------------------------------------------------- | Generate JSON Web Token |-------------------------------------------------------------------------- */ function createJWT(user) { var payload = { sub: user._id, iat: moment().unix(), exp: moment().add(14, 'days').unix() }; return jwt.encode(payload, secrets.TOKEN_SECRET); } /* |-------------------------------------------------------------------------- | Login Required Middleware |-------------------------------------------------------------------------- */ function ensureAuthenticated(req, res, next) { if (!req.header('Authorization')) { return res.status(401).send({ message: 'Please make sure your request has an Authorization header' }); } var token = req.header('Authorization').split(' ')[1], payload = null; try { payload = jwt.decode(token, secrets.TOKEN_SECRET); } catch (err) { return res.status(401).send({ message: err.message }); } if (payload.exp <= moment().unix()) { return res.status(401).json({ message: 'Token has expired' }); } req.user = payload.sub; next(); } module.exports = { createJWT: createJWT, ensureAuthenticated: ensureAuthenticated }; |
We have the createJWT method that sets the expiry date of the token to 14 days. Then we have the middleware in the form of ensureAuthenticated function.
Take a good look at this function.
It ensures there is an Authorization Header, if it doesn’t exist, it returns a 401 Unauthorized. If it exists, it grabs the value of the header, then decodes the token to obtain the user payload. If the token is valid, it allows the next function to be called else returns the appropriate message as seen above.
Next, let’s update our routes.js to have the middleware
routes.js
|
1 2 3 4 5 6 7 8 9 10 11 12 |
var User = require('./controllers/user.server.controller'), token = require('../config/token'); module.exports = function(app) { app.get('/api', token.ensureAuthenticated, User.welcome); app.post('/api/login', User.authenticate); app.post('/api/register', User.registerUser); app.get('/api/me', token.ensureAuthenticated, User.getLoggedInUserDetail); app.put('/api/me', token.ensureAuthenticated, User.updateLoggedInUserDetail); }; |
Now, make a request without any Authorization Header and token. We will have something like this:

BRACE UP GUYS, LET’S GET TO THE FUN STUFF!!!
Step 5: Setting Up Frontend Login
Open public/index.html and add this:
index.html
|
1 2 3 4 5 6 7 8 9 10 11 12 13 14 15 16 17 18 19 20 21 22 23 24 25 26 27 28 29 30 31 32 33 34 35 36 37 38 39 40 41 42 43 44 45 46 47 48 49 50 51 52 53 54 55 56 57 58 59 60 61 62 63 64 65 66 67 68 69 70 71 72 73 74 75 76 77 78 79 80 81 82 83 84 85 86 87 88 89 90 91 92 93 |
<!doctype html> <html lang="en" ng-app="yourtube"> <head> <meta charset="UTF-8"> <meta http-equiv="X-UA-Compatible" content="IE=edge"> <meta name="author" content="Prosper Otemuyiwa"> <meta name="HandheldFriendly" content="true"> <meta property="og:title" content="Yourtube"> <meta property="og:type" content="website"> <meta property="og:url" content="https://yourtube.com"> <meta property="og:image" content="https://yourtube.com/img/google-pushpin-md.png"> <meta property="og:site_name" content="yourtube.com"> <meta property="og:description" content="Awesome Online Directory for videos"> <meta http-equiv="X-UA-Compatible" content="IE=edge,chrome=1"> <meta name="description" content="Yourtube - Directory of Online Videos"> <meta name="fragment" content="!"> <meta name="keywords" content="Yourtube, Mean Stack, AngularJS, MongoDB, Expressjs, Angularjs, Online Directory, Developers, Mean Tutorials"> <meta name="viewport" content="initial-scale=1, maximum-scale=1, user-scalable=no" /> <link rel="icon" href="/img/google-pushpin-md.png"> <link href='https://fonts.googleapis.com/css?family=Permanent+Marker|Montserrat:400,700|Open+Sans:300italic,400italic,600italic,700italic,400,300,600,700|Gentium+Book+Basic:400,400italic' rel='stylesheet' type='text/css'> <base href="/"> <title>Yourtube :: Personalized Youtube</title> <link href="favicon.png" rel="shortcut icon"> <link href="//fonts.googleapis.com/css?family=Roboto|Montserrat:400,700|Open+Sans:400,300,600" rel="stylesheet"> <link href="//maxcdn.bootstrapcdn.com/font-awesome/4.3.0/css/font-awesome.min.css" rel="stylesheet"> <link href="//code.ionicframework.com/ionicons/2.0.1/css/ionicons.min.css" rel="stylesheet"> <link href="//maxcdn.bootstrapcdn.com/bootstrap/3.3.0/css/bootstrap.min.css" rel="stylesheet"> <link href="//cdn.jsdelivr.net/animatecss/3.2.0/animate.css" rel="stylesheet"> <link rel="stylesheet" href="css/style.css"> <link rel="stylesheet" href="vendor/angular-toastr/dist/angular-toastr.css"> <link rel="stylesheet" href="vendor/angular-loading-bar/build/loading-bar.min.css"> <!-- JS --> <script src="vendor/angular/angular.js"></script> <script src="vendor/angular-route/angular-route.min.js"></script> <script src="vendor/angular-bootstrap/ui-bootstrap-tpls.min.js"></script> <script src="vendor/angular-cookies/angular-cookies.min.js"></script> <script src="vendor/angular-toastr/dist/angular-toastr.tpls.js"></script> <script src="vendor/angular-sanitize/angular-sanitize.min.js"></script> <script src="vendor/angular-loading-bar/build/loading-bar.min.js"></script> <script src="vendor/angular-animate/angular-animate.js"></script> <script src="vendor/angular-messages/angular-messages.min.js"></script> <script src="vendor/angular-aria/angular-aria.js"></script> <script src="vendor/angular-utils-disqus/dirDisqus.js"></script> <script src="vendor/ngstorage/ngStorage.min.js"></script> <script src="vendor/ng-lodash/build/ng-lodash.min.js"></script> <script src="vendor/moment/moment.js"></script> <script src="vendor/angular-moment/angular-moment.js"></script> <script src="vendor/marked.js"></script> <script src="vendor/angular-marked.js"></script> <script src="vendor/satellizer/satellizer.js"></script> <!-- ANGULAR CUSTOM --> <script src="js/app.js"></script> <script src="js/routes.js"></script> <script src="js/controllers/auth.client.controller.js"></script> <script src="js/controllers/profile.client.controller.js"></script> <script src="js/controllers/user.client.controller.js"></script> <script src="js/controllers/nav.client.controller.js"></script> <script src="js/controllers/logout.client.controller.js"></script> <script src="js/services/auth.client.service.js"></script> <script src="js/services/user.client.service.js"></script> </head> <body> <div ng-controller="NavbarCtrl" class="navbar navbar-default navbar-static-top"> <div class="navbar-header"> <a class="navbar-brand" href="/"><i class="ion-ios7-pulse-strong"></i> Your <span class="tube">Tube</span> </a> </div> <ul class="nav navbar-nav"> <li ng-if="isAuthenticated()"><a href="/account">Profile</a></li> <li><a href="/page/about">About</a></li> </ul> <ul ng-if="!isAuthenticated()" class="nav navbar-nav pull-right"> <li><a href="/auth/login">Login</a></li> <li><a href="/auth/signup">Sign up</a></li> </ul> <ul ng-if="isAuthenticated()" class="nav navbar-nav pull-right"> <li><a href="/logout">Logout</a></li> </ul> </div> <!-- ANGULAR DYNAMIC CONTENT --> <div ng-view> </div> <!-- END DYNAMIC CONTENT --> </body> </html> |
With this, we have referenced all the relevant scripts. Angular, Satellizer( Used for Authentication), toastr, sanitize and the rest.
Note: There are better ways to add this. We can use Gulp and minify all of this into just one script. I actually recommend that for production apps. It helps to reduce the number of HTTP requests that our app serves.
Next ,create app.js and routes.js inside the public/js directory.
We will initialize all the modules inside app.js
app.js
|
1 2 3 4 5 6 7 8 9 10 11 12 13 14 15 16 17 18 19 20 21 22 23 24 25 26 27 28 29 |
var app = angular .module('yourtube', [ 'ngCookies', 'ngRoute', 'ngStorage', 'ngMessages', 'angularMoment', 'angular-loading-bar', 'ui.bootstrap', 'appRoutes', 'ngSanitize', 'toastr', 'ngLodash', 'hc.marked', 'angularUtils.directives.dirDisqus', 'satellizer']) .config(['cfpLoadingBarProvider','$authProvider', function(cfpLoadingBarProvider, $authProvider){ $authProvider.baseUrl = '/'; $authProvider.loginUrl = '/api/login'; $authProvider.signupUrl = '/api/register'; $authProvider.authHeader = 'Authorization'; $authProvider.authToken = 'Bearer'; $authProvider.storageType = 'localStorage'; cfpLoadingBarProvider.includeSpinner = false; cfpLoadingBarProvider.includeBar = true; }]); |
Take a good look at the config method, we set some $authProvider properties.
This is the goodness of Satellizer. Satellizer is a token-based AngularJS authentication library. Here, we set the login and signup remote url, Header, auth token and type of storage we want.
cfpLoadingBarProvider simply provides the Youtube top red loading bar effect.
Open public/js/routes.js and add this:
routes.js
|
1 2 3 4 5 6 7 8 9 10 11 12 13 14 15 16 17 18 19 20 21 22 23 24 25 26 27 28 29 30 31 32 33 34 35 36 37 38 39 40 41 42 43 44 45 46 47 48 49 50 51 52 53 54 55 56 57 58 59 60 61 62 63 64 65 |
var appRoutes = angular.module('appRoutes', []); appRoutes.config(['$routeProvider', '$locationProvider', function($routeProvider, $locationProvider){ $routeProvider .when('/', { templateUrl: './views/pages/home.client.view.html' }) .when('/auth/signup', { templateUrl: './views/account/create-user.client.view.html', controller: 'AuthController', resolve: { skipIfLoggedIn: skipIfLoggedIn } }) .when('/auth/login', { templateUrl: './views/account/login.client.view.html', controller: 'AuthController', resolve: { skipIfLoggedIn: skipIfLoggedIn } }) .when('/logout', { template: null, controller: 'LogoutCtrl', resolve: { loginRequired: loginRequired } }) .when('/account', { templateUrl: './views/account/edit-account.client.view.html', controller: 'ProfileController', resolve: { loginRequired: loginRequired } }) .when('/page/about', { templateUrl: './views/pages/about.client.view.html' }) .otherwise({ redirectTo: '/' }); function skipIfLoggedIn($q, $auth) { var deferred = $q.defer(); if ($auth.isAuthenticated()) { deferred.reject(); } else { deferred.resolve(); } return deferred.promise; } function loginRequired($q, $location, $auth) { var deferred = $q.defer(); if ($auth.isAuthenticated()) { deferred.resolve(); } else { $location.path('/auth/login'); } return deferred.promise; } //eliminate the hashbang $locationProvider.html5Mode(true); }]); |
This is where our client routes are defined. ngRoute is being used here.
The skipIfLoggedIn and loginRequired functions are very important here.
The skipIfLoggedIn function checks if the user has been authenticated, if he/she has been logged in, it rejects the promise.
Promises are alternatives to callbacks. You can either defer, reject or resolve a promise. Here we used $q – AngularJS inbuilt promise service. Learn more about Promises here.
The loginRequired function redirects the user back to the login page if he/she has not been logged in.
These two functions act as middlewares on our frontend. They prevent users from authorizing routes they don’t have privilege for.
I don’t like to see the hashbang in my AngularJS apps, So I turned it off with
|
1 |
$locationProvider.html5Mode(true); |
Next, let’s create the login views and controller.
Before that, let’s create the home view, that’s the landing page
Create a pages folder inside the public/views directory. Then create a file home.client.view.html inside the folder. Open the file and add this:
home.client.view.html
|
1 2 3 4 5 6 7 8 9 10 11 12 13 14 15 16 17 18 19 20 21 22 23 24 25 26 27 28 29 30 31 32 33 34 35 36 37 38 39 40 41 42 43 44 45 46 47 48 49 50 51 52 53 54 55 56 57 58 59 60 61 62 63 64 65 66 67 68 69 |
<div class="container"> <div class="panel panel-default"> <div class="panel-heading">Recommended</div> <div class="panel-body"> <div class="row"> <div class="col-sm-4"> <h5>PHP Programming</h5> <!-- 4:3 aspect ratio --> <div class="embed-responsive embed-responsive-4by3"> <iframe class="embed-responsive-item" src="https://www.youtube.com/embed/7TF00hJI78Y"></iframe> </div> </div> <div class="col-sm-4"> <h5>Bahd Baddo Baddest</h5> <div class="embed-responsive embed-responsive-4by3"> <iframe class="embed-responsive-item" src="https://www.youtube.com/embed/n-AvAxGji6c"></iframe> </div> </div> <div class="col-sm-4"> <h5>Funniest Red Cards in Football</h5> <div class="embed-responsive embed-responsive-4by3"> <iframe class="embed-responsive-item" src="https://www.youtube.com/embed/SkRTGx46Iz4"></iframe> </div> </div> </div> <hr /> <div class="row"> <div class="col-sm-4"> <h5>Simi - Love Don't Care Official Video</h5> <!-- 4:3 aspect ratio --> <div class="embed-responsive embed-responsive-4by3"> <iframe class="embed-responsive-item" src="https://www.youtube.com/embed/YthMTby33d8"></iframe> </div> </div> <div class="col-sm-4"> <h5>Kevin Hart annoys David Beckham</h5> <div class="embed-responsive embed-responsive-4by3"> <iframe class="embed-responsive-item" src="https://www.youtube.com/embed/WqCQq31ORFk"></iframe> </div> </div> <div class="col-sm-4"> <h5>Jay-Jay Okocha Magic moments </h5> <div class="embed-responsive embed-responsive-4by3"> <iframe class="embed-responsive-item" src="https://www.youtube.com/embed/LTj2lnFo-Dk"></iframe> </div> </div> </div> </div> </div> <div class="panel-footer text-center"> <ul class="list-inline"> <li><i class="ion-star"></i> stars</li> <li><i class="ion-fork-repo"></i> forks</li> <li><i class="ion-pull-request"></i> issues</li> </ul> </div> </div> </div> <div class="text-center"> <a class="btn btn-default" href="https://github.com/goodheads/yourtube"><i class="ion-social-github"></i> GitHub project</a> <a class="btn btn-default" href="https://github.com/goodheads/yourtube/issues/new"><i class="ion-bug"></i> Report issue</a> </div> </div> |
Here we added about 6 youtube video URLs. Right now, they’ll be placeholders to make our homepage look beautiful. In the subsequent posts, we’ll remove them as we start uploading & hosting our videos on Yourtube using Cloudinary as the storage facility.
Before we open the page, let’s set up the NavbarCtrl.
Create a file nav.client.controller.js file inside public/js/controllers directory and add this:
nav.client.controller.js
|
1 2 3 4 5 |
app.controller('NavbarCtrl', function($scope, $auth) { $scope.isAuthenticated = function() { return $auth.isAuthenticated(); }; }); |
This checks if a user is logged in or not. $auth service is invoked from Satellizer package.
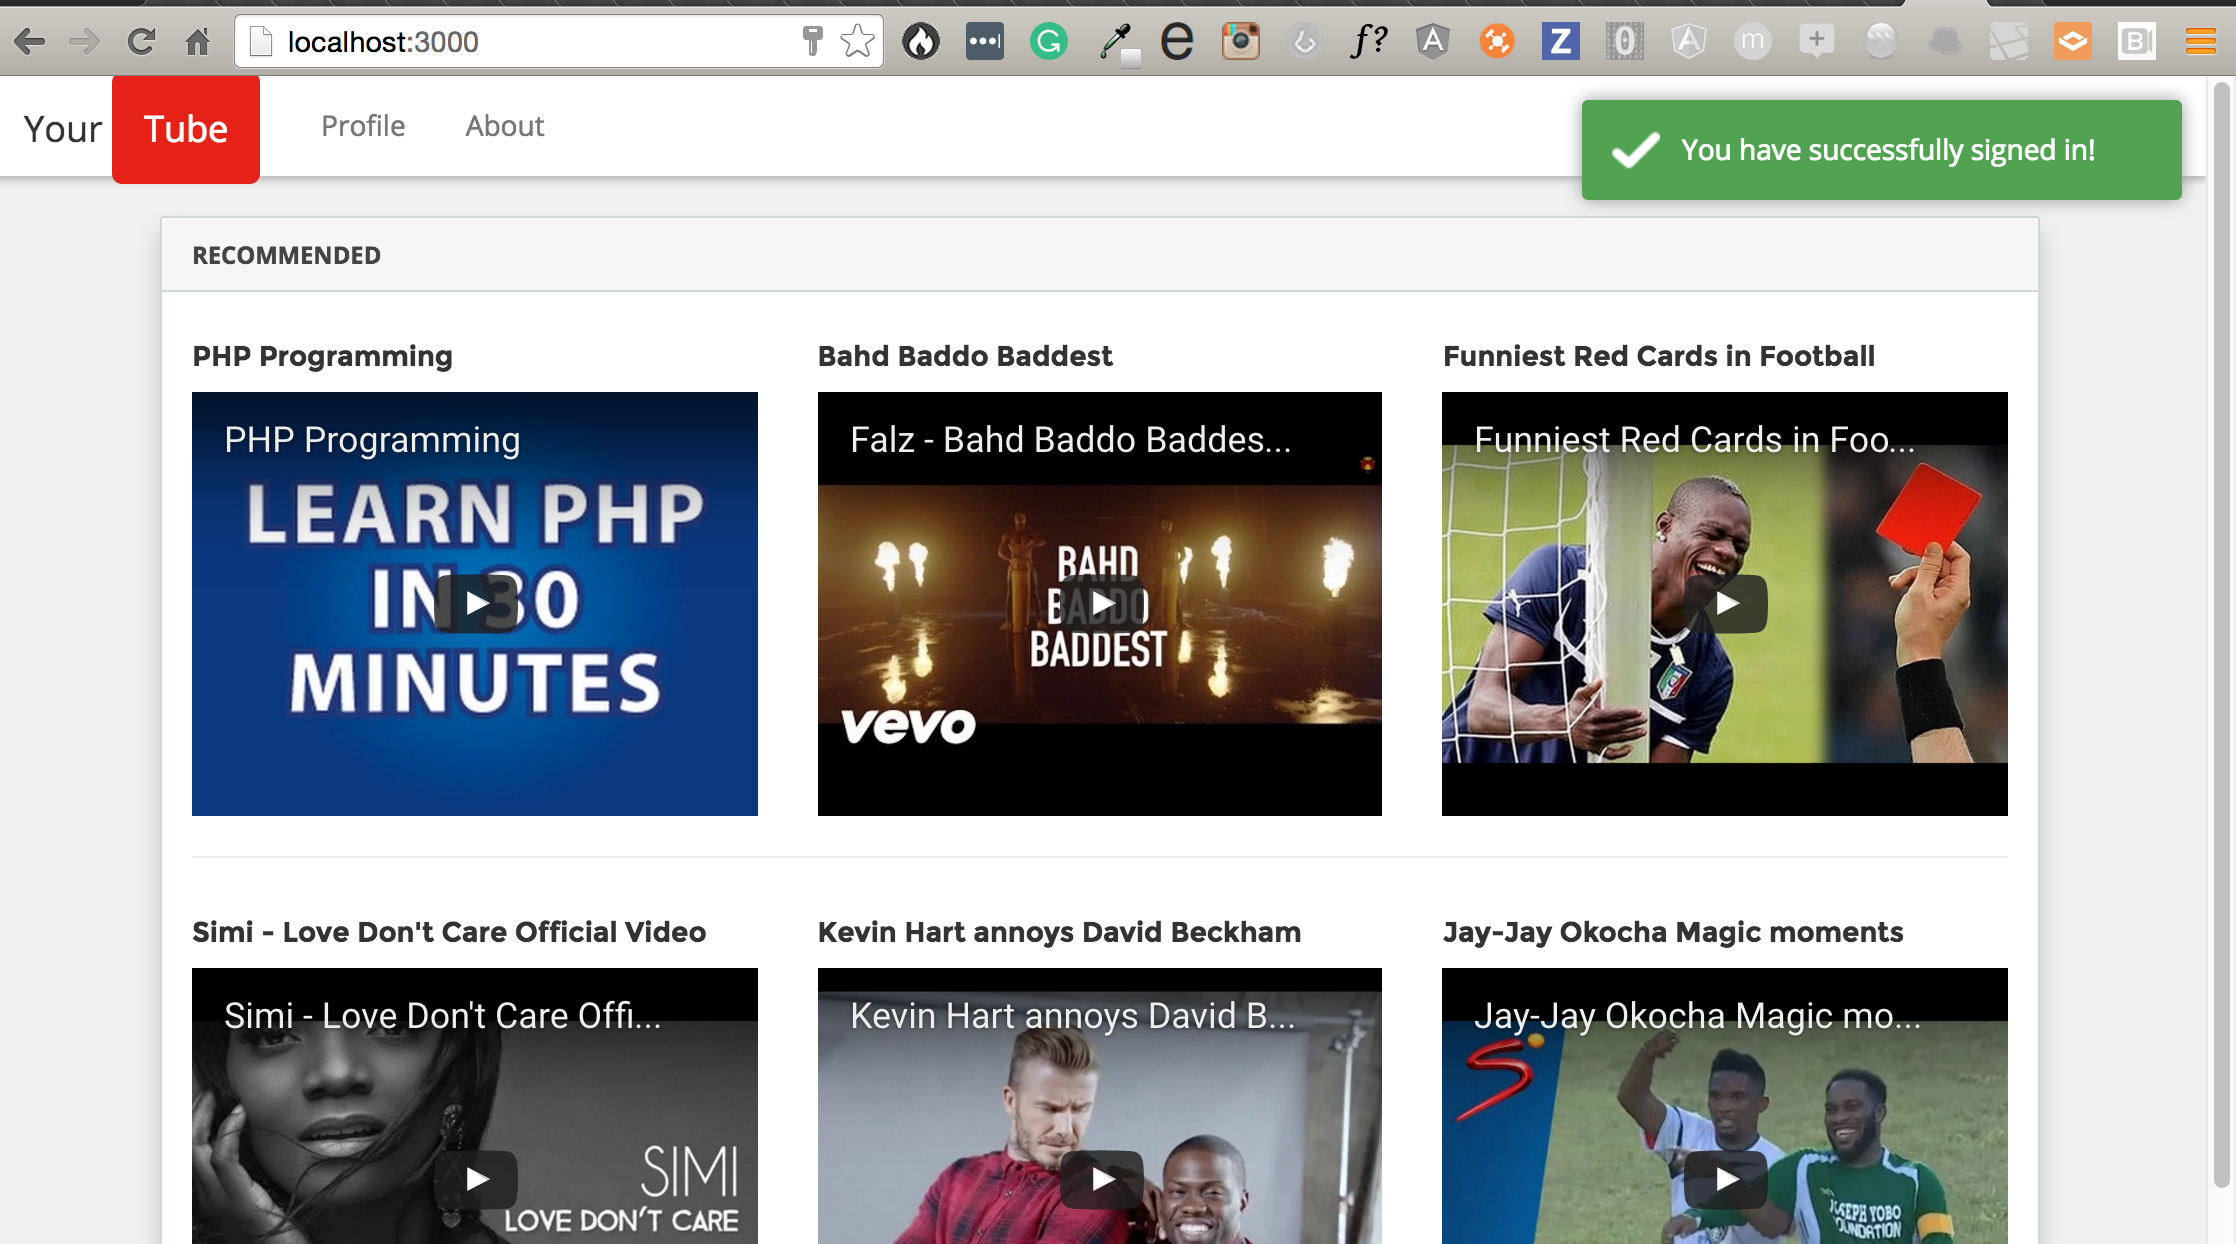
Now, if you open the application, you should see this as the landing page.

Next, create an account folder inside public/views directory. Then, create a file login.client.view.html inside the folder. Open the file and add this:
login.client.view.html
|
1 2 3 4 5 6 7 8 9 10 11 12 13 14 15 16 17 18 19 20 21 22 23 24 |
<div class="container"> <div class="row"> <div class="center-form panel"> <div class="panel-body"> <h2 class="text-center">Log in</h2> <form method="post" ng-submit="login()" name="loginForm"> <div class="form-group has-feedback"> <input class="form-control input-lg" type="text" name="email" ng-model="user.email" placeholder="Email" required autofocus> <span class="ion-at form-control-feedback"></span> </div> <div class="form-group has-feedback"> <input class="form-control input-lg" type="password" name="password" ng-model="user.password" placeholder="Password" required> <span class="ion-key form-control-feedback"></span> </div> <button type="submit" ng-disabled="loginForm.$invalid" class="btn btn-lg btn-block btn-success">Log in</button> <br/> <p class="text-center text-muted"> <small>Don't have an account yet? <a href="/auth/signup">Sign up</a></small> </p> </form> </div> </div> </div> </div> |
Before, we view the login page. Let’s create the controller that handles the login page.
Create a controllers folder inside the public/js directory. Now, create auth.client.controller.js file inside the controllers folder.
Open the file and add this:
auth.client.controller.js
|
1 2 3 4 5 6 7 8 9 10 11 12 13 |
app.controller('AuthController', ['$scope','$location','$auth','toastr', function($scope, $location, $auth, toastr) { $scope.login = function() { $auth.login($scope.user) .then(function() { toastr.success('You have successfully signed in!'); $location.path('/'); }) .catch(function(error) { toastr.error(error.data.message, error.status); }); }; }]); |
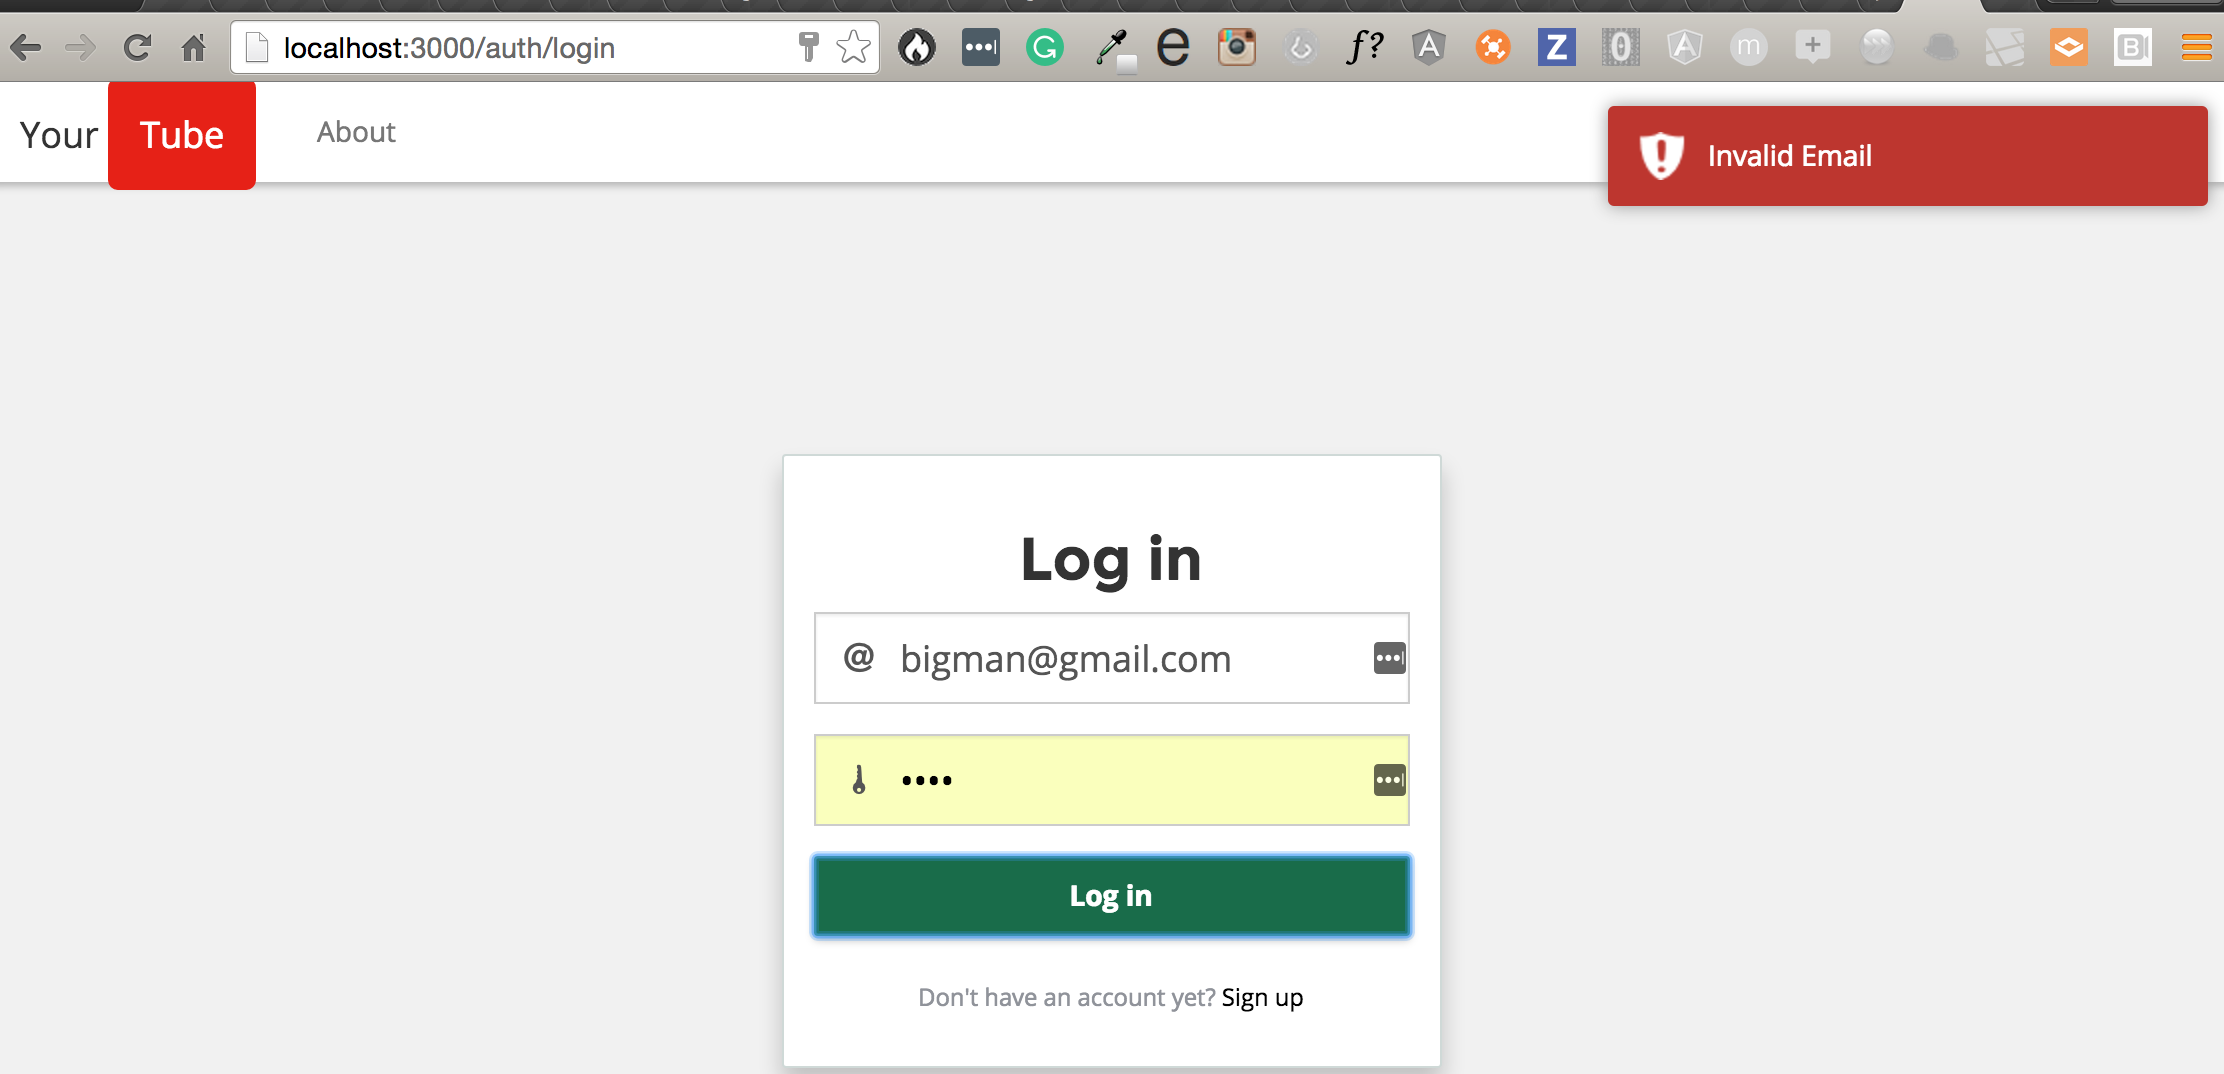
The $auth service from the Satellizer package has a login function that we simply called. It makes a request to our server side API login route. Now, this is our login page should look like:
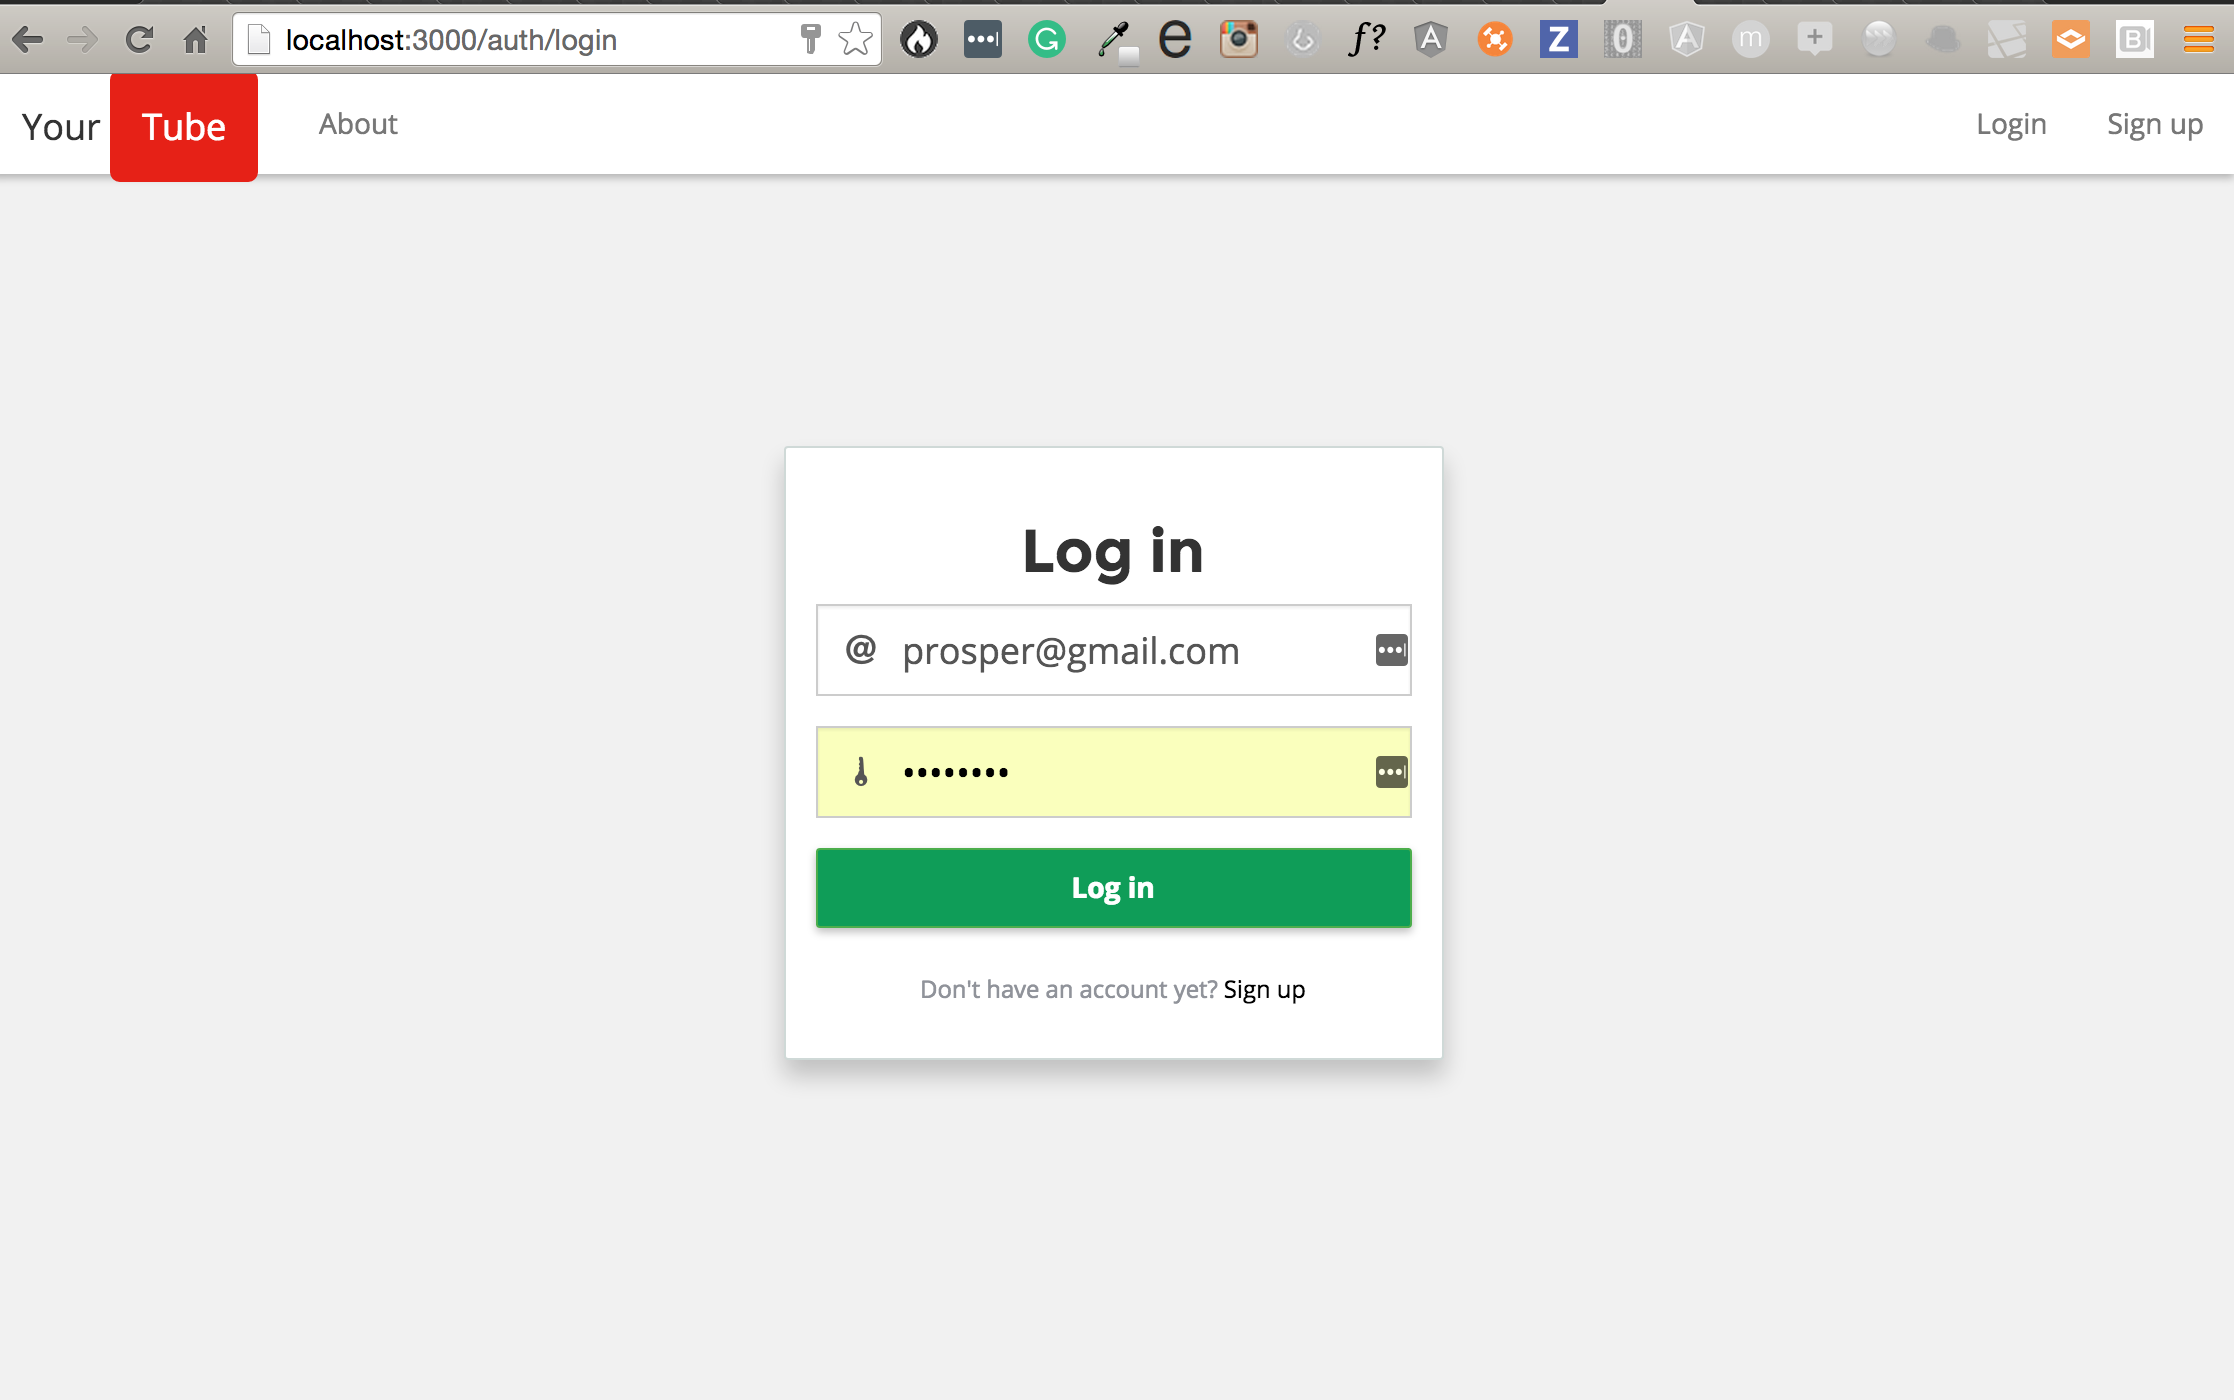
When a user signs in successfully,
When a user login details are not correct,
Step 6: Setting up Frontend Signup
Create a create-user.client.view.html file inside the views/account directory.
Open the file and add this:
create-user.client.view.html
|
1 2 3 4 5 6 7 8 9 10 11 12 13 14 15 16 17 18 19 20 21 22 23 24 25 26 27 28 29 30 31 32 33 34 35 36 37 38 39 40 41 42 43 44 |
<div class="container"> <div class="row"> <div class="center-form panel"> <div class="panel-body"> <h2 class="text-center">Sign up</h2> <form method="post" ng-submit="signup()" name="signupForm"> <div class="form-group has-feedback" ng-class="{ 'has-error' : signupForm.displayName.$invalid && signupForm.displayName.$dirty }"> <input class="form-control input-lg" type="text" name="fullName" ng-model="user.fullName" placeholder="Name" required autofocus> <span class="ion-person form-control-feedback"></span> <div class="help-block text-danger" ng-if="signupForm.fullName.$dirty" ng-messages="signupForm.fullName.$error"> <div ng-message="required">You must enter your name.</div> </div> </div> <div class="form-group has-feedback" ng-class="{ 'has-error' : signupForm.email.$invalid && signupForm.email.$dirty }"> <input class="form-control input-lg" type="email" id="email" name="email" ng-model="user.email" placeholder="Email" required> <span class="ion-at form-control-feedback"></span> <div class="help-block text-danger" ng-if="signupForm.email.$dirty" ng-messages="signupForm.email.$error"> <div ng-message="required">Your email address is required.</div> <div ng-message="pattern">Your email address is invalid.</div> </div> </div> <div class="form-group has-feedback" ng-class="{ 'has-error' : signupForm.password.$invalid && signupForm.password.$dirty }"> <input password-strength class="form-control input-lg" type="password" name="password" ng-model="user.password" placeholder="Password" required> <span class="ion-key form-control-feedback"></span> <div class="help-block text-danger" ng-if="signupForm.password.$dirty" ng-messages="signupForm.password.$error"> <div ng-message="required">Password is required.</div> </div> </div> <div class="form-group has-feedback" ng-class="{ 'has-error' : signupForm.confirmPassword.$invalid && signupForm.confirmPassword.$dirty }"> <input password-match="user.password" class="form-control input-lg" type="password" name="confirmPassword" ng-model="confirmPassword" placeholder="Confirm Password"> <span class="ion-key form-control-feedback"></span> <div class="help-block text-danger" ng-if="signupForm.confirmPassword.$dirty" ng-messages="signupForm.confirmPassword.$error"> <div ng-message="compareTo">Password must match.</div> </div> </div> <p class="text-center text-muted"><small>By clicking on Sign up, you agree to <a href="#">terms & conditions</a> and <a href="#">privacy policy</a></small></p> <button type="submit" ng-disabled="signupForm.$invalid" class="btn btn-lg btn-block btn-primary">Sign up</button> <br/> <p class="text-center text-muted">Already have an account? <a href="/#/login">Log in now</a></p> </form> </div> </div> </div> </div> |
Next, Open the AuthController file auth.client.controller.js. Let’s add the signup method like so:
auth.client.controller.js
|
1 2 3 4 5 6 7 8 9 10 11 12 |
$scope.signup = function() { $auth.signup($scope.user) .then(function(response) { $auth.setToken(response); $location.path('/'); toastr.info('You have successfully created a new account and have been signed-in'); }) .catch(function(response) { console.log(response); toastr.error(response.data.message); }); }; |
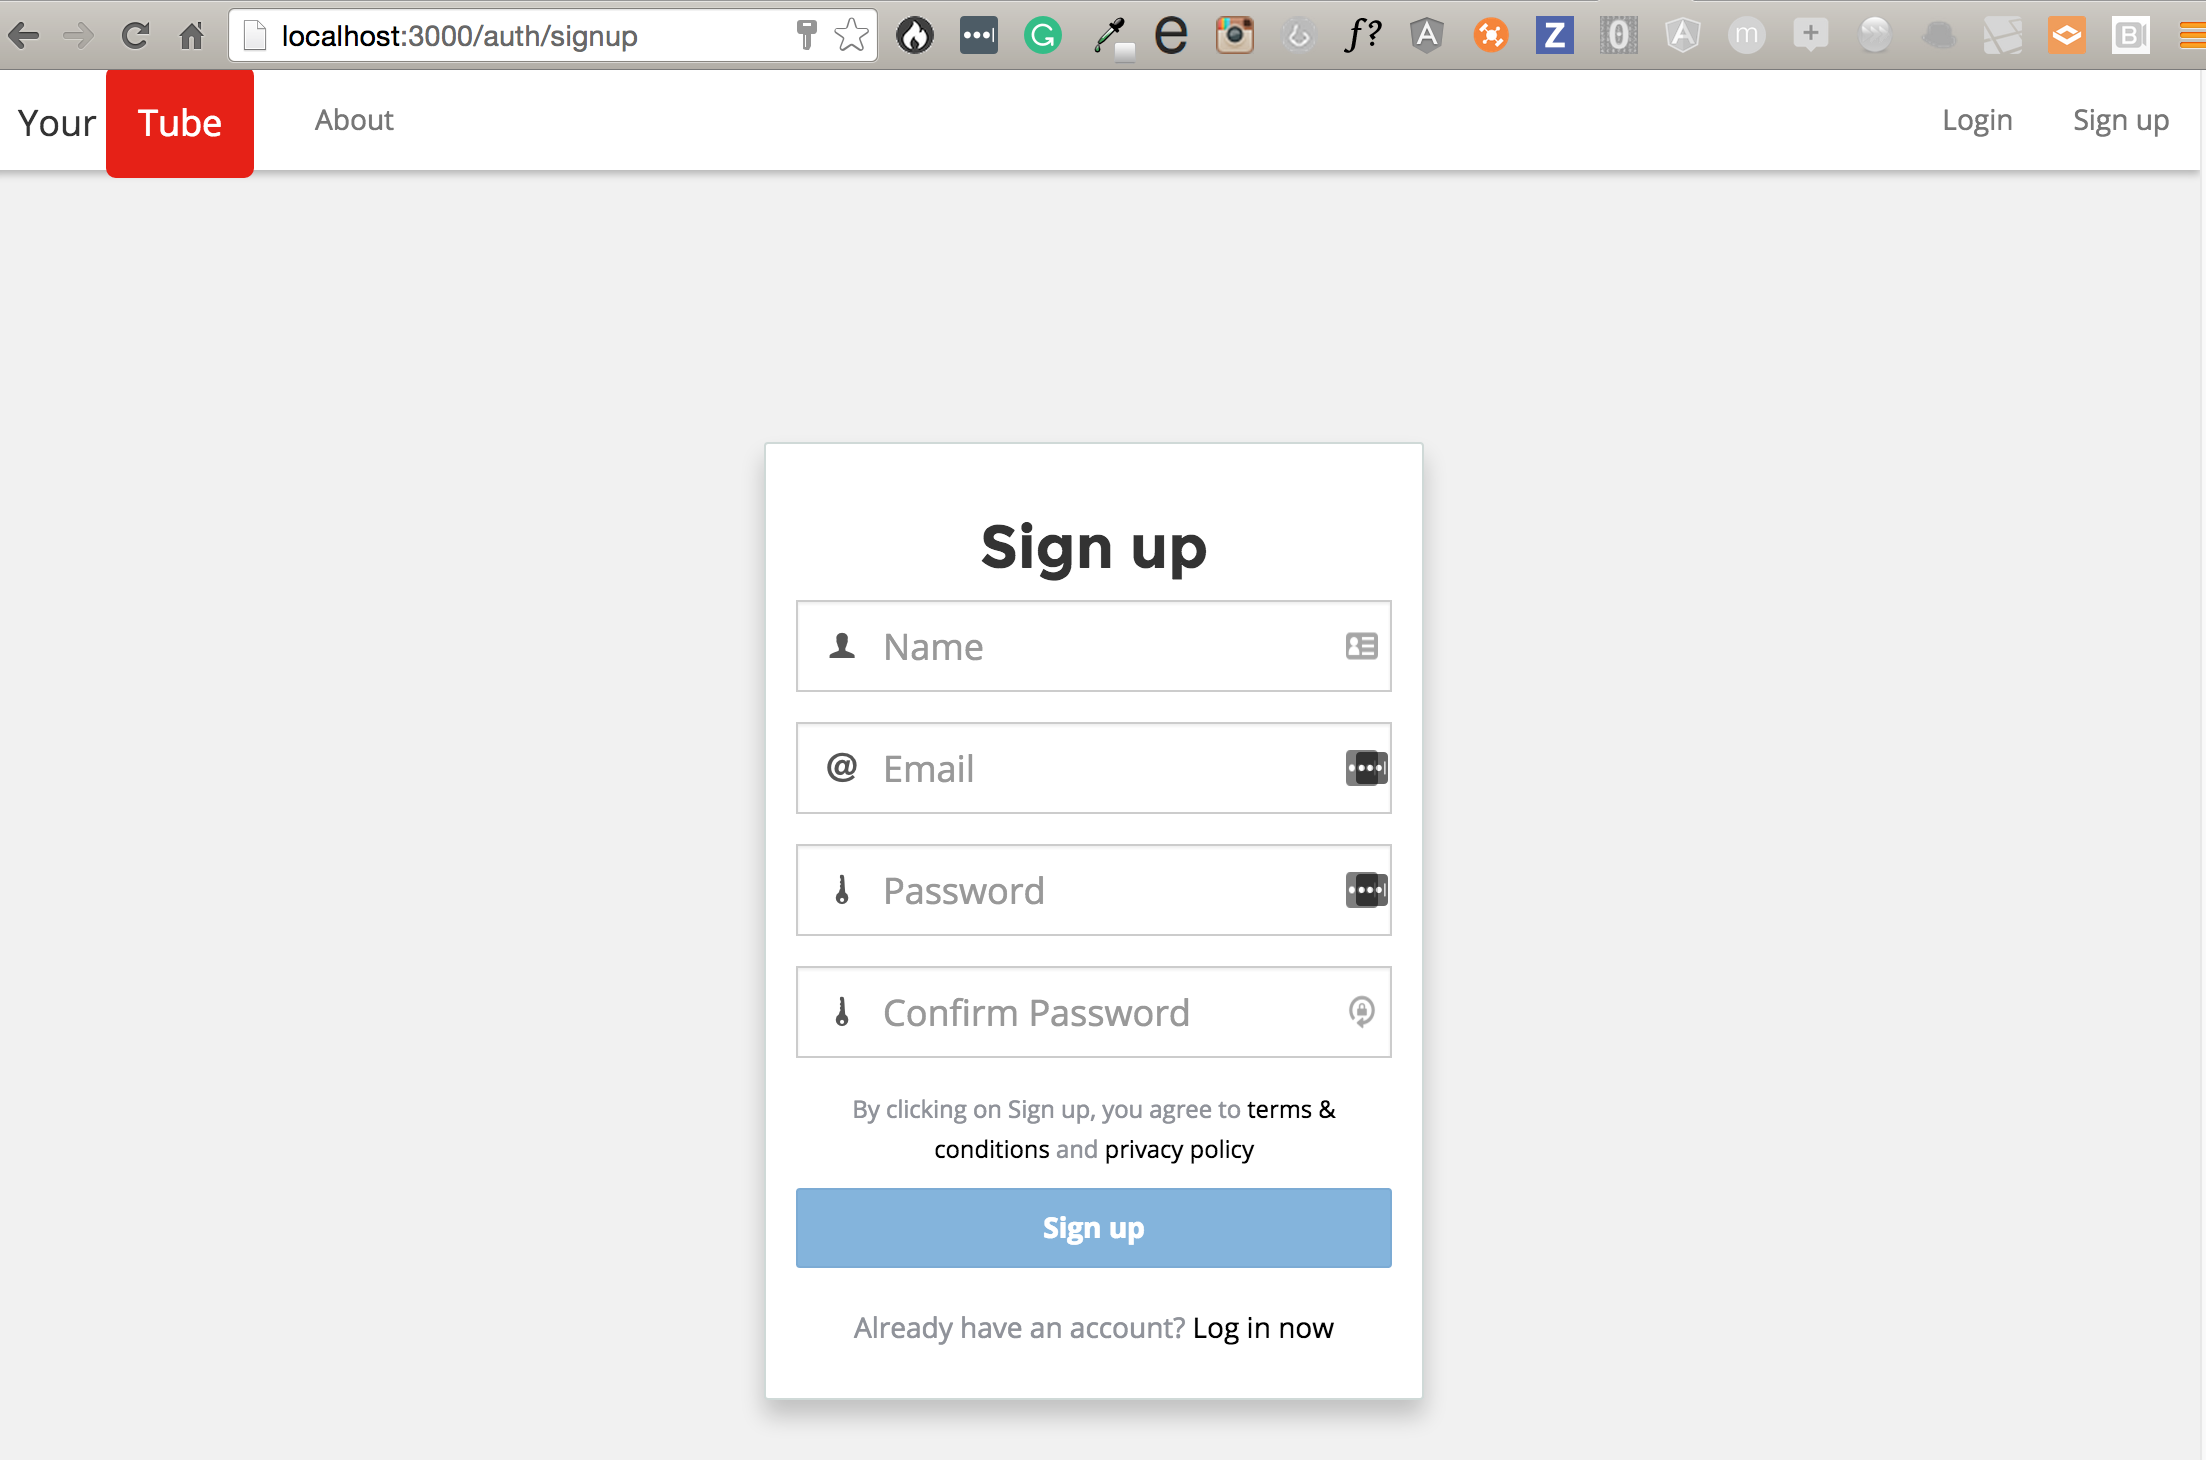
Now, your signup should look like this:
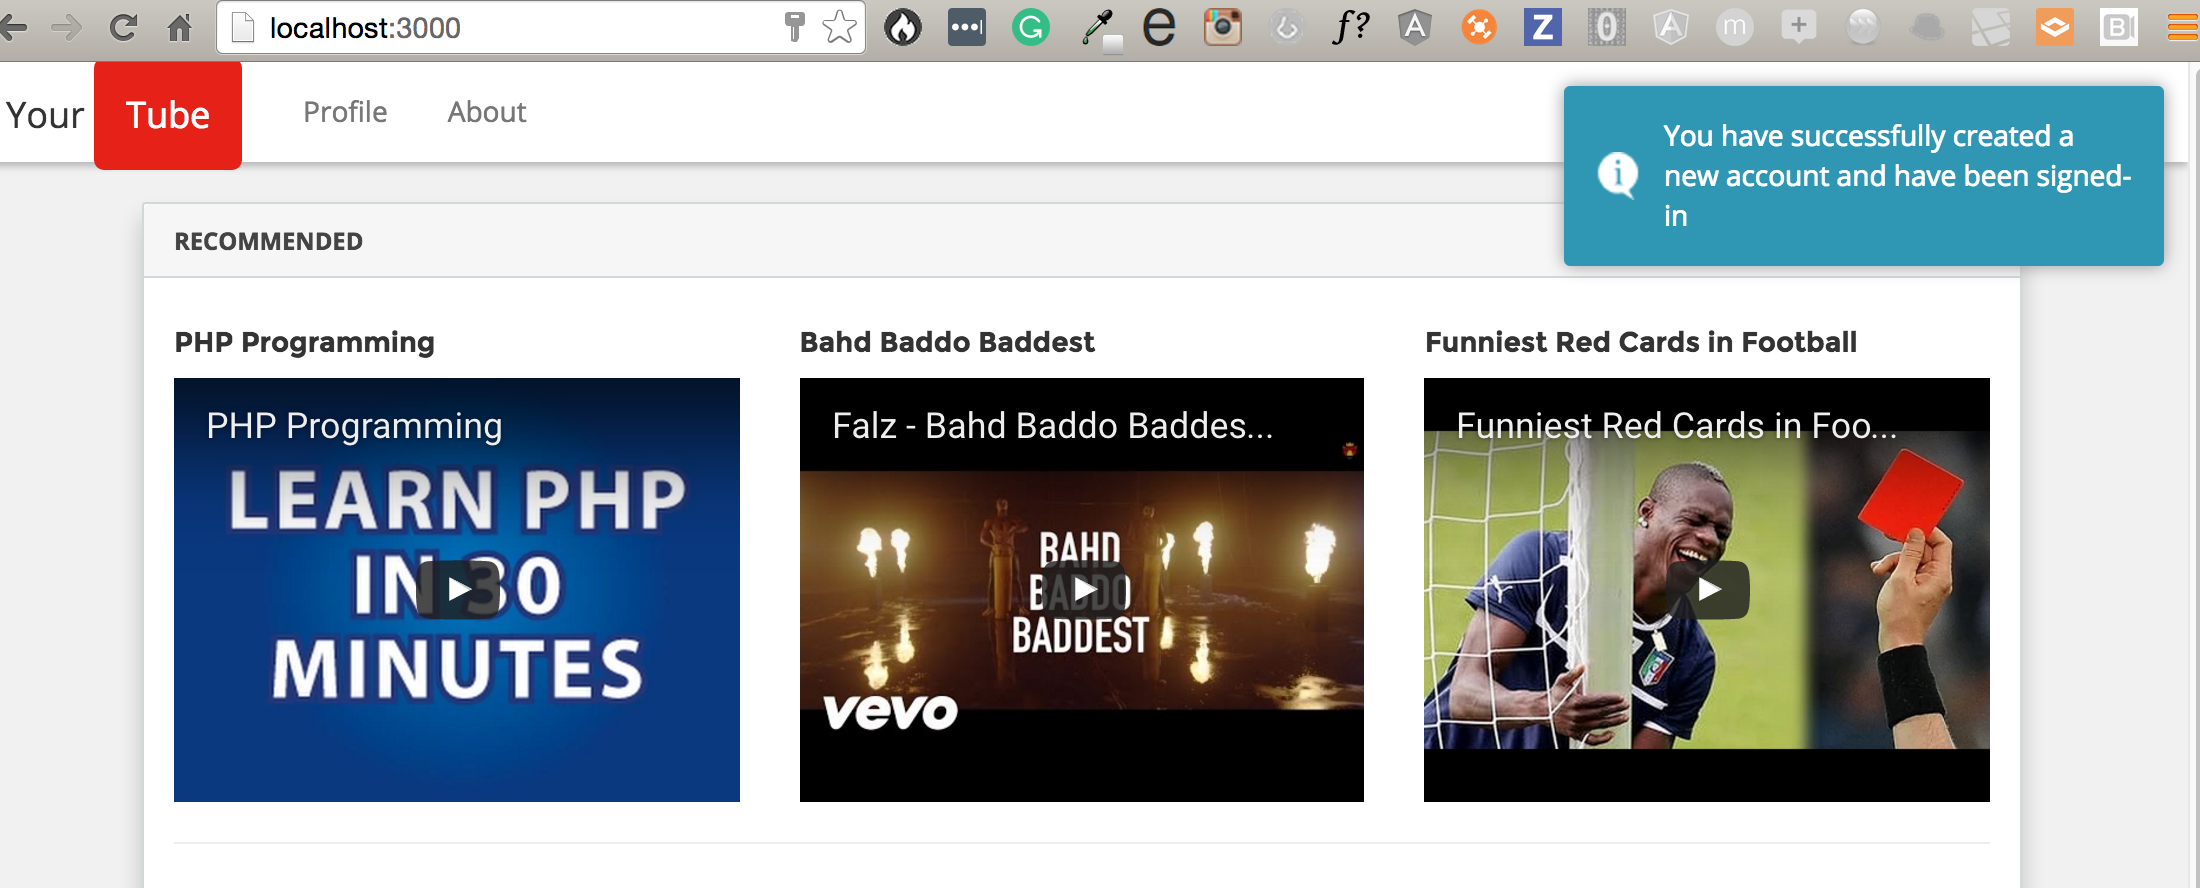
A successful signup should look like this:
Step 7: Setting Up Profile
Create a profile.client.controller.js file inside the public/js/controllers directory.
Open the file and add this:
profile.client.controller.js
|
1 2 3 4 5 6 7 8 9 10 11 12 13 14 15 16 17 18 19 20 21 22 23 24 |
app.controller('ProfileController', ['$scope','$http','toastr','User', function($scope, $http, toastr, User) { $scope.getProfile = function() { User.getProfile() .then(function(response) { $scope.user = response.data; }) .catch(function(response) { toastr.error(response.data.message); }); }; $scope.updateProfile = function() { User.updateProfile($scope.user) .then(function() { toastr.success('Profile has been updated!'); }) .catch(function(response) { toastr.error(response.data.message); }); }; $scope.getProfile(); }]); |
Here we are getting the profile data and also have the function that updates the user profile. We injected the User service.
Create a services folder inside the public/js directory.
Create the User service user.client.service.js inside the services folder and add this:
user.client.service.js
|
1 2 3 4 5 6 7 8 9 10 11 12 |
app.factory('User', ['$http', function($http) { return { getProfile: function(){ return $http.get('/api/me'); }, updateProfile: function(profile){ return $http.put('/api/me', profile); } }; }]); |
The getProfile and updateProfile functions both return promises from the API routes to the controllers.
Next, let’s create the view edit-account.client.view.html inside public/views/account directory.
edit-account.client.view.html
|
1 2 3 4 5 6 7 8 9 10 11 12 13 14 15 16 17 18 19 20 21 22 23 |
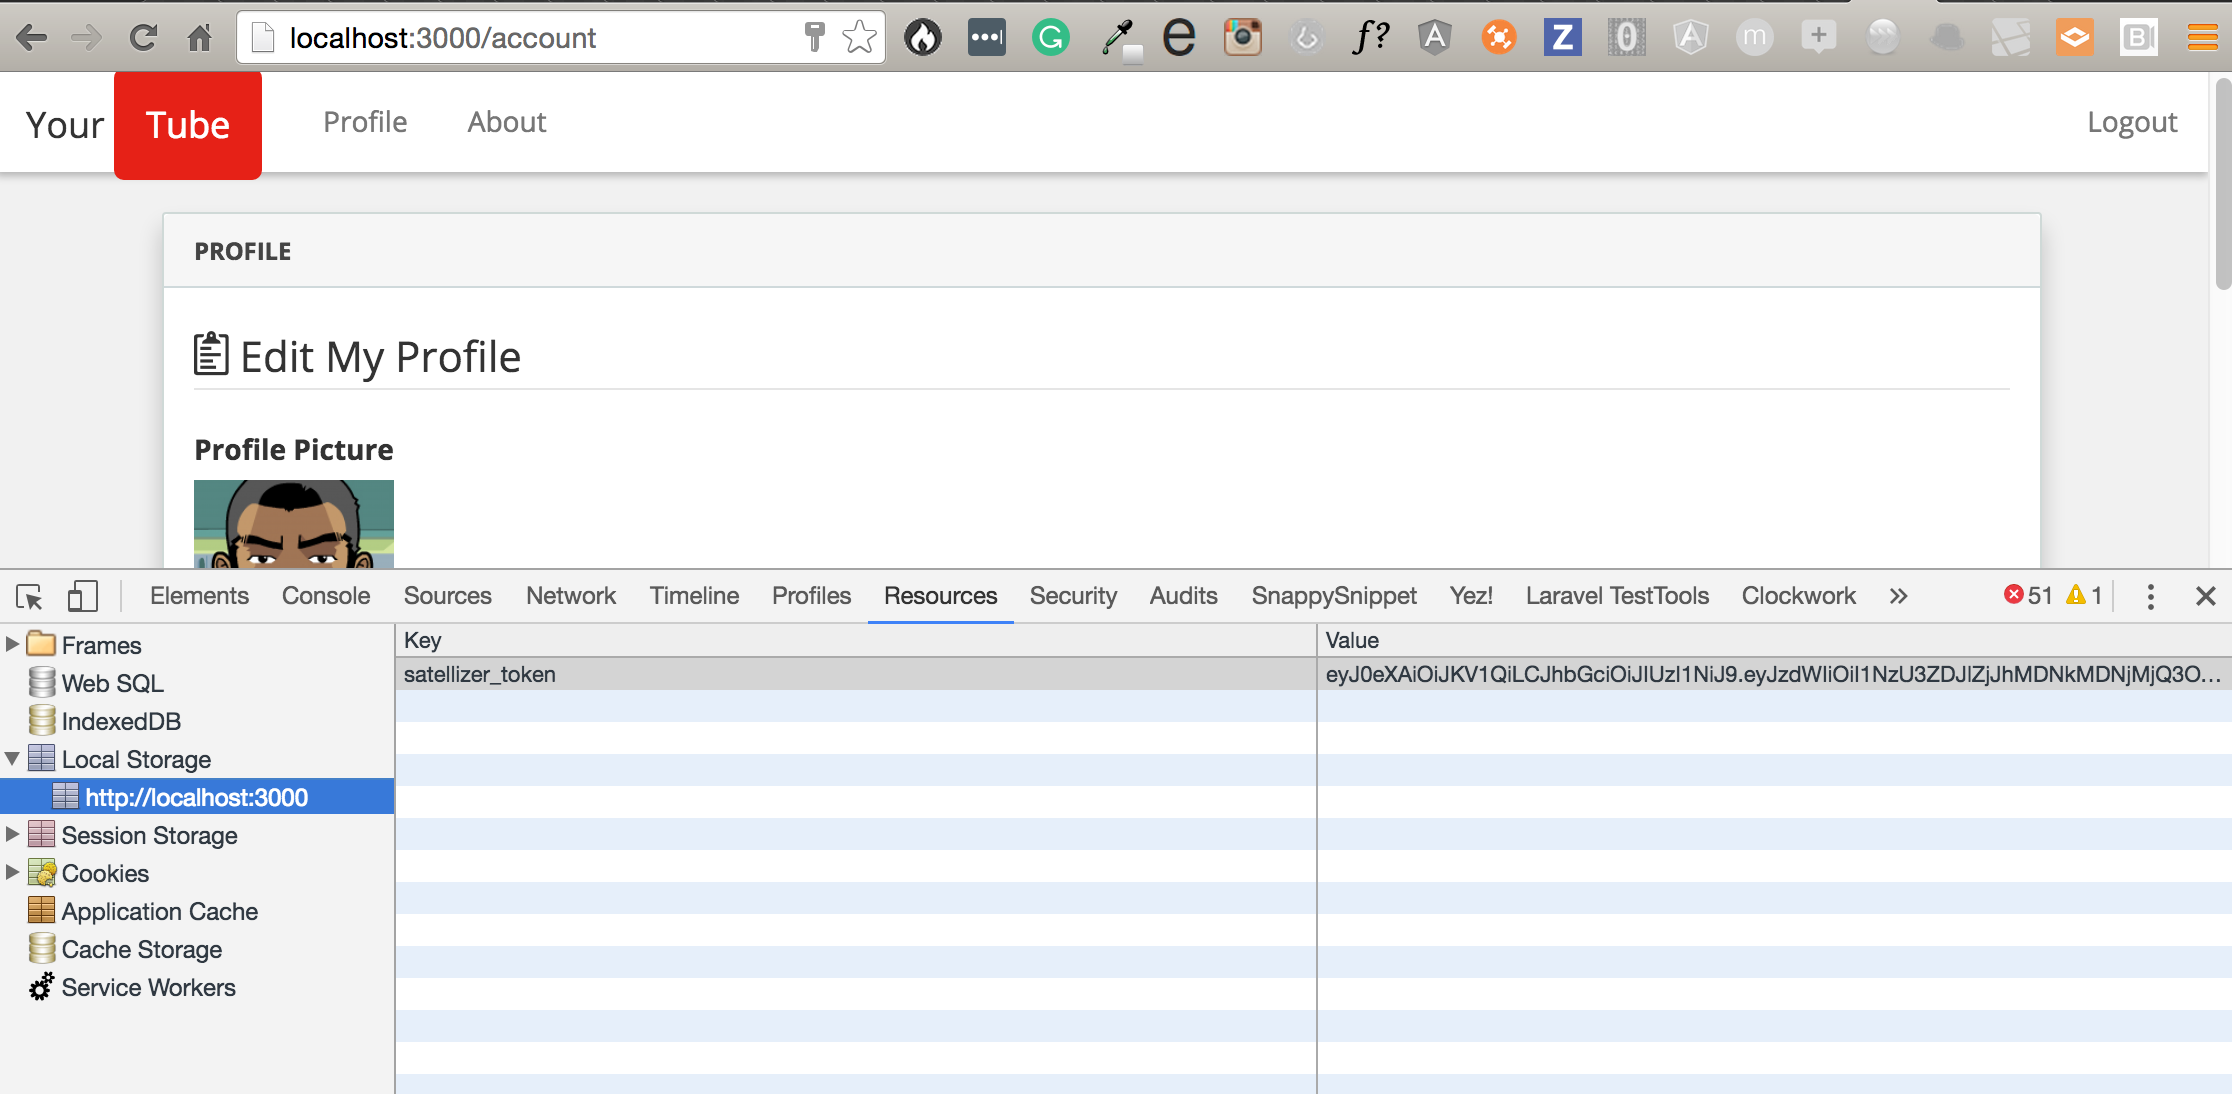
<div class="container"> <div class="panel panel-default"> <div class="panel-heading">Profile</div> <div class="panel-body"> <legend><i class="ion-clipboard"></i> Edit My Profile</legend> <form method="post" ng-submit="updateProfile()"> <div class="form-group"> <label class="control-label">Profile Picture</label> <img class="profile-picture" ng-src="{{ user.user_avatar || 'http://placehold.it/100x100'}}"> </div> <div class="form-group"> <label class="control-label"><i class="ion-person"></i> Display Name</label> <input type="text" class="form-control" ng-model="user.fullName" /> </div> <div class="form-group"> <label class="control-label"><i class="ion-at"></i> Email Address</label> <input type="email" class="form-control" ng-model="user.email" /> </div> <button class="btn btn-lg btn-success">Update Information</button> </form> </div> </div> </div> |
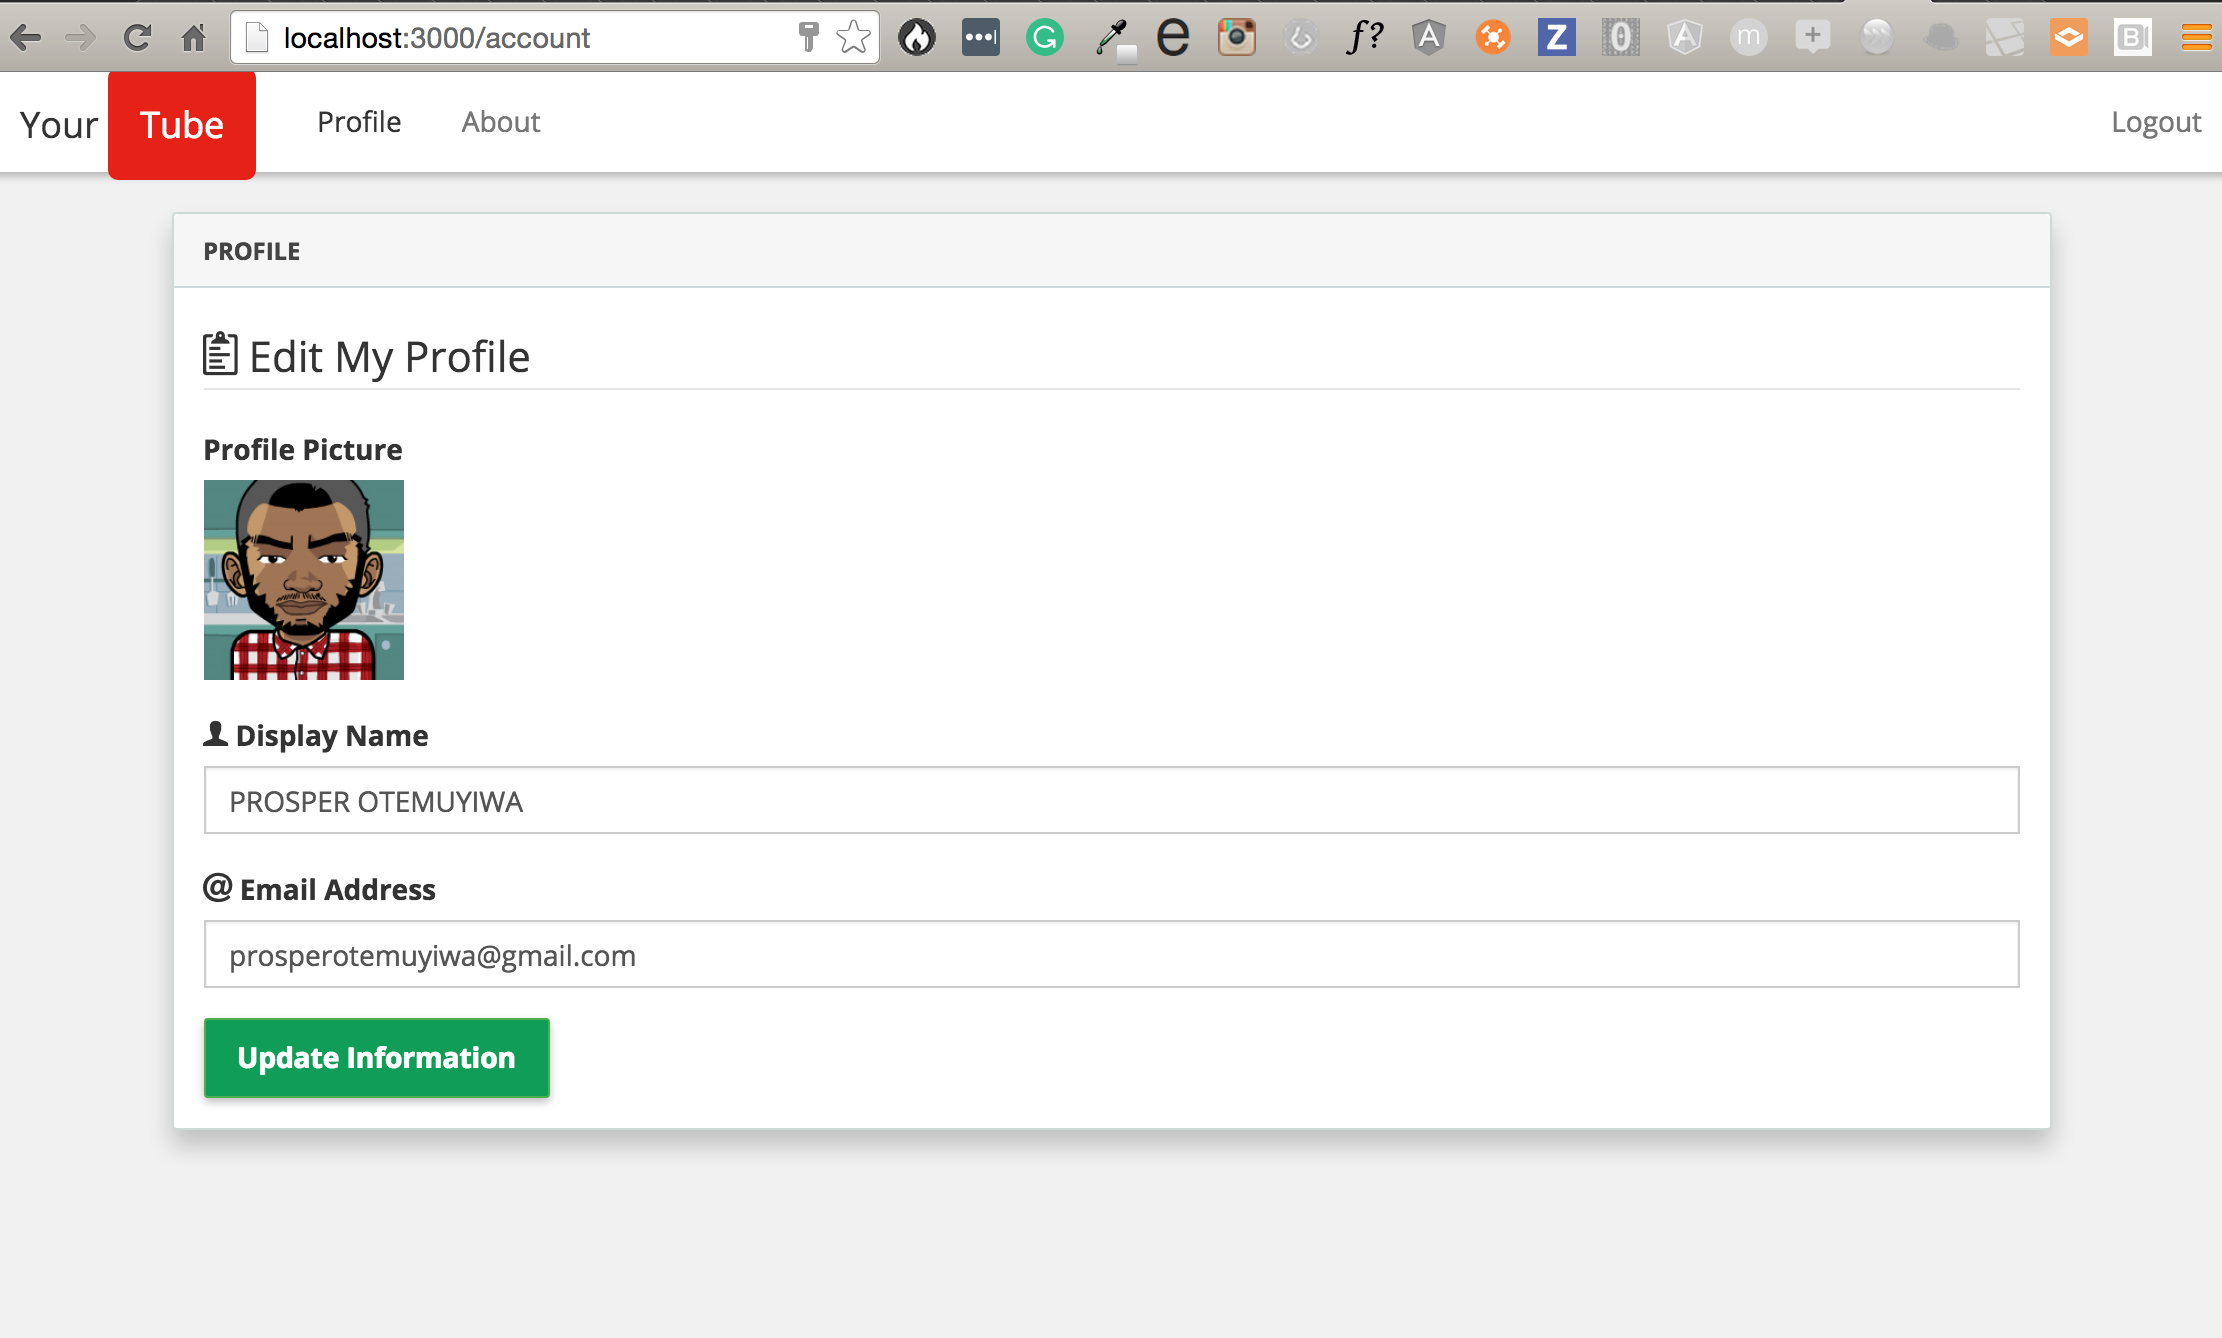
Now, the profile link on the navbar when clicked should look like this:
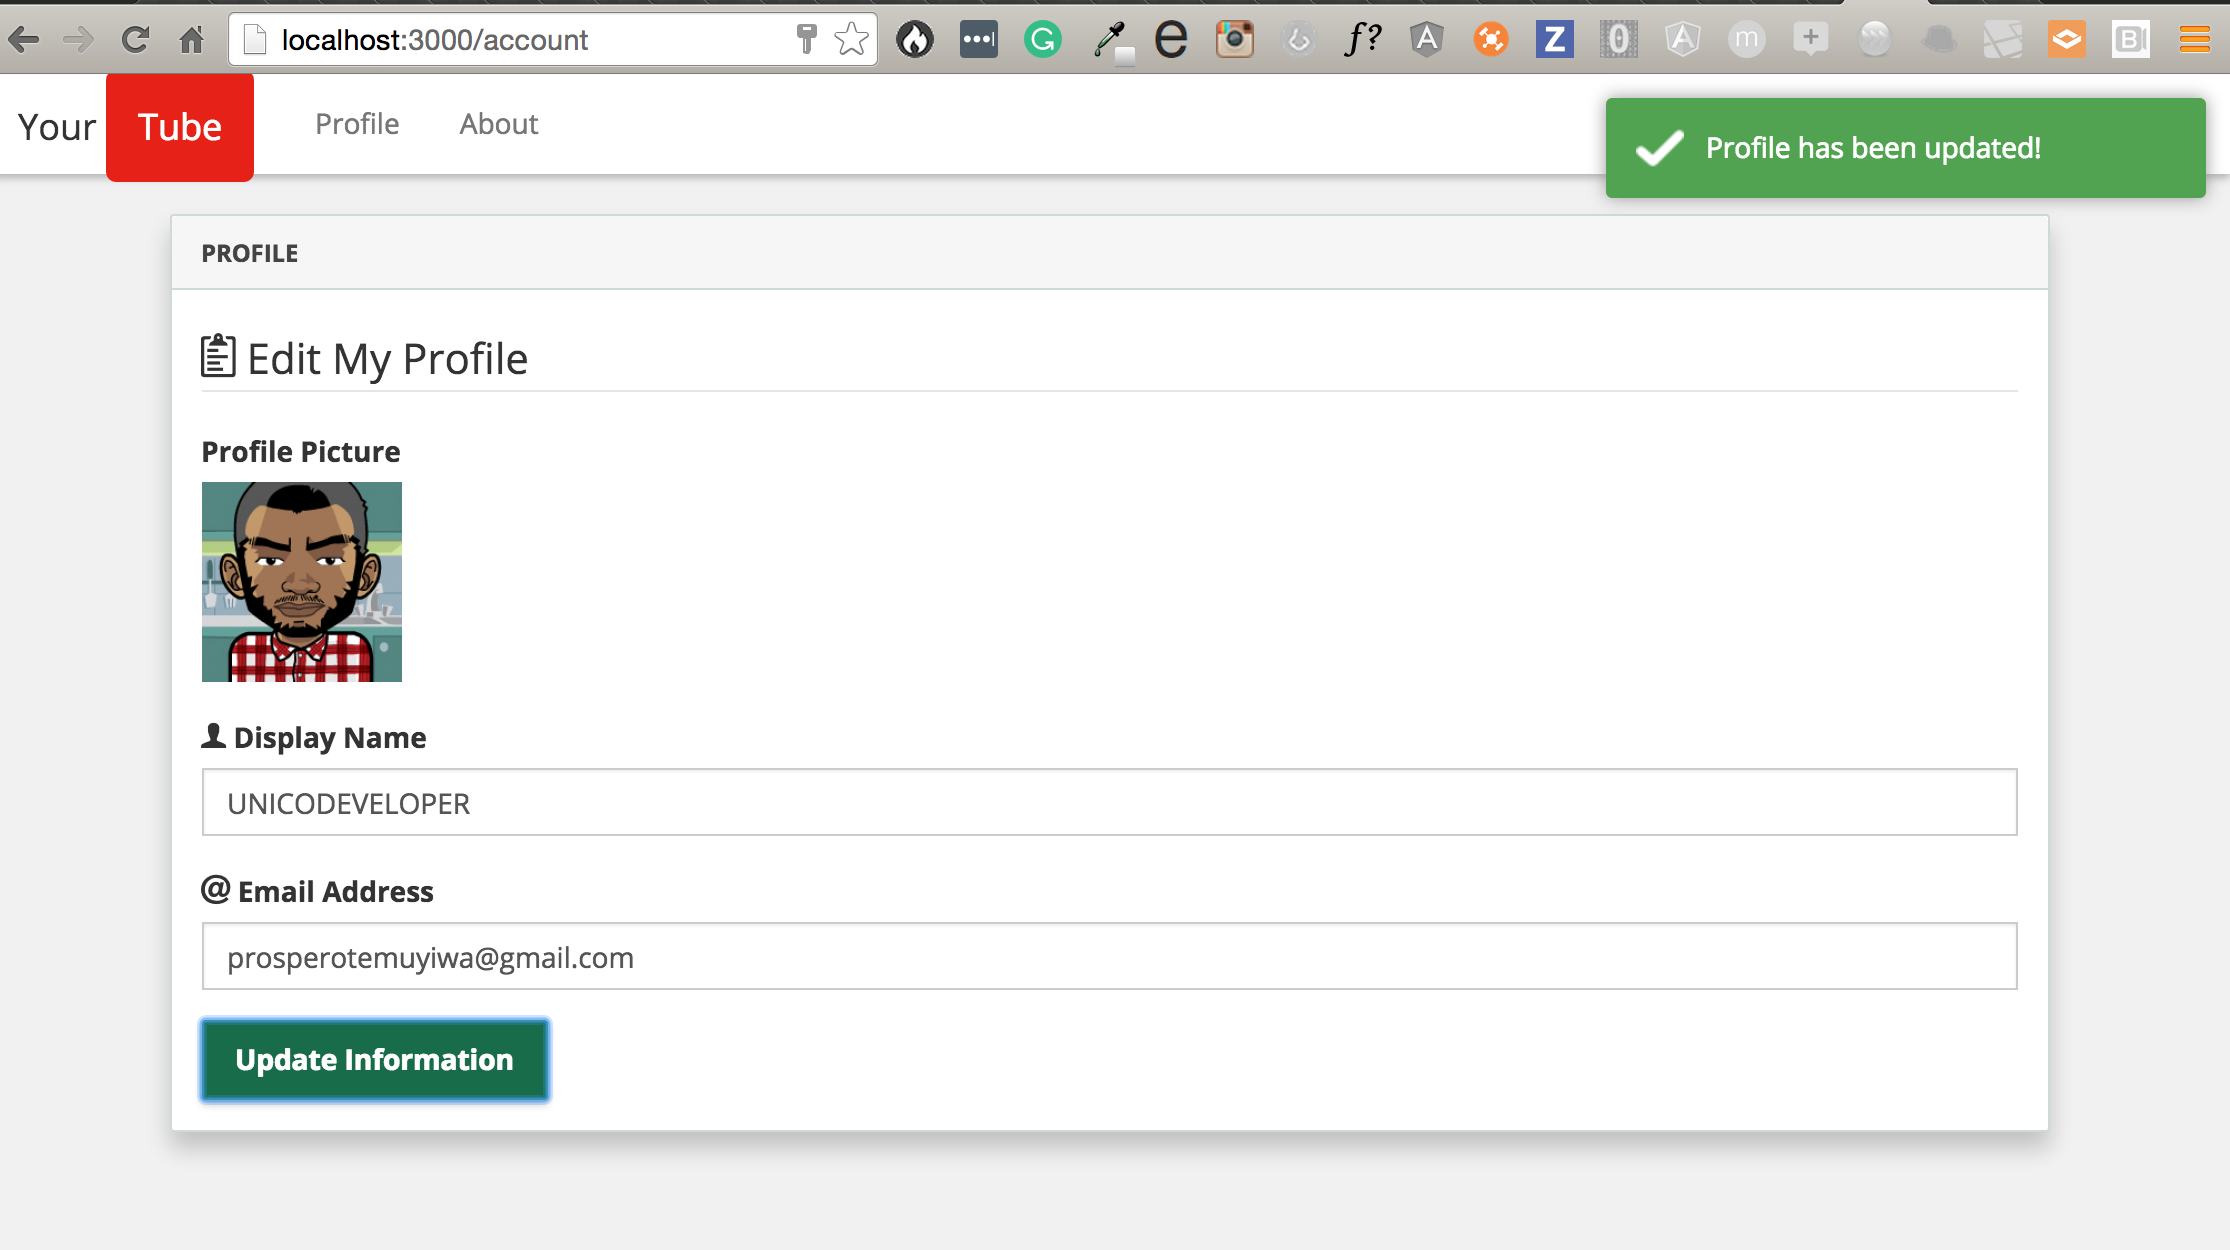
When the profile information is updated, it should look like this:
Step 8: Setting Up Logout
Create a logout.client.controller.js file inside the public/js/controllers directory.
Open the file and add this:
logout.client.controller.js
|
1 2 3 4 5 6 7 8 9 |
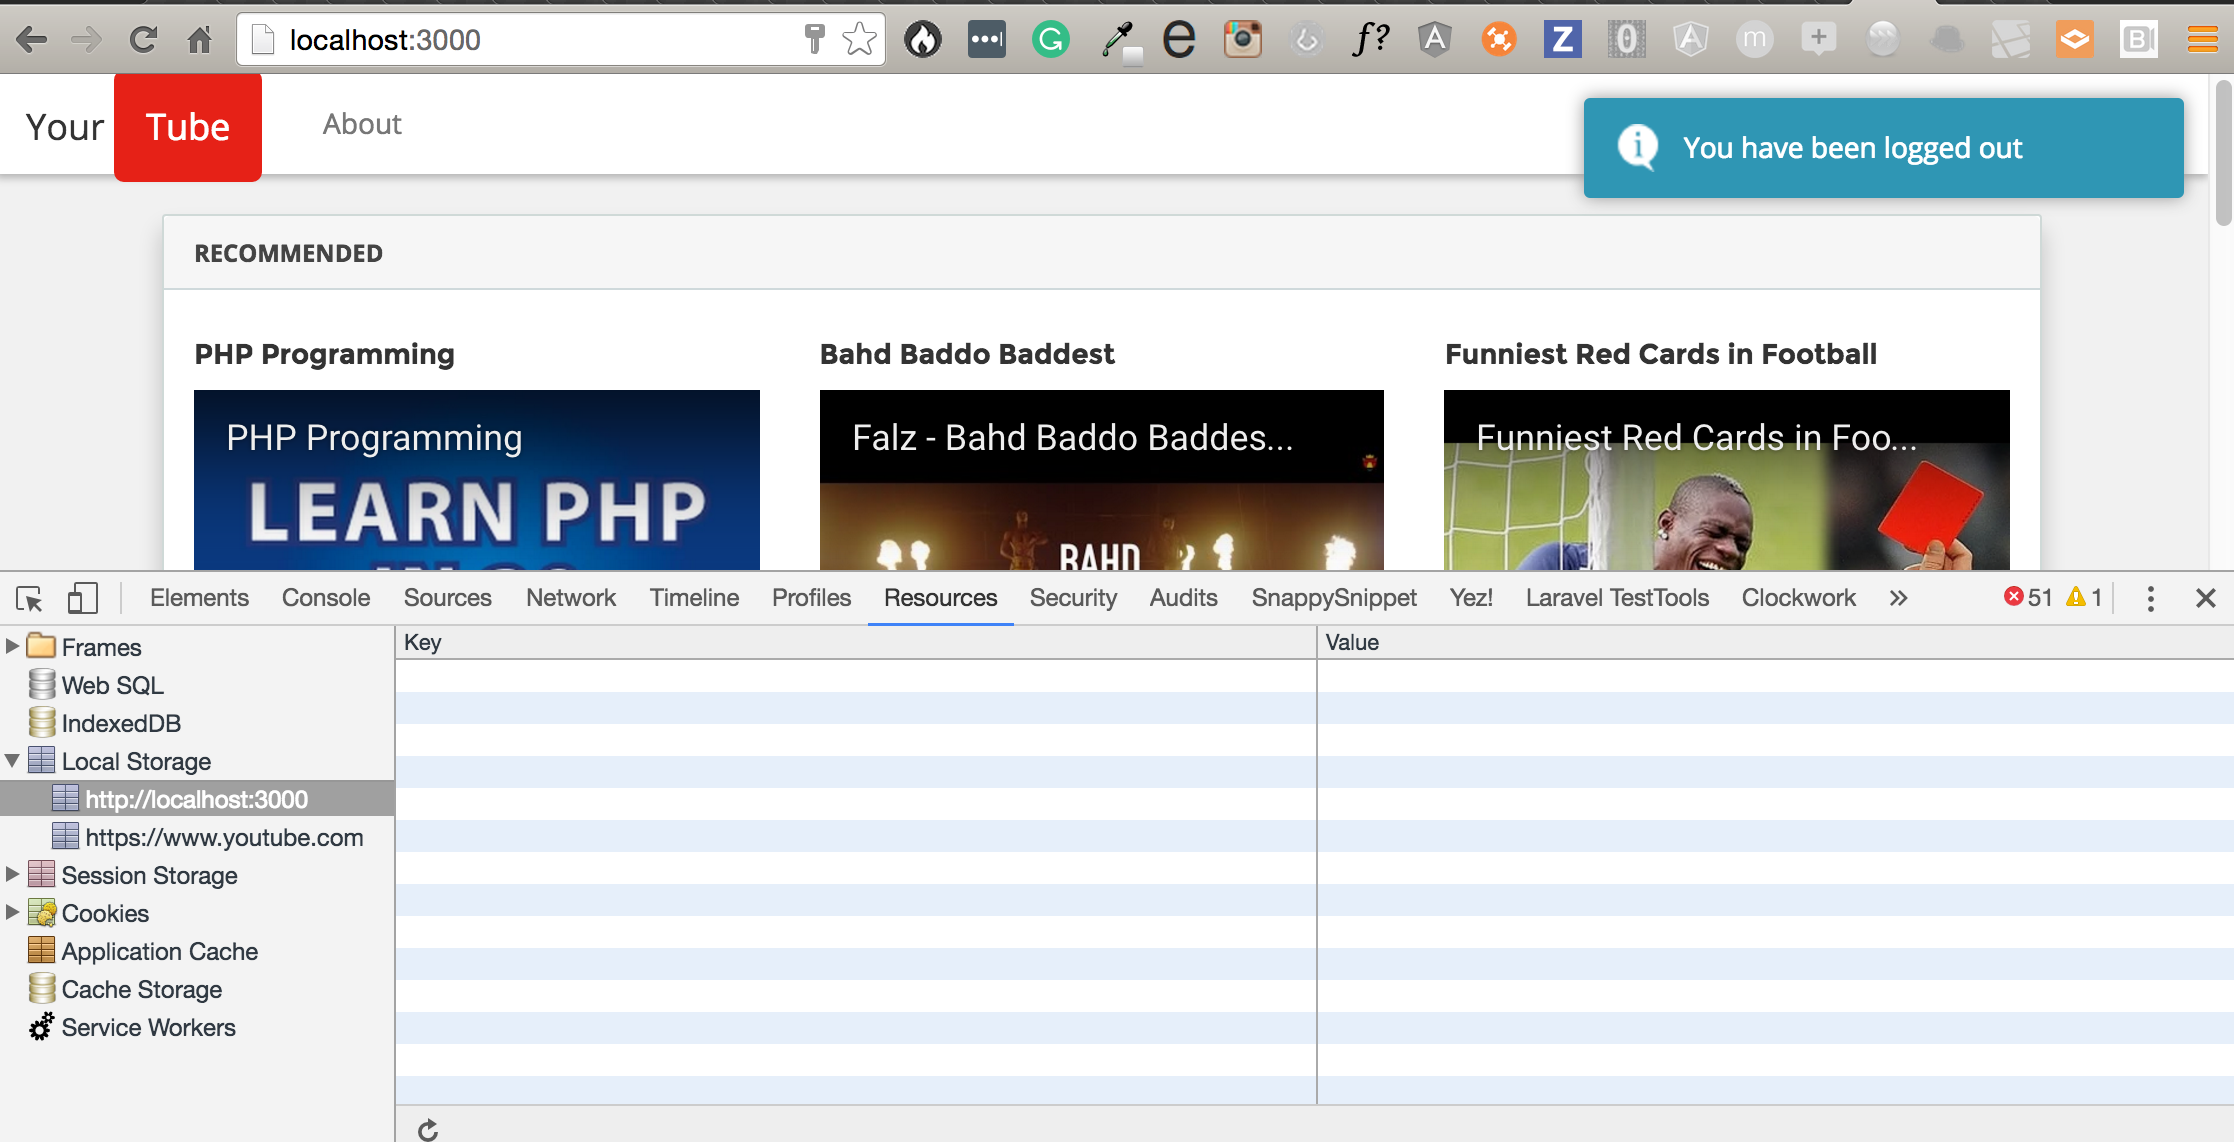
app.controller('LogoutCtrl', function($location, $auth, toastr) { if (!$auth.isAuthenticated()) { return; } $auth.logout() .then(function() { toastr.info('You have been logged out'); $location.path('/'); }); }); |
If you haven’t been logged in and peradventure you get access to that route, it just stops execution else it calls the Satellizer’s $auth  logout function which actually deletes your token from the browser.
Step 9: Setting Up About
Create a about.client.view.html file inside the public/views/pages directory.
Open the file and add this:
about.client.view.html
|
1 2 3 4 5 6 7 8 9 10 11 12 13 14 15 16 17 18 19 20 21 22 23 24 25 26 27 28 29 30 31 32 33 34 35 36 37 38 39 40 41 42 43 44 45 46 47 48 49 |
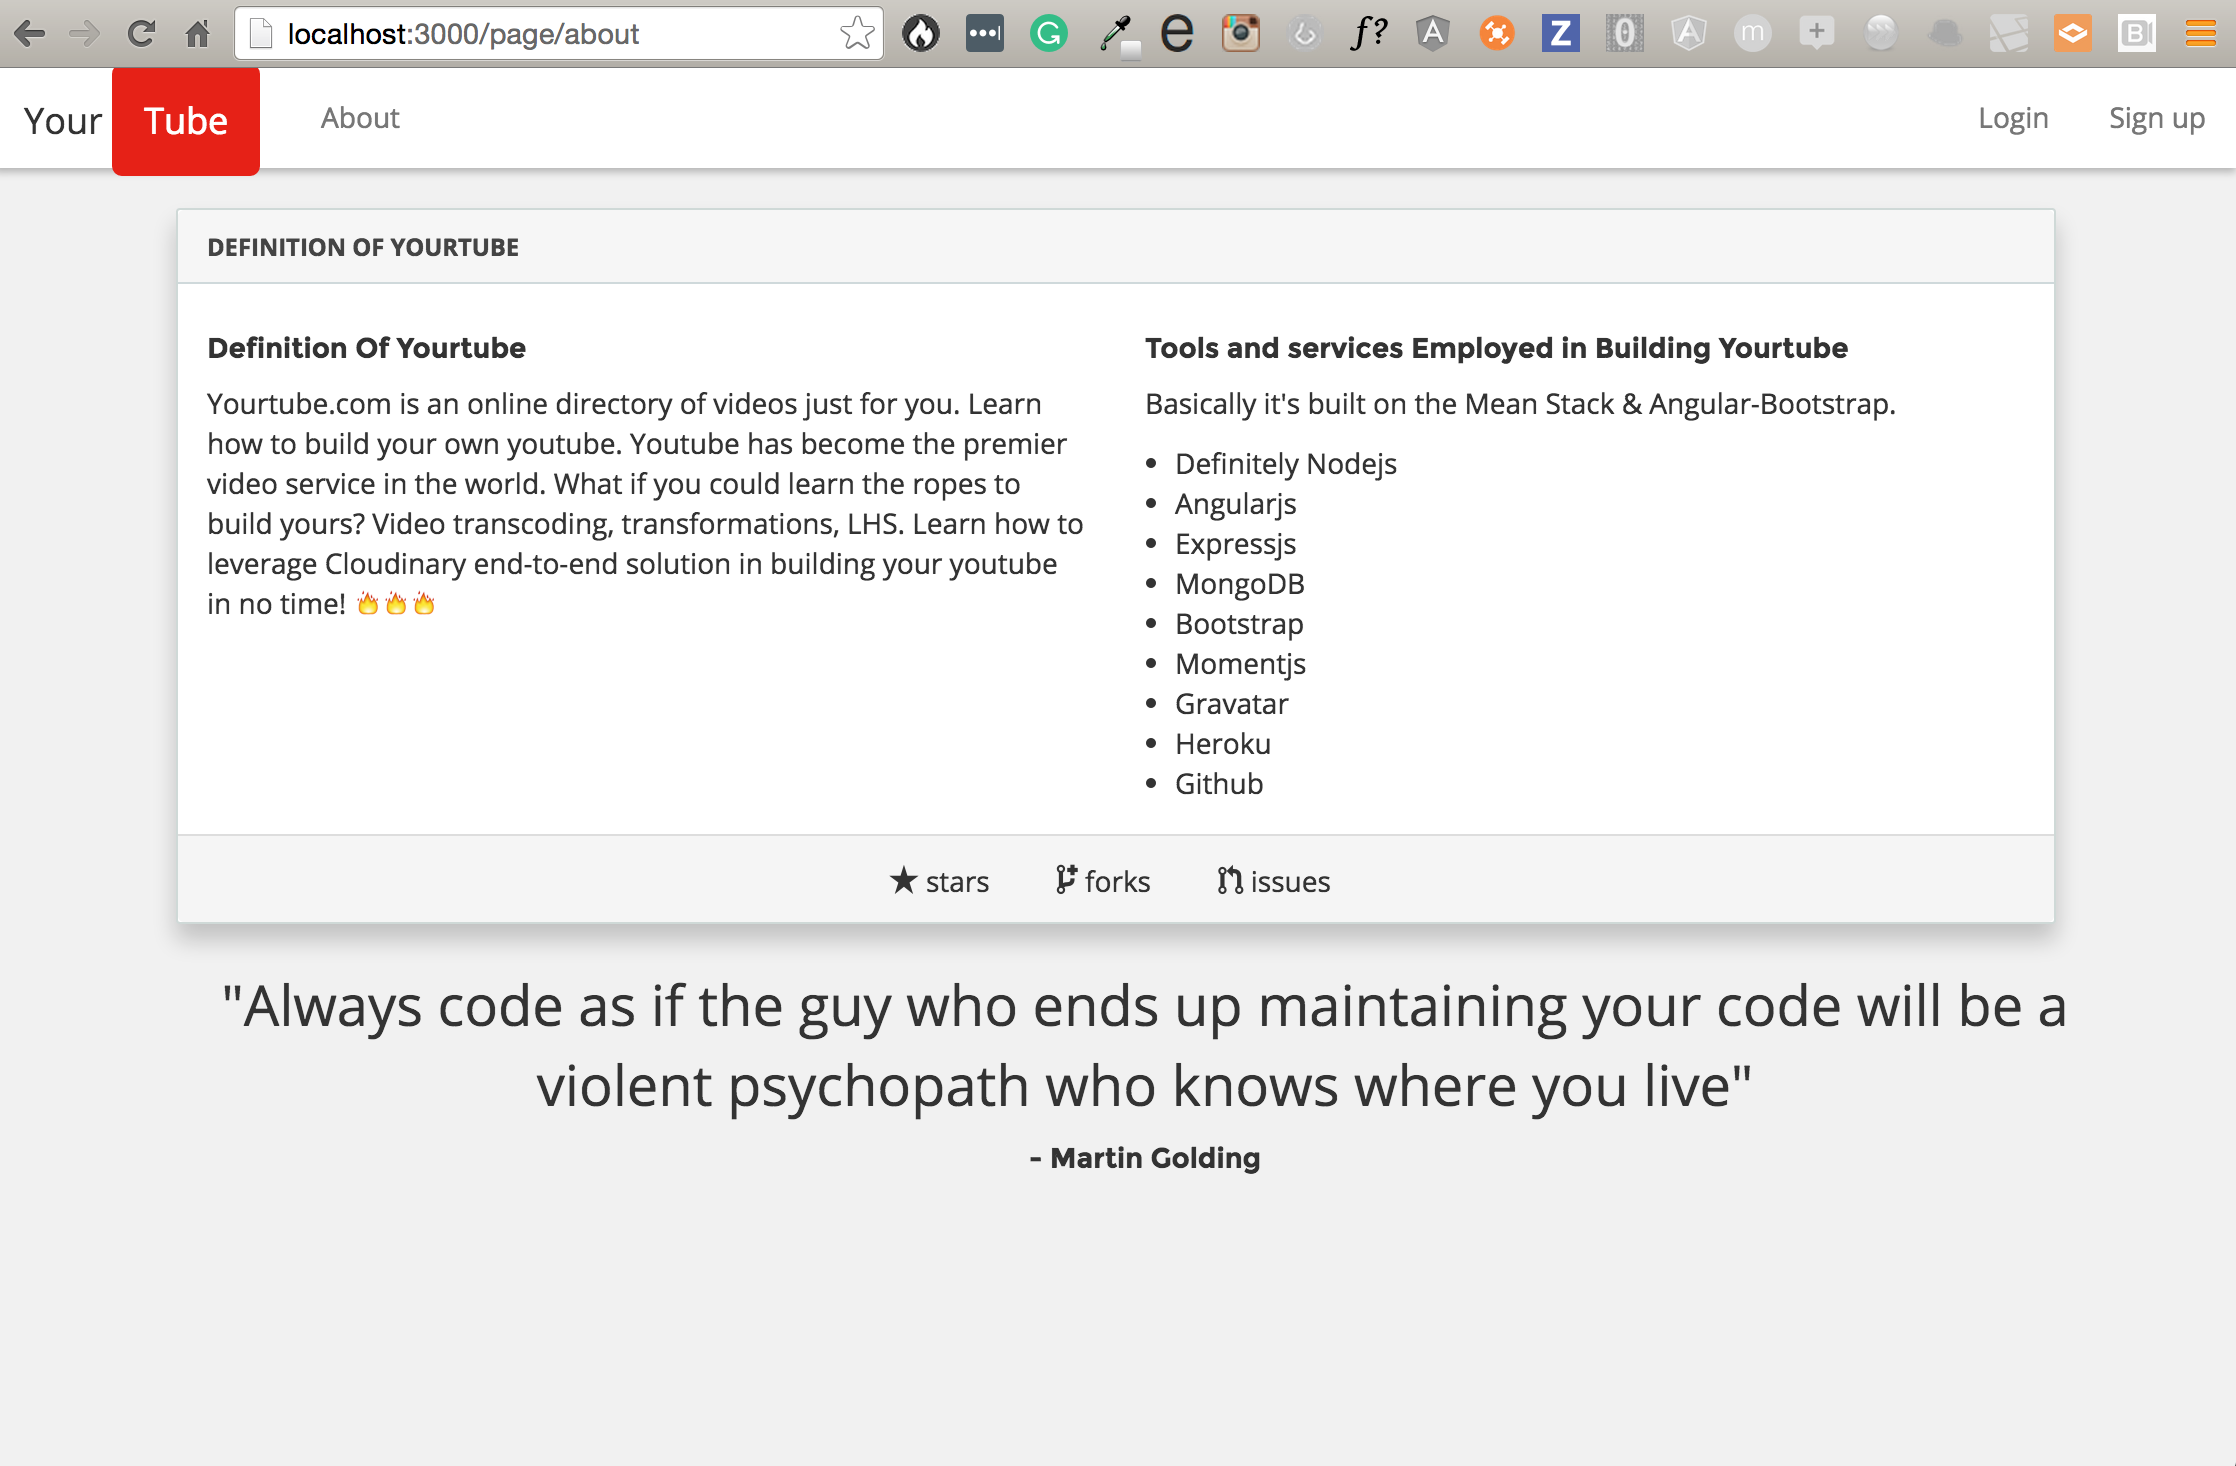
<!-- Main container for About Page View --> <div class="container"> <div class="panel panel-default"> <div class="panel-heading">Definition of Yourtube</div> <div class="panel-body"> <div class="row"> <div class="col-sm-6"> <h5>Definition Of Yourtube</h5> <p>Yourtube.com is an online directory of videos just for you. Learn how to build your own youtube. Youtube has become the premier video service in the world. What if you could learn the ropes to build yours? Video transcoding, transformations, LHS. Learn how to leverage Cloudinary end-to-end solution in building your youtube in no time! 🔥🔥🔥</p> </div> <div class="col-sm-6"> <h5>Tools and services Employed in Building Yourtube</h5> <p>Basically it's built on the Mean Stack & Angular-Bootstrap.</p> <li>Definitely Nodejs</li> <li>Angularjs</li> <li>Expressjs</li> <li>MongoDB</li> <li>Bootstrap</li> <li>Momentjs</li> <li>Gravatar</li> <li>Heroku</li> <li>Github</li> </div> </div> </div> <div class="panel-footer text-center"> <ul class="list-inline"> <li><i class="ion-star"></i> stars</li> <li><i class="ion-fork-repo"></i> forks</li> <li><i class="ion-pull-request"></i> issues</li> </ul> </div> </div> <section> <div class="container"> <div class="row"> <div class="leader col-sm-12 text-center"> <span style="font-size:2em;">"Always code as if the guy who ends up maintaining your code will be a violent psychopath who knows where you live"</span> <h5 class='lead-author'>- Martin Golding </h5> </div> </div> </div> </section> </div> <!-- End Main Container for About Page View --> |
Your About page should look like this:
Conclusion
I know it’s a lot to take in. Stay calm, go over it as many times as you want. A full understanding of the authentication techniques covered today would be great!
Join me in subsequent posts as we continue figuring out how to build our own Youtube
The source code can be found here. Please do check it out.
You can view how it works in the video below too.
Build Your Own Youtube – Part 2 from unicodeveloper on Vimeo.
Check out part 3 here.
If you have any questions or observations, please drop your thoughts in the comment section below
- How to build your own Youtube – Part 10 - August 1, 2016
- How to build your own Youtube – Part 9 - July 25, 2016
- How to build your own Youtube – Part 8 - July 23, 2016
- How to build your own Youtube – Part 6 - July 6, 2016
- Introducing Laravel Password v1.0 - July 3, 2016
- How to build your own Youtube – Part 5 - June 28, 2016
- How to build your own Youtube – Part 4 - June 23, 2016
- How to build your own Youtube – Part 3 - June 15, 2016
- How to build your own Youtube – Part 2 - June 8, 2016
- How to build your own Youtube – Part 1 - June 1, 2016