How to build your own Youtube – Part 3
Introduction: If you missed part 1 and 2, in this series we are covering how to build your own YouTube clone, Click here.
Note: You need to have at least some prior experience with client-side Javascript frameworks and Node.js to get the most out of this tutorial.
Step 1: Set Up Necessary Files
- Create a new file upload.client.controller.js in public/js/controllers
- Update your style.css file with style.css
- Create a new file upload.client.view.html in public/views/pages
- Create a new file upload.server.controller.js in server/controllers
Run this command below in your terminal to install these frontend modules
|
1 |
bower install ng-file-upload cloudinary_ng --save |
We are installing an angular file upload directive and Cloudinary angular SDK.
Run this command below also in your terminal to install these node modules
|
1 |
npm install cloudinary multiparty --save |
cloudinary – Nodejs module that provides simple API methods to upload to Cloudinary Storage.
multiparty – multipart-formdata parser which supports streaming for file uploads.
Open up your public/index.html file and reference the frontend files that has just been installed like so:
index.html
|
1 2 3 4 5 6 7 8 9 10 11 12 13 14 15 16 17 |
..... ..... <!-- cloudinary angular plugin --> <script src="vendor/cloudinary-core/cloudinary-core.js"></script> <script src="vendor/cloudinary_ng/js/angular.cloudinary.js"></script> ..... ..... <!-- angular file upload --> <script src="vendor/ng-file-upload/ng-file-upload-shim.js"></script> <script src="vendor/ng-file-upload/ng-file-upload.js"></script> ..... ..... <!-- ANGULAR CUSTOM --> ..... ..... <script src="js/controllers/upload.client.controller.js"></script> ..... |
In the body of the index.html file, also add this:
|
1 2 3 4 5 |
<ul class="nav navbar-nav"> .... <li ng-if="isAuthenticated()"><a href="/upload">Upload</a></li> .... </ul> |
This ensures a non-loggedin user can’t see the the upload link on the navbar.
Next, open up your public/js/routes.js file and add this to the route config like so:
|
1 2 3 4 5 6 7 |
.when('/upload', { templateUrl: './views/pages/upload.client.view.html', controller: 'UploadController', resolve: { loginRequired: loginRequired } }) |
Step 2: Setting Up Backend Upload Routes and Controllers
Open up your upload.server.controller.js file and add this:
upload.server.controller.js
|
1 2 3 4 5 6 7 8 9 10 11 12 13 14 15 16 17 18 19 20 21 22 23 24 25 26 27 28 29 30 31 32 33 34 35 36 37 38 39 40 41 42 43 44 45 |
var User = require('../models/user.server.model'), cloudinary = require('cloudinary'), multiparty = require('multiparty'); module.exports = { /** * Upload a video to Yourtube's Cloudinary Server * @param req * @param res * @return void */ uploadVideo: function(req, res){ var fileName = ''; var size = ''; var tempPath; var extension; var videoName; var destPath = ''; var inputStream; var outputStream; var form = new multiparty.Form(); form.on('error', function(err){ console.log('Error parsing form: ' + err.stack); }); form.on('part', function(part){ if(!part.filename){ return; } size = part.byteCount; fileName = part.filename; }); form.on('file', function(name, file){ cloudinary.uploader.upload(file.path, function(response){ return res.json({ response: response }); }, { resource_type: "video" }); }); form.on('close', function(){ console.log('Uploaded!!'); }); form.parse(req); } }; |
Inside this controller, we have an uploadVideo function. This is where the actual uploading works. We are using multiparty to ensure the video is been uploaded in streams.
|
1 2 3 4 5 |
form.on('file', function(name, file){ cloudinary.uploader.upload(file.path, function(response){ return res.json({ response: response }); }, { resource_type: "video" }); }); |
cloudinary.uploader.upload is a method from the Cloudinary Nodejs module that we installed. It masks the upload API route from Cloudinary which accepts several parameters like the file path of the video and resource_type. If we don’t specify the resource_type, it would assume that we are trying to upload an image file by default.
The second argument is a callback function that returns a response from Cloudinary. We’ll look into this in the later part of this post.
Open up your server/routes.js and add this:
routes.js
|
1 2 3 4 5 6 7 8 9 10 11 |
var User = require('./controllers/user.server.controller'), Upload = require('./controllers/upload.server.controller'), token = require('../config/token'); module.exports = function(app) { .... .... app.post('/api/upload', token.ensureAuthenticated, Upload.uploadVideo); ... ... }; |
Once we hit that route, it invokes the uploadVideo functionality and uploads the video to Cloudinary.
Ohh, We have forgotten to add our api_secret, api_key and the necessary credentials to our project for Cloudinary to be able to authenticate this request.
Now, head over to your dashboard https://cloudinary.com/console . Under Account details, you will see your API Key, API Secret and Environment Variable.
Copy your Environment variable and add it to your .env file like so:
|
1 2 |
... CLOUDINARY_URL=cloudinary://xxxxxxxxx:xxxxxxxxxx@xxxxxxx |
Open up your config/secrets.js and add this like so:
|
1 |
CLOUDINARY_URL: process.env.CLOUDINARY_URL |
This URL will be loaded into the process memory once your application starts up. Cloudinary gets your credentials from the URL.
Step 3: Setting Up Frontend Upload Routes and Controllers
Open public/views/pages/upload.client.view.html and add this:
upload.client.view.html
|
1 2 3 4 5 6 7 8 9 10 11 12 13 14 15 16 17 18 19 20 21 22 23 24 25 26 27 28 29 30 31 32 33 34 35 36 37 38 39 40 41 42 43 44 45 46 47 48 49 50 51 52 53 |
<div class="container"> <div class="panel panel-default"> <div class="panel-heading">Upload Video</div> <div class="panel-body"> <div id="direct_upload" ngf-drop="uploadFiles($files)" ngf-drag-over-class="dragOverClass($event)" ng-model="files" ng-multiple="false"> <h4>New Video</h4> <p>Directly upload or drag and drop a video into the dashed area.</p> <form> <div class="form_line"> <label path="title"> Title: </label> <div class="form_controls"> <input type="text" class="form-control" placeholder="Title" ng-model="title" /> </div> </div> <div class="form_line"> <label path="video" style="margin-top:10px;"> Video: </label> <div class="form_controls"> <div class="upload_button_holder"> <div href="#" class="upload_button" ngf-select="uploadFiles($files)" title="upload" multiple="multiple" resetOnClick="true"> Select File to Upload</div> </div> </div> </div> </form> <h5>Status</h5> <div class="file" ng-repeat="file in files"> <h3>{{ file.name }} {{ f.$error }} {{ f.$errorParam }}</h3> <div class="status">{{ file.status }}</div> <div class="progress" ng-show="file.status == 'Done...100%'"> <div class="progress-bar progress-bar-success progress-bar-striped" ng-show="file.status == 'Done...100%'" style="width: {{ file.progress }}%" ng-init="progress=0" role="progressbar"> <span class="sr-only">{{ file.progress }}</span> </div> </div> <div class="progress" ng-show="file.status == 'Uploading...'"> <div class="progress-bar progress-bar-info progress-bar-striped active" ng-show="file.status == 'Uploading...'" style="width: {{ file.progress }}%" ng-init="progress=0" role="progressbar"> <span class="sr-only">{{ file.progress }}</span> </div> </div> </div> </div> </div> </div> </div> |
Next, let’s set up the controller that is responsible for this page.
Open public/js/controllers/upload.client.controller.js and add this:
upload.client.controller.js
|
1 2 3 4 5 6 7 8 9 10 11 12 13 14 15 16 17 18 19 20 21 22 23 24 25 26 27 28 29 30 31 32 33 34 35 36 37 38 39 40 41 42 43 44 45 46 47 |
app.controller('UploadController', ['$scope', '$rootScope', '$location', 'Upload', 'cloudinary', '$http', /* Uploading with Angular File Upload */ function($scope, $rootScope, $location, Upload, cloudinary, $http) { $scope.uploadFiles = function(files){ $scope.files = files; if (!$scope.files) return; angular.forEach(files, function(file){ if (file && !file.$error) { file.upload = Upload.upload({ url: "/api/upload", method: "POST", data: { file: file } }).progress(function (e) { file.status = "Uploading..."; file.progress = Math.round((e.loaded * 100.0) / e.total); }).success(function (data, status, headers, config) { file.status = "Done...100%"; file.result = data; }).error(function (data, status, headers, config) { file.result = data; }); } }); }; /* Modify the look and fill of the dropzone when files are being dragged over it */ $scope.dragOverClass = function($event) { var items = $event.dataTransfer.items; var hasFile = false; if (items !== null) { for (var i = 0 ; i < items.length; i++) { if (items[i].kind == 'file') { hasFile = true; break; } } } else { hasFile = true; } return hasFile ? "dragover" : "dragover-err"; }; }]); |
Here, we injected the Upload service from ng-file-upload angular plugin into the UploadController. The uploadFiles function loops through the files that are been dragged or dropped into the upload zone and makes a POST request to our backend Nodejs upload API that we wrote earlier. The backend API then uploads the video to Cloudinary.
The uploadFiles function has been tied to the upload button and the file upload drop zone through the ngf-drop and ngf–select attribute in the upload form.
Now, let’s register the ng-file-upload module in our app.js.
Open public/js/app.js and add ngFileUpload like so:
app.js
|
1 2 3 4 5 6 7 8 9 10 11 12 13 14 15 16 17 18 |
var app = angular .module('yourtube', [ 'ngCookies', 'ngRoute', 'ngStorage', 'ngMessages', 'angularMoment', 'angular-loading-bar', 'ui.bootstrap', 'appRoutes', 'ngSanitize', 'ngFileUpload', 'toastr', 'ngLodash', 'hc.marked', 'angularUtils.directives.dirDisqus', 'satellizer']) .config(....) |
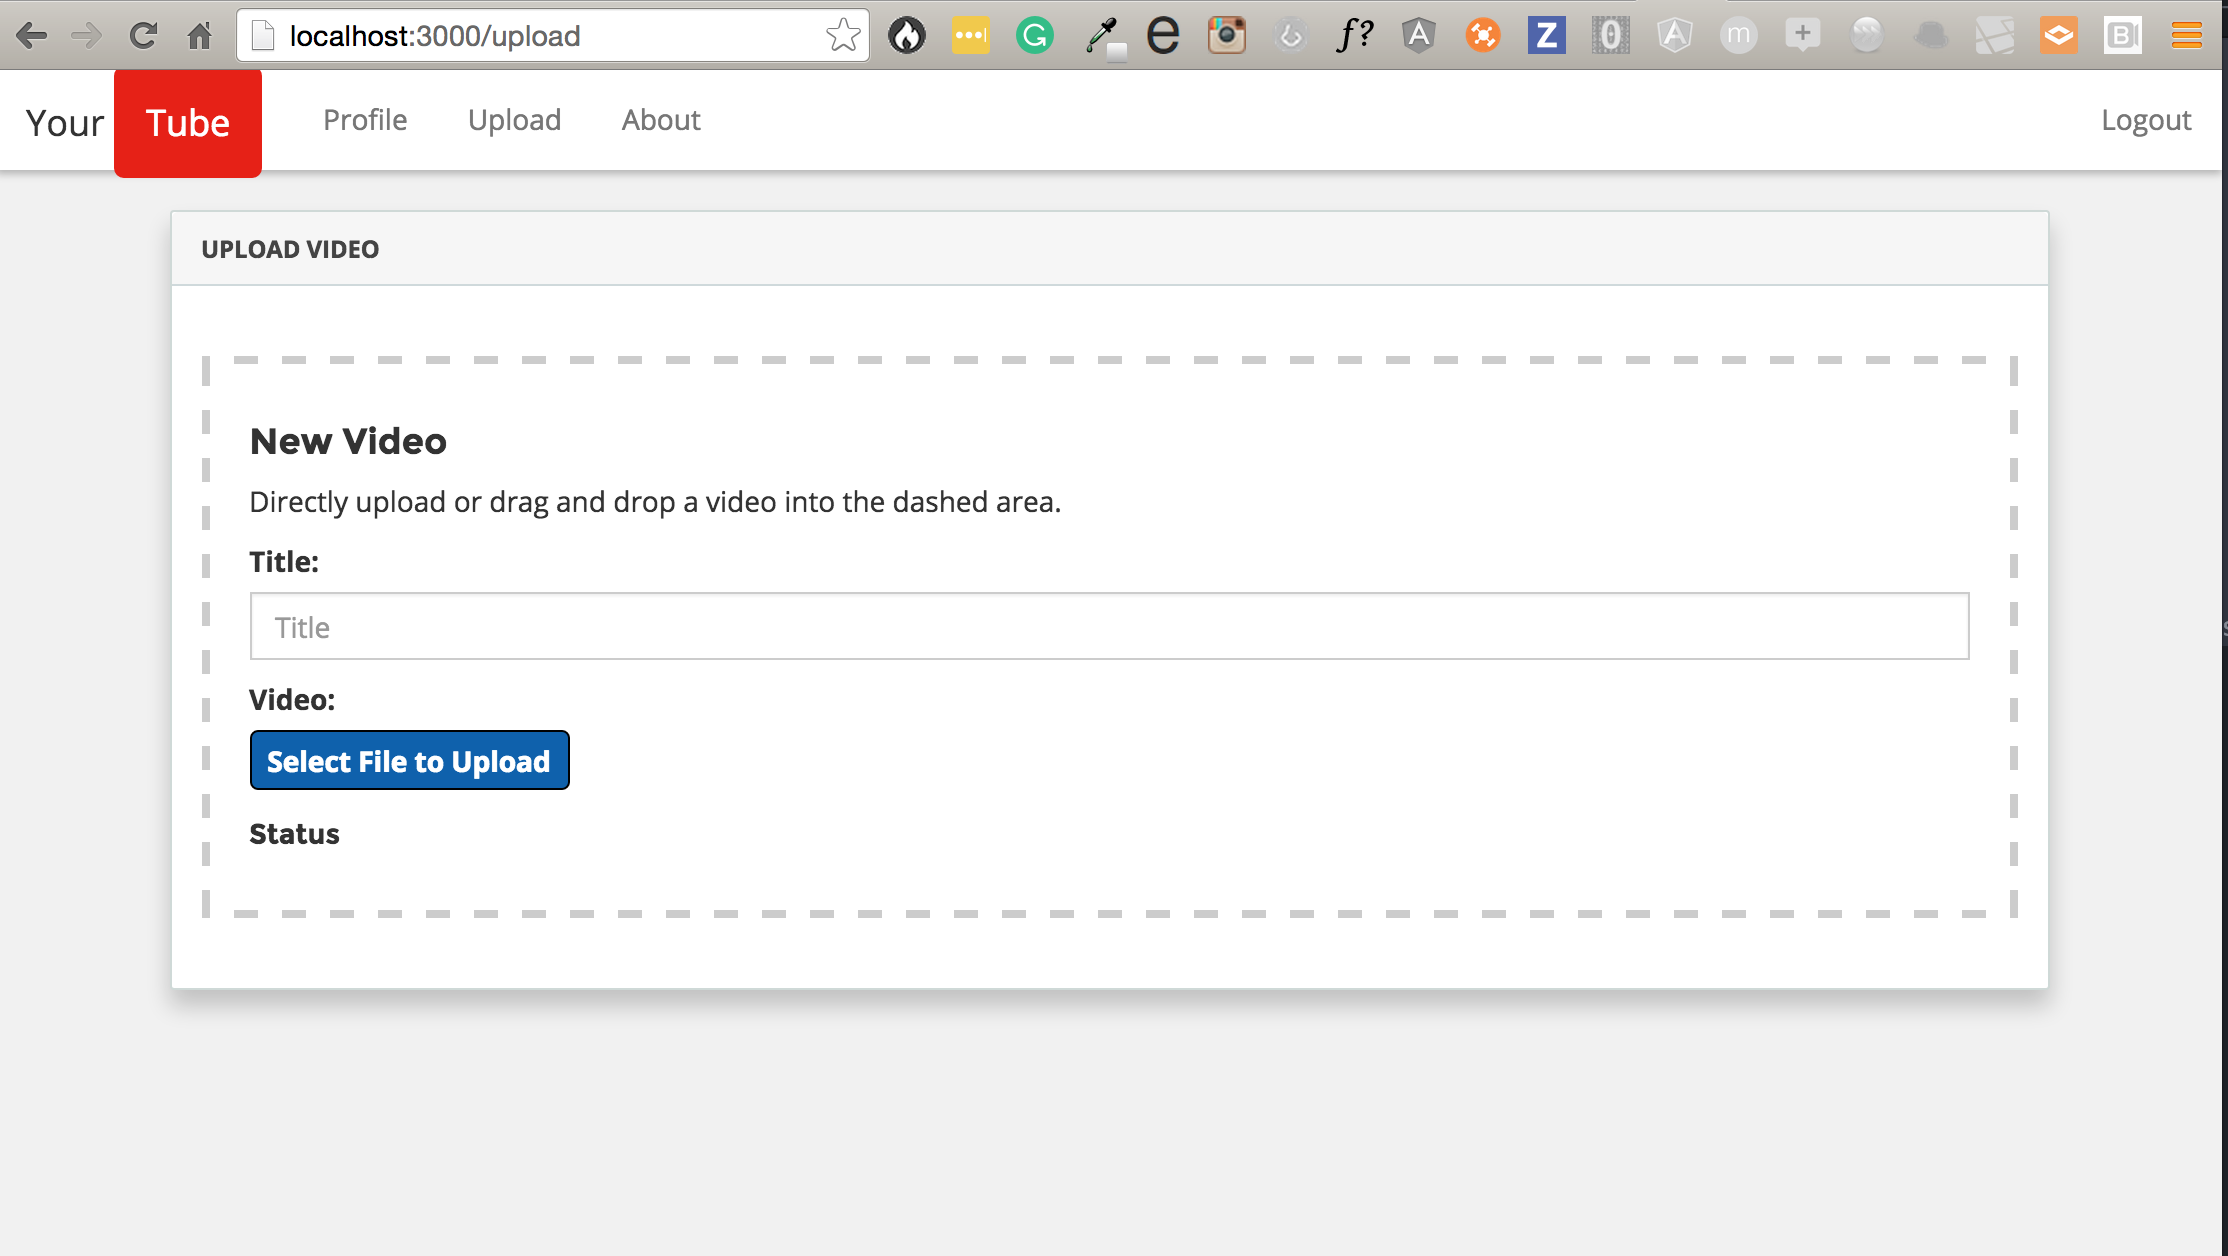
Now, when we load the application, it should load up our upload page successfully like so:
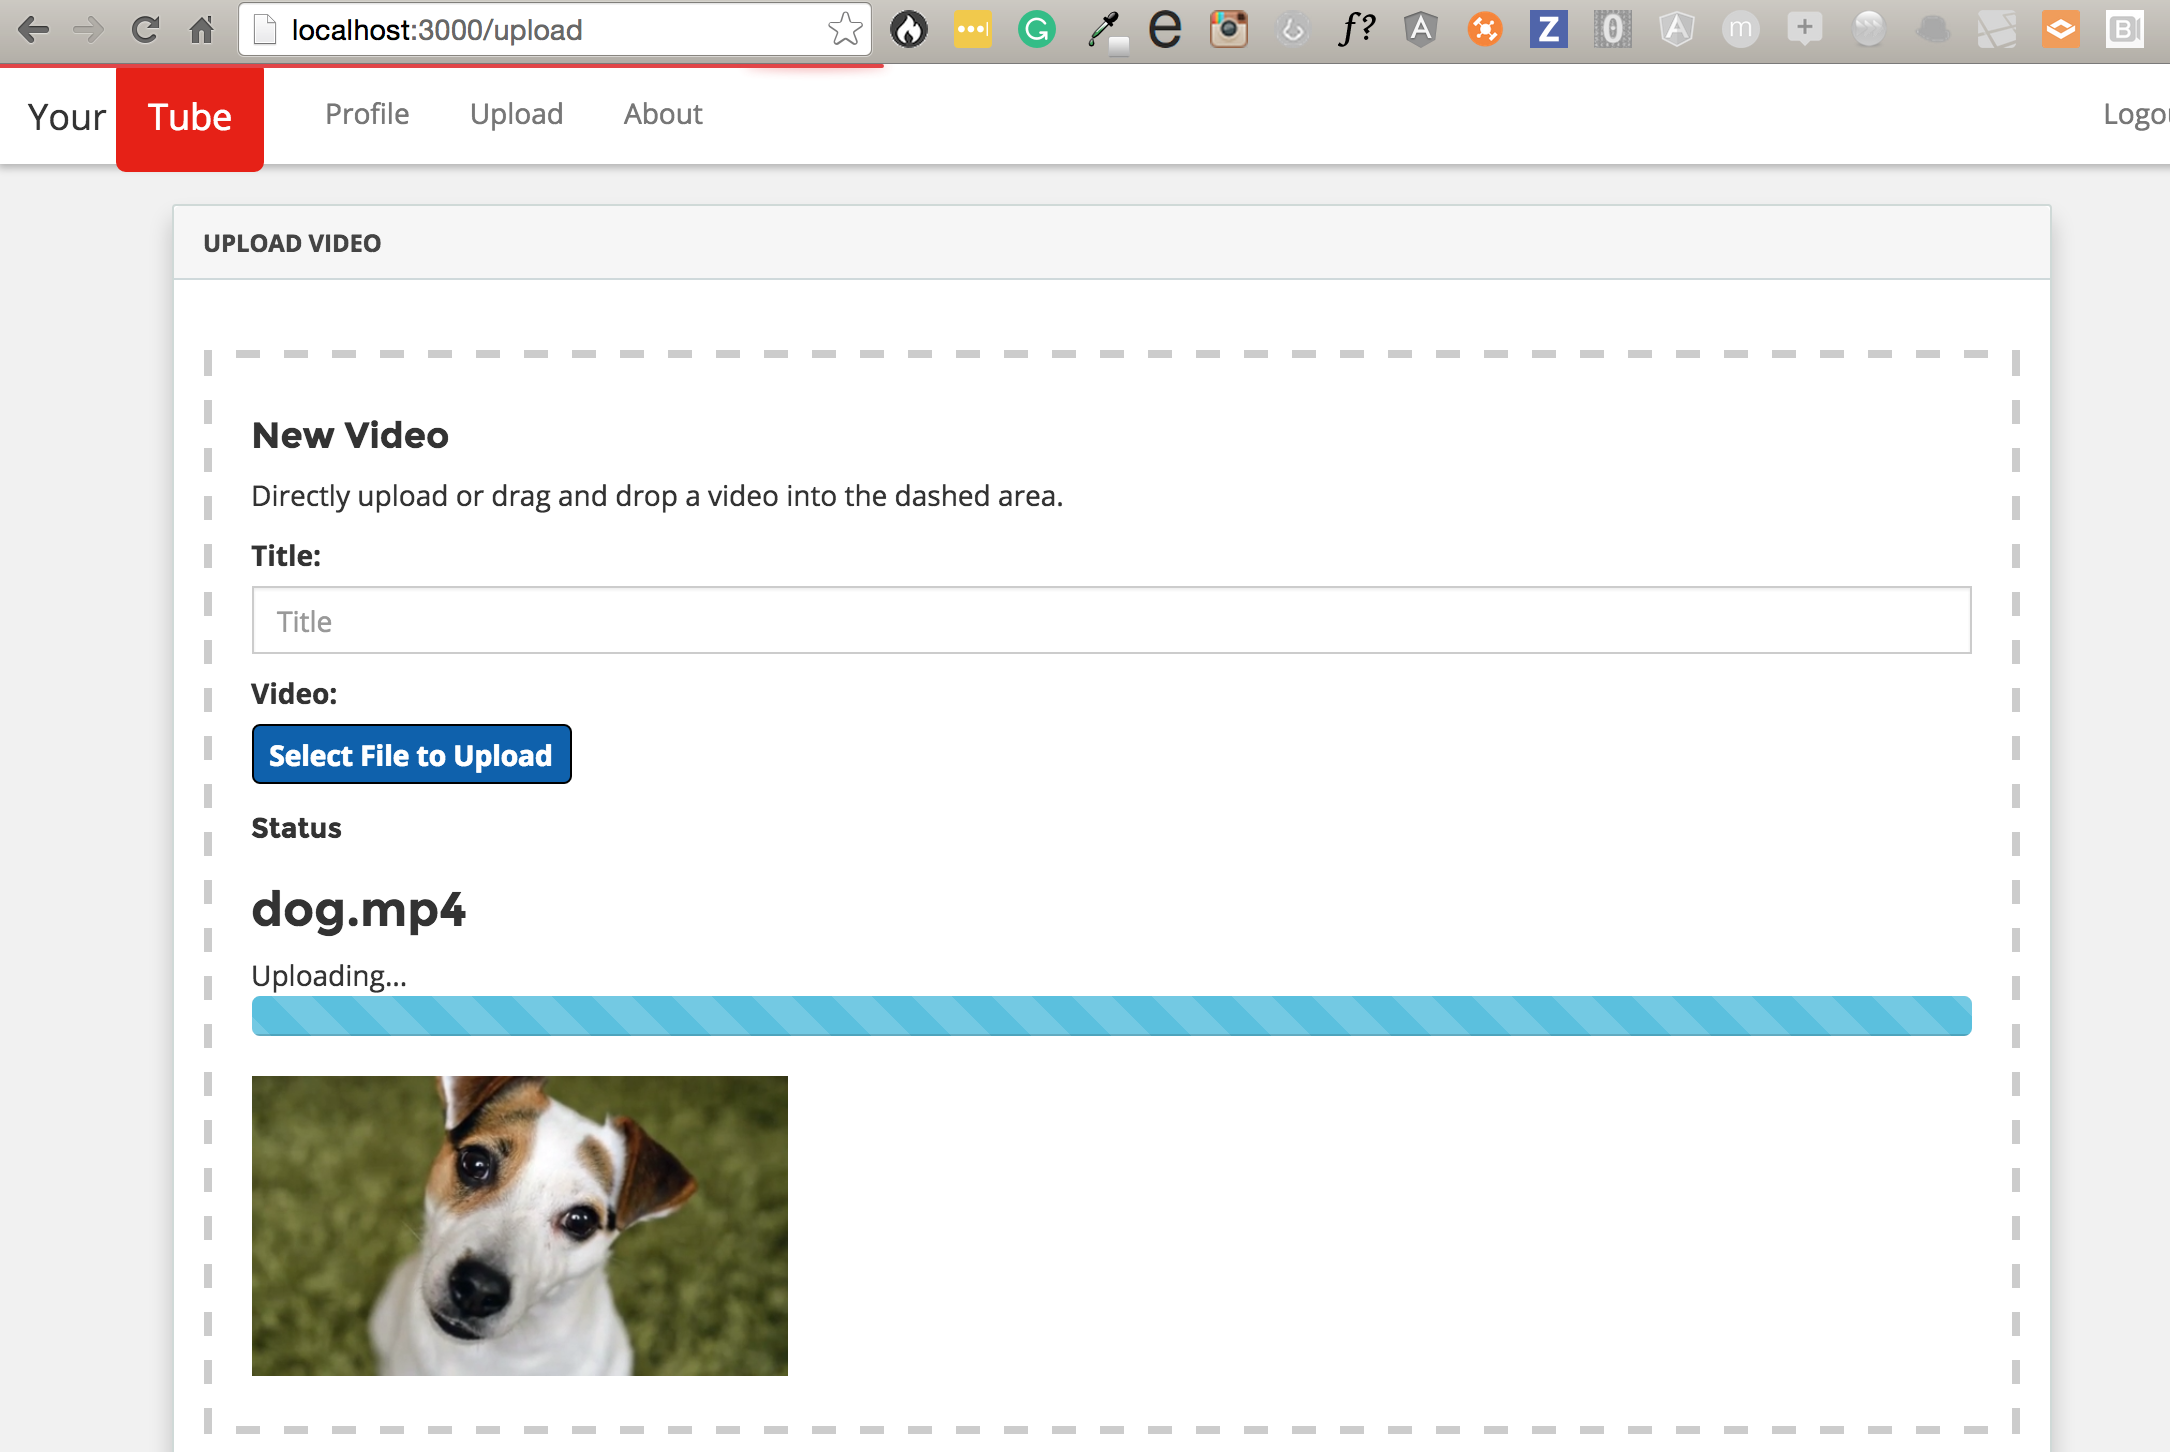
Go ahead and upload a video now. It uploads the video successfully to Cloudinary.
Videos can be uploaded to Cloudinary in a variety of formats: mp4, webm, flv, mov, ogv, 3gp, 3g2, wmv, mpeg, flv, mkv or avi
Check out this video below:
Note: Currently, Cloudinary’s Free plan allows the following:
- The maximum video file size for uploading is 40MB
- The maximum online video manipulation size is 40MB
If your service requires more than the specs listed above, consider upgrading to their paid plans.
Step 4: Setting Up Video Preview
Let’s set up preview for our video even as it’s being uploaded.
Open up upload.client.view.html. Just after this piece of code for the progress bar, add this below:
|
1 2 3 4 5 6 7 8 9 10 11 12 13 14 15 16 |
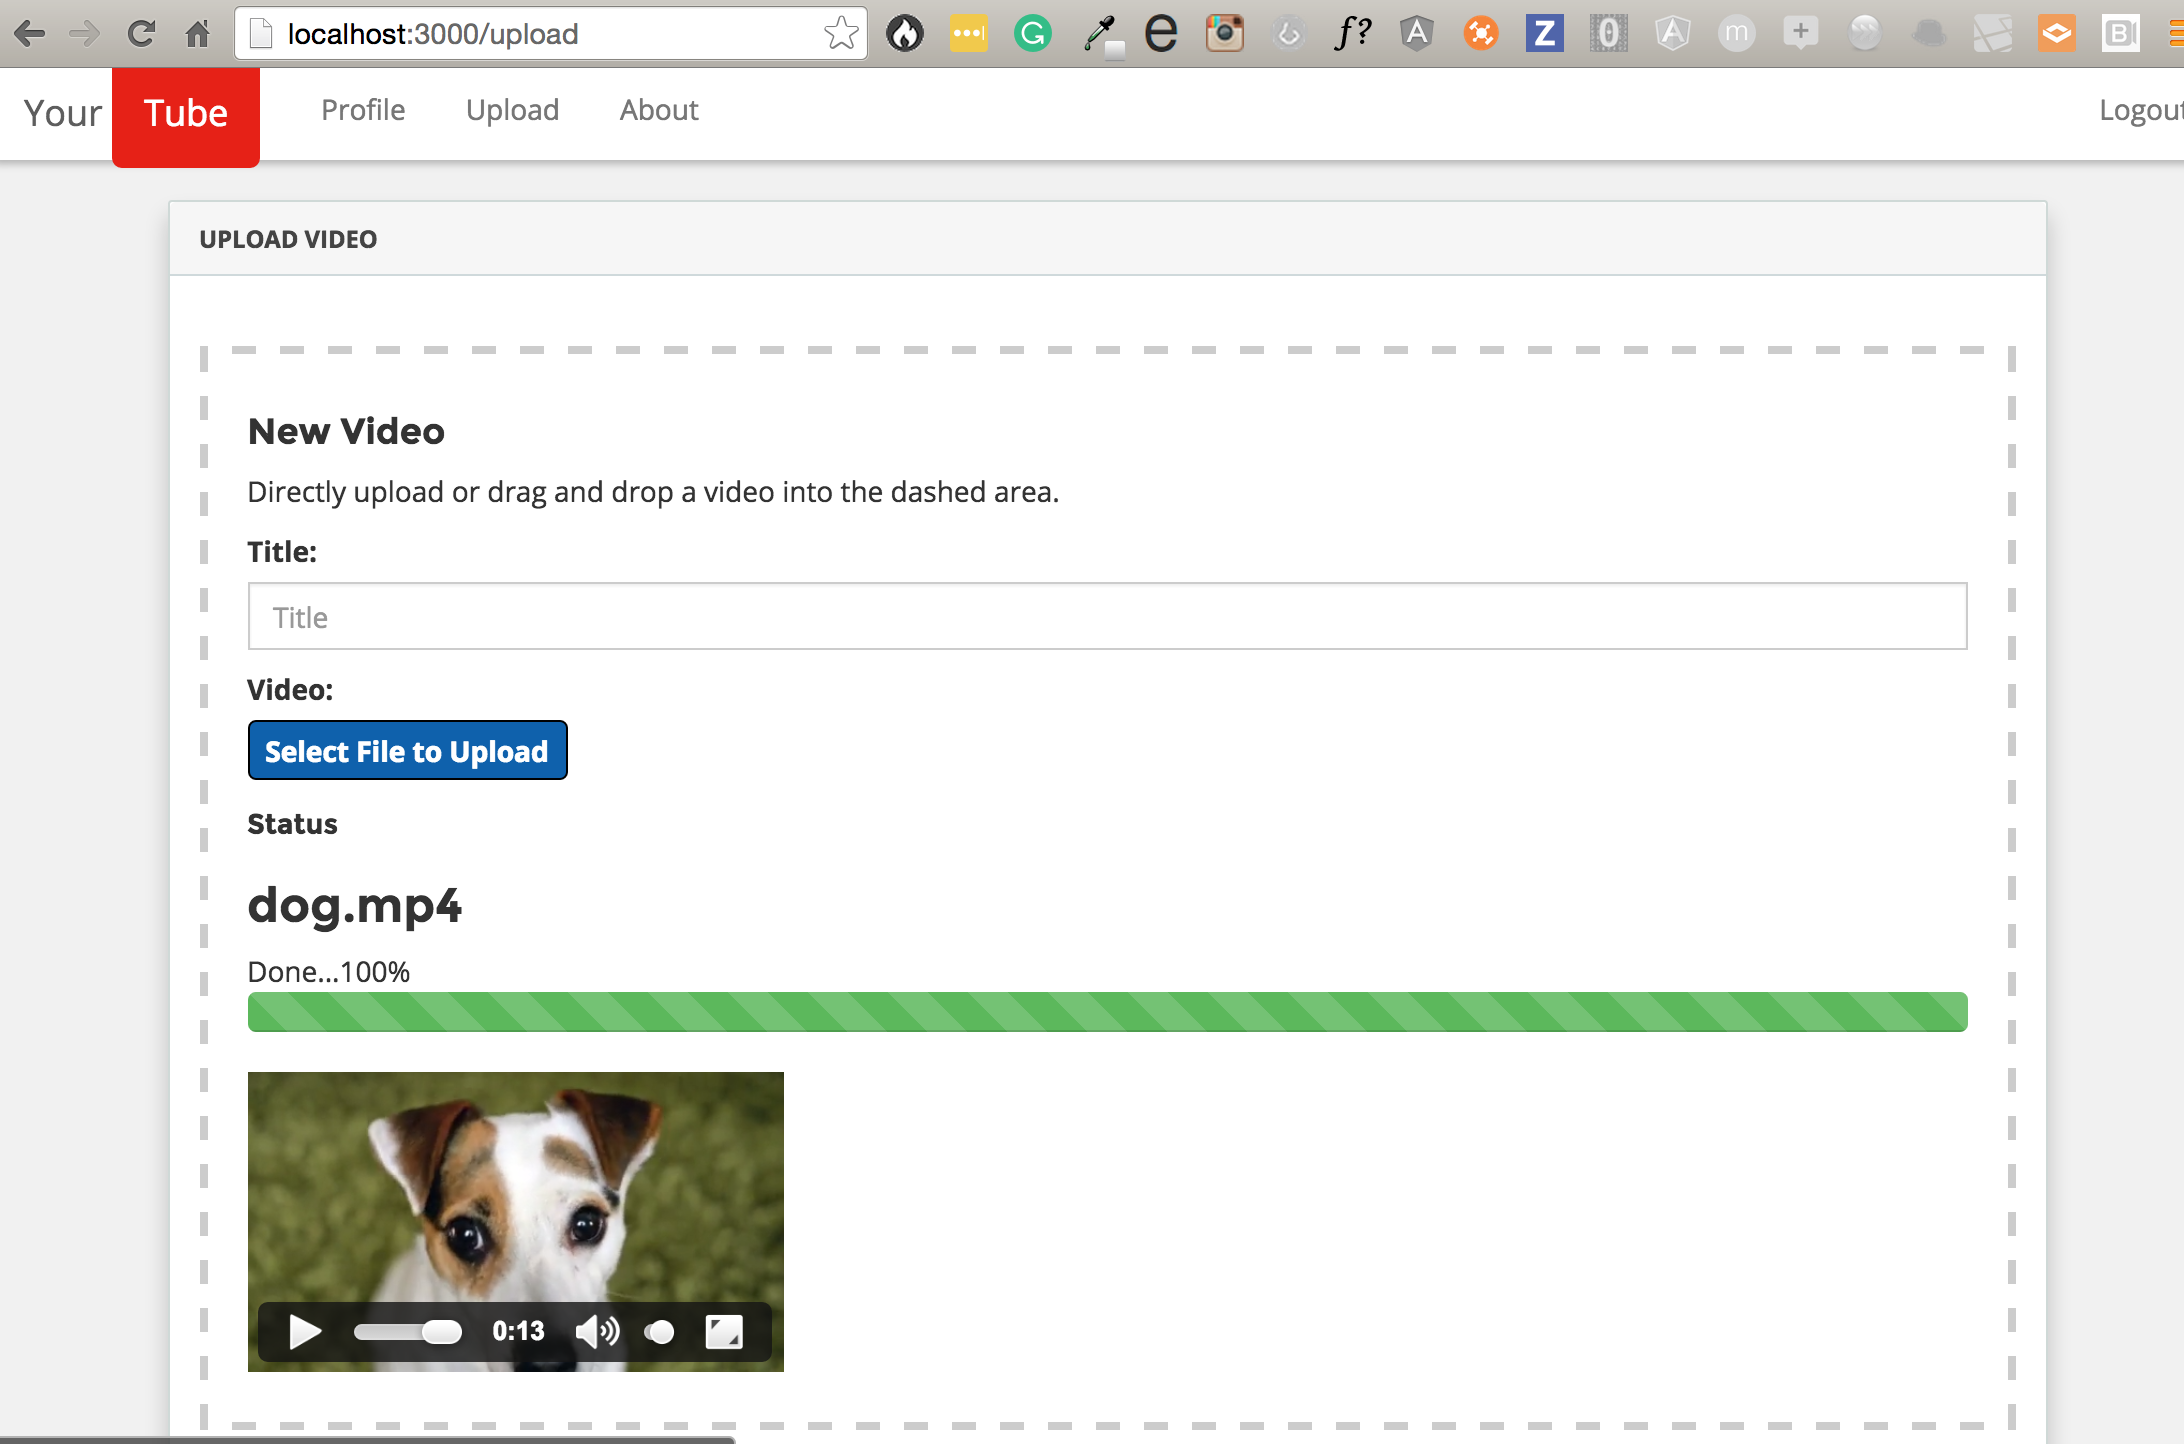
.... <div class="progress" ng-show="file.status == 'Uploading...'"> <div class="progress-bar progress-bar-info progress-bar-striped active" ng-show="file.status == 'Uploading...'" style="width: {{ file.progress }}%" ng-init="progress=0" role="progressbar"> <span class="sr-only">{{ file.progress }}</span> </div> </div> <!-- Add this --> <div class="form_line"> <div class="form_controls"> <div class="preview"> <video controls ngf-src="file.result.response.url || file" autoplay="autoplay"> </div> </div> </div> |
file.result.response.url contains the video URL returned from Cloudinary. If that’s not available, it defaults to the local file that’s being uploaded and displays that in the HTML5 video player.
Now, try uploading a video and see how cool the video preview works!
Step 5: Get all the Information
Let’s take a good look at the various information Cloudinary provides us with when we upload a video.
Open your upload.client.controller.js file and just within the success function inside the $scope.uploadFiles function, add console.log(data.response) like so:
|
1 2 3 4 5 |
.success(function (data, status, headers, config) { file.status = "Done...100%"; console.log(data.response); file.result = data; }). |
Now upload a video, and checkout the console section of your browser.
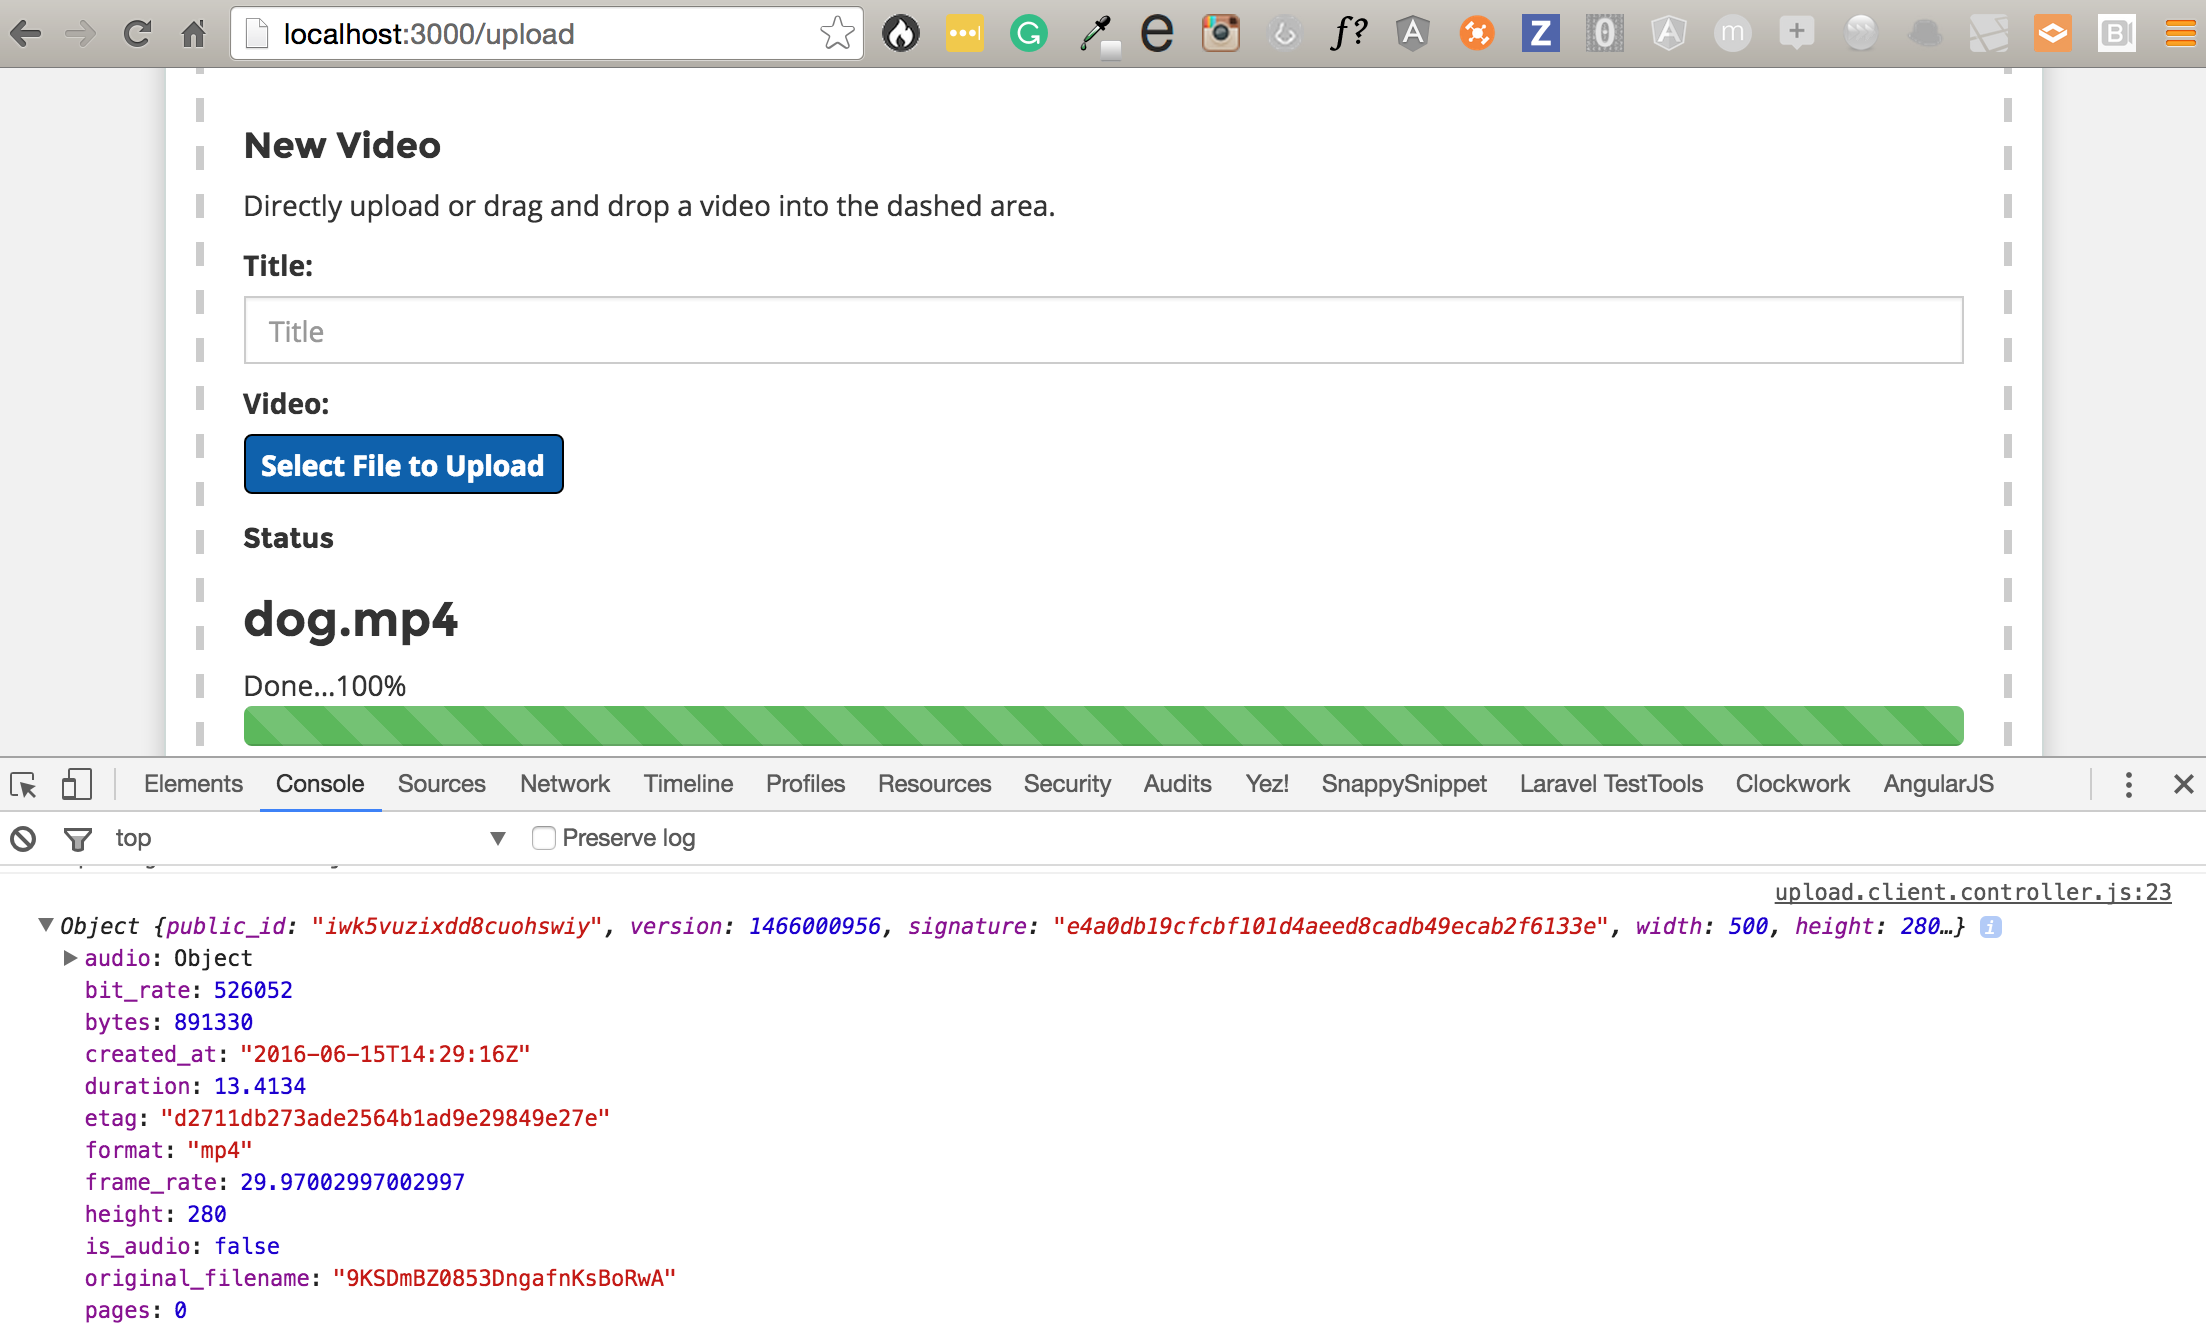
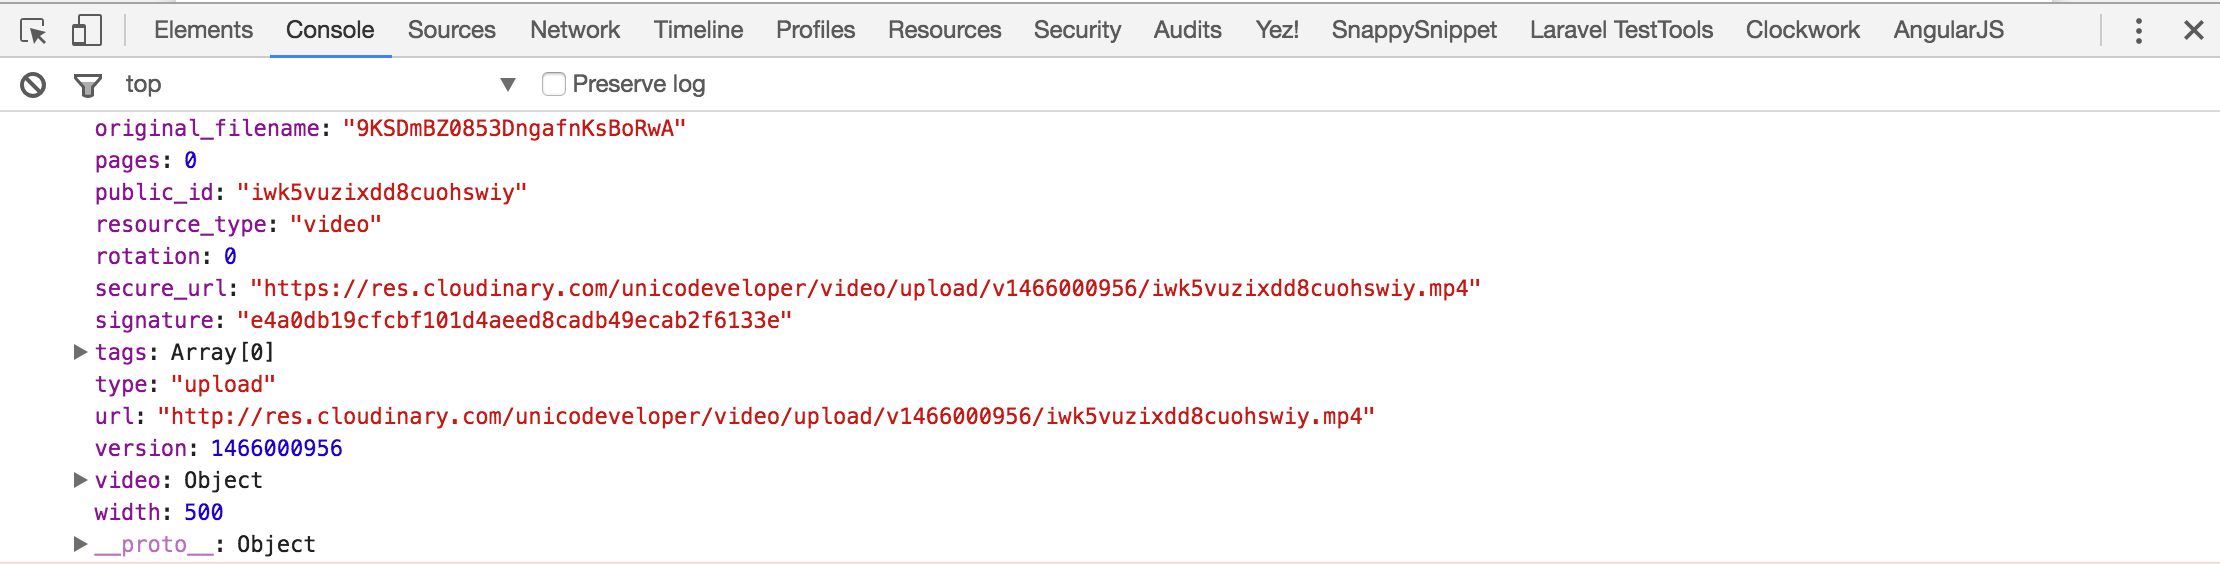


A typical response in one glance is shown below:
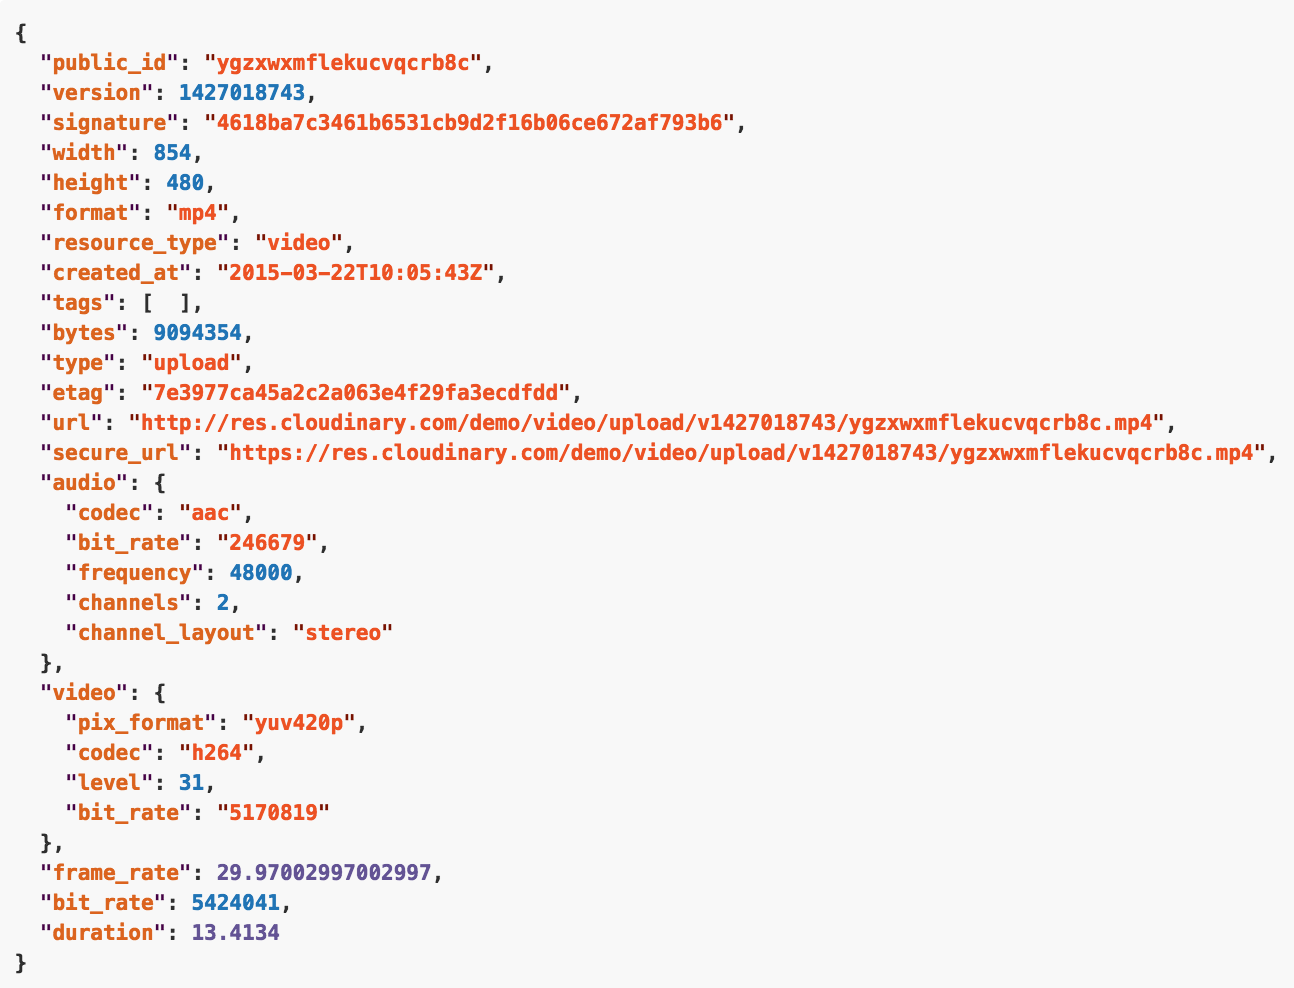
Just look at all that info! This is crazy! 
public_id, signature, original filename, width & height of the video, bit_rate, duration, URL, secure_url, type, audio bit_rate, audio codec, video bit_rate, video codec, frame rate, frequency, tags and several others.
Availability of this kind of information can help influence all sorts of decisions as to how the video service you are building will work, the types of video your audience uploads or whatever idea you have in mind that deals with video manipulation and delivery.
Wrapping Up
In this post, we have simply looked at uploading a video. This is one of the most basic operations you can perform using Cloudinary. In the next post, we’ll look at saving & displaying video details, chunked video upload & eager video transformations: assigning tags, removing audio, changing video dimensions on the fly, changing video background & video cropping.
The source code for this project is on github. Check here.
If you have any questions or observations, please drop your thoughts in the comment section below
- How to build your own Youtube – Part 10 - August 1, 2016
- How to build your own Youtube – Part 9 - July 25, 2016
- How to build your own Youtube – Part 8 - July 23, 2016
- How to build your own Youtube – Part 6 - July 6, 2016
- Introducing Laravel Password v1.0 - July 3, 2016
- How to build your own Youtube – Part 5 - June 28, 2016
- How to build your own Youtube – Part 4 - June 23, 2016
- How to build your own Youtube – Part 3 - June 15, 2016
- How to build your own Youtube – Part 2 - June 8, 2016
- How to build your own Youtube – Part 1 - June 1, 2016